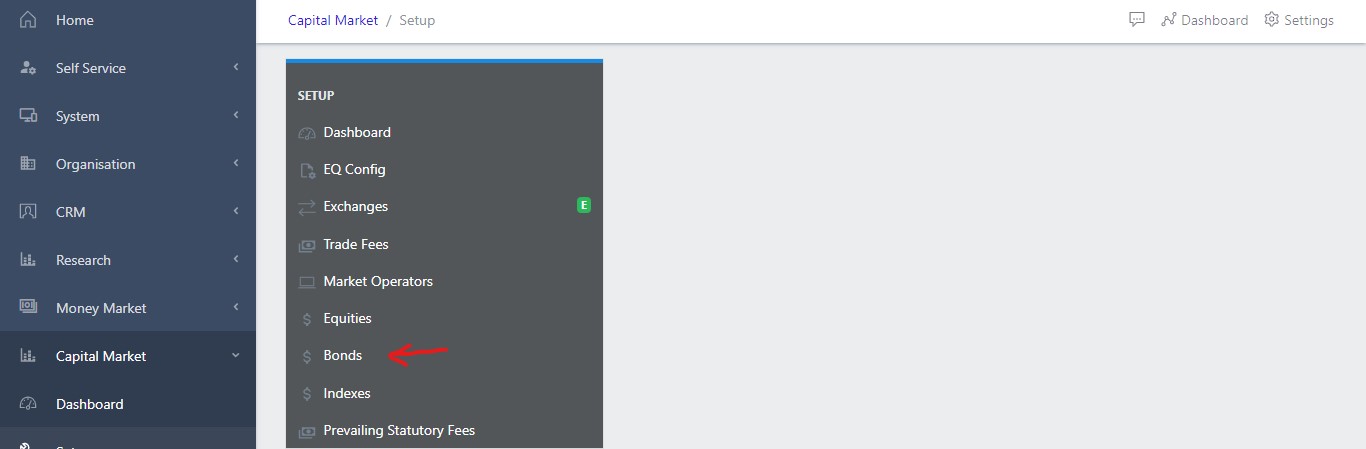
bonds operations can be accessed by navigating to Capital Market,Setup,Bonds shown in Fig 1 below. This part of the app host the various Bonds available to be traded on, some Bonds have already been loaded into the system, but users can also create new Bonds when they are unavailable. All of these Bonds have nominal values, currency and starting values attached to them.
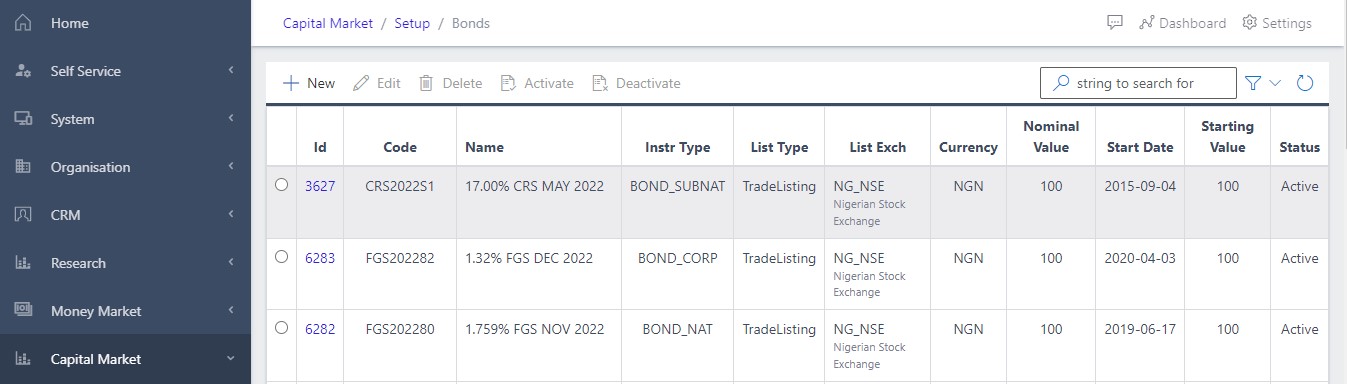
Clicking on the Bonds in the dashboard view as shown in fig 1 above, opens a new screen that shows a list of all the current Bonds that exist in the system. Fig 2 below, shows a list of all the available Bonds in the system.
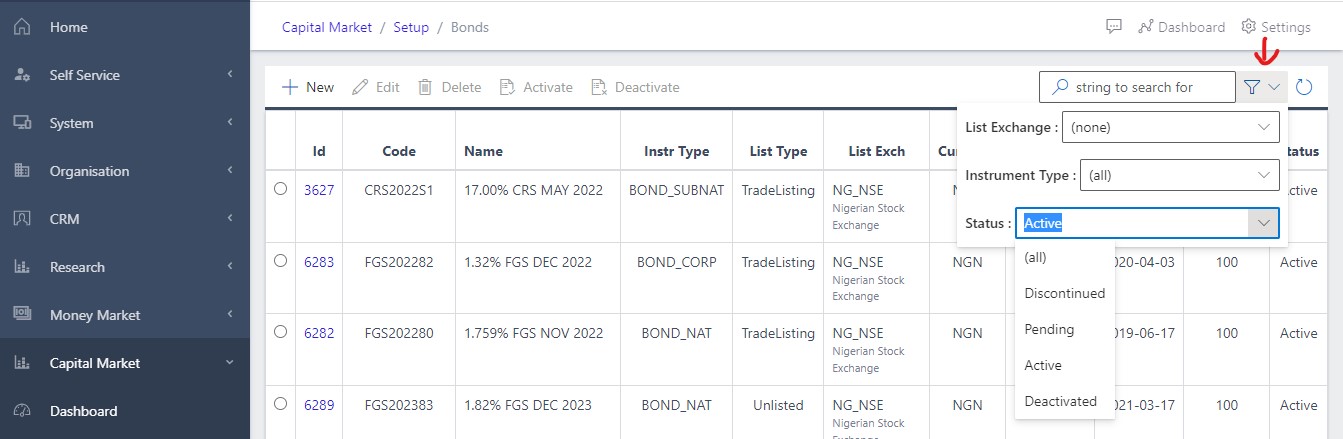
Fig 2.1, shows how the user can filter for a particular Bond that has been created and loaded in the system by simply entering the valid parameter displayed on the filter menu(parameter to be slected are list exchange, instrument type and status)
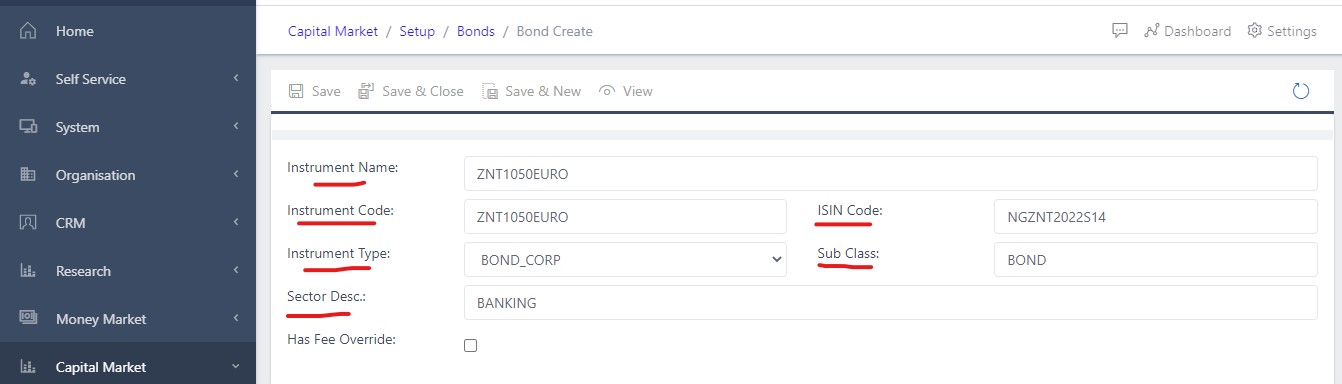
To create a new Bond, user can click on the create/new button as shown in Fig 3 below and fill out all the necessary fields as shown in the fig 3.1 below. Fields to be filled out includes the following:
Instrument Name - This field represents the name of the Bond that is to be created.
Instrument Type - A bond type can either be a Bond_NAT( national bond; issued by the federal government), or a Bond_SUBNAT(sub-national bond; issued by the state or local government), or lastly a Bond_CORP(Corperate bond; issued by corporate organisations/companies).
Instrument Code - Each instrument is assigned a particular code, and that code is to be filled during creation. e.g., FG152025S2, ABBEYBDS.
ISIN Code - International securities identification number. A 12-digit alphanumeric code that uniquely identifies a specific security. User will have to input these ISIN code for every Bond to be created.
Sector Desc. - Represents the sector description. It identifies what the sector for which the Bond is created for is into. e.g., Food and Beverages, Government issues Bond, Investment, Auto mobiles
Fee Overridden - User may/may not thick this box depending on the condition to be met
Fig 3 Showing create new Bond button
Fig 3.1 Showing fields to be filled out
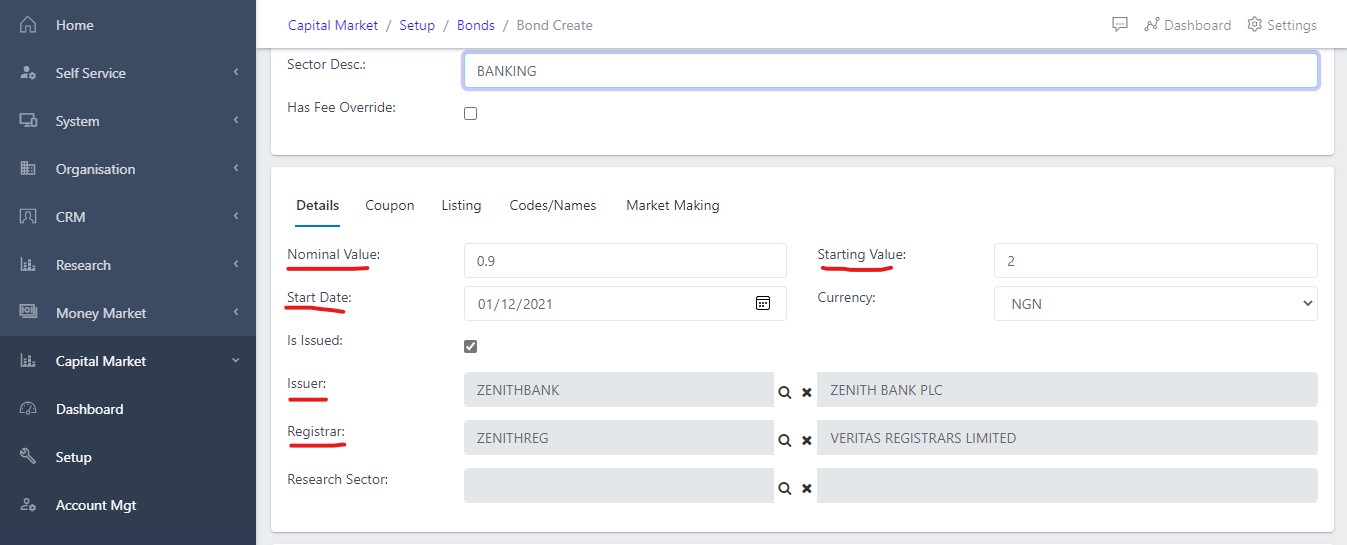
Next screen to be filled out, is the Details fields of the Bond to be created. This fields and a couple of others, provide more clarity about the Bond. Fig 3.2 below shows the Details field to be filled out.
Nominal Value - Often referred to as the “face value” of an Bond or investment. It is the upfront monetary value of the Bond without adjusting for inflation
Starting Value - User is ti fill the starting value of the Bond. These values are subject to fluctuations based on the supply and demand from investors for the securities.
Issuer - This signifies the company issuing out the Bond to be created
Registrar - User is to select an institution, often a bank or trust company, responsible for keeping records of bondholders and shareholders
Fig 3.2 Showing details field of the Bond creation
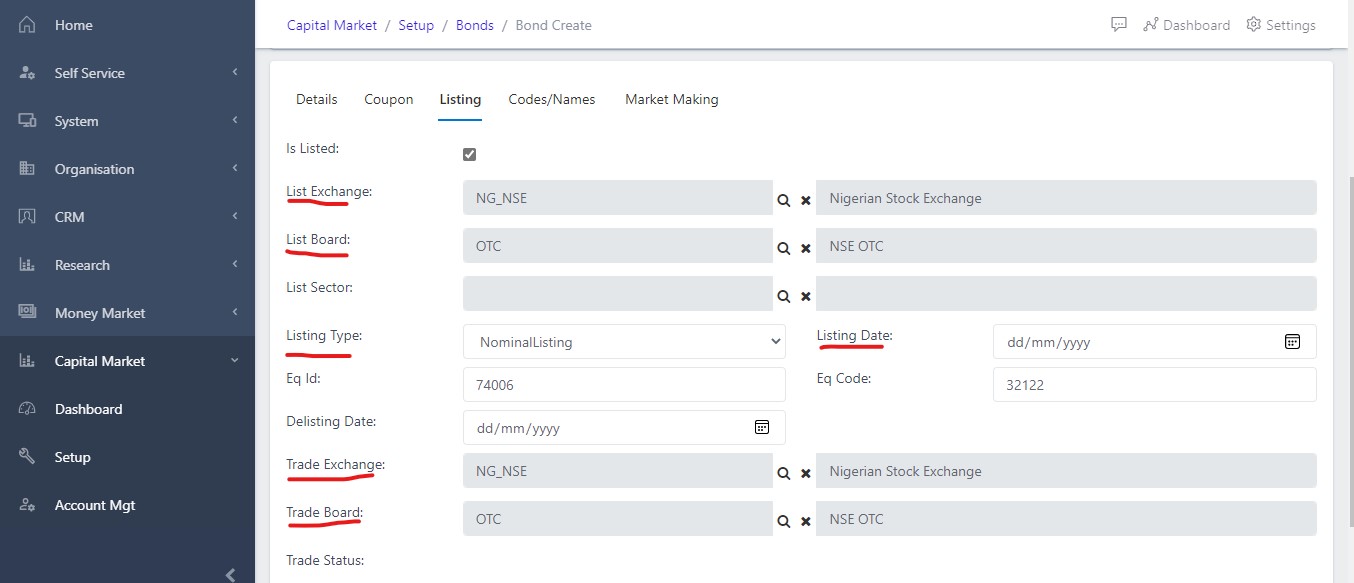
Next Screen to be filled out is the Listing screen. Fig 3.2 below shows the Listing field to be filled out. Some fields to be filled includes:
List Exchange - User is to choose the list exchange for which the Bond to be created falls under. e.g., Nigerian stock exchange, Jamaican stock exchange, American stock exchange, National association of security dealers Nigeria etc.
Listing Type - This signifies the listing type of the company issuing out the Bond. Users are to choose from the 3 options listed on the app (Nominal Listing, Tradelisting or Unlisted).
Listing Date - This contains the date for which the company was listed.
Delisting Date - This column should be filled if the company has been delisted from the list exchange.
Trade Exchange - This column should be filled with the trade platform for which the Bond will be traded on.
Fig 3.3 Showing Listing field of the Bond creation
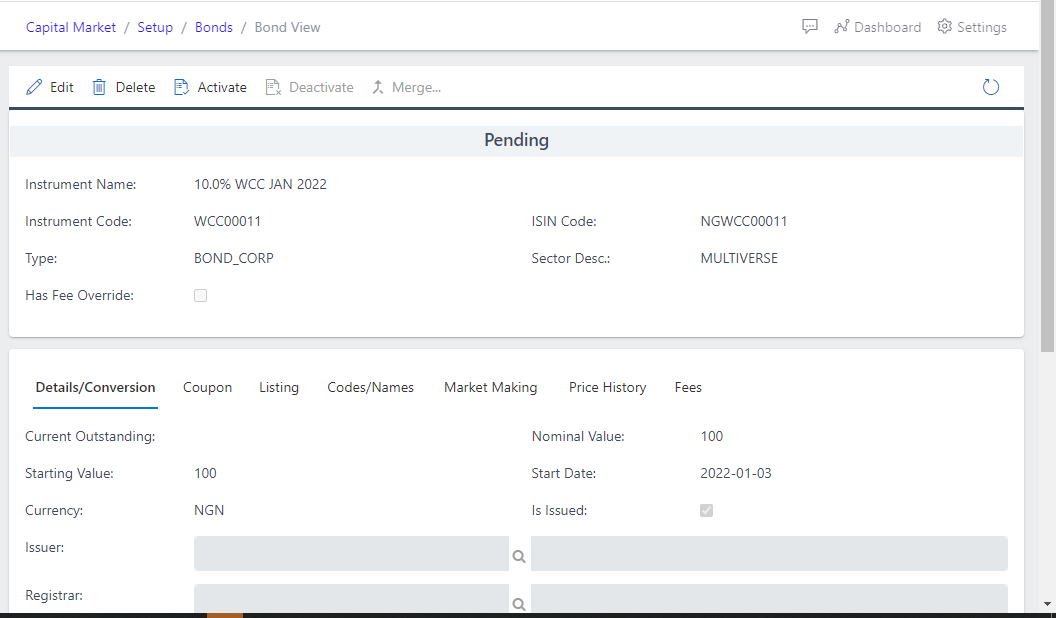
Every newly created Bond usually takes the status of pending as seen in fig 4 below. A user who created the Bond has to activate the newly created Bond by using the filter menu option shown in fig 2.1 above to filter for the particular Bond. Fig 4 below shows a newly created Bond taking the status of pending.
Fig 4 Showing pending state of newly created Bond
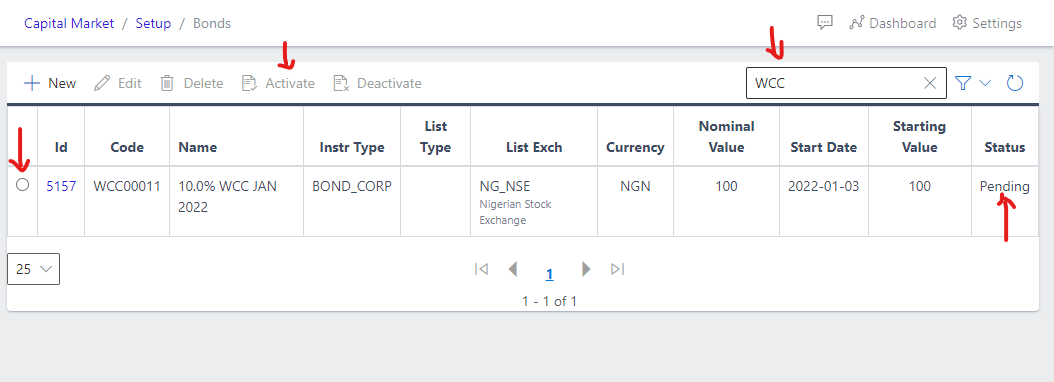
In activating a new Bond, user has to select the newly created Bond’s ID shown in fig 4.1 below. Seleting the ID will automatically highlight the Activate button as shown below. The user can then proceed to activating the selected Bond.
Fig 4.1 Showing selected ID for activation
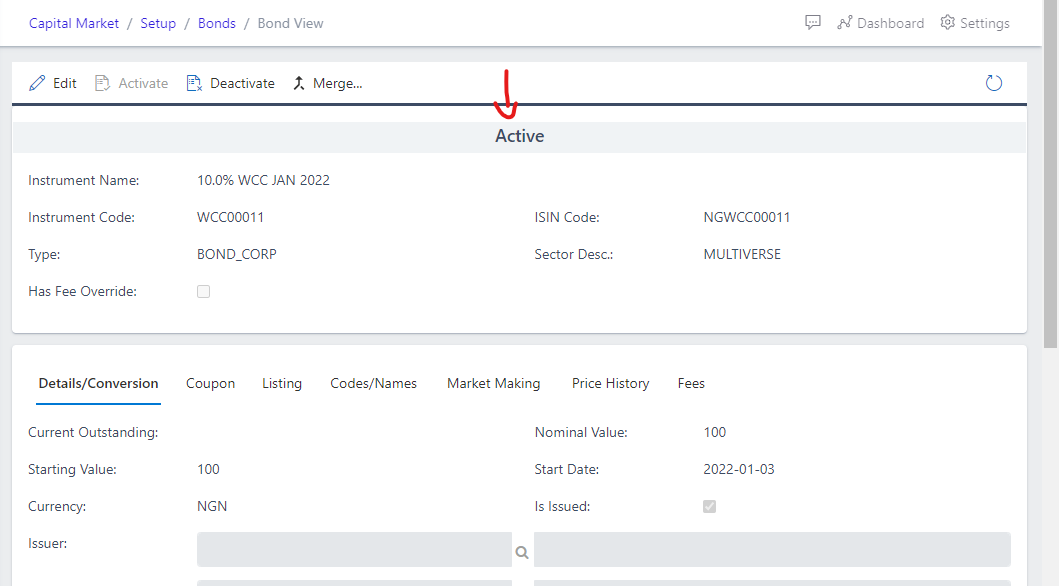
Once the user has activated the selected newly created Bond, the status immediately changes from the inital pending state to an active state. Fig 4.2 below shows the new state (active state) of the activated Bond.
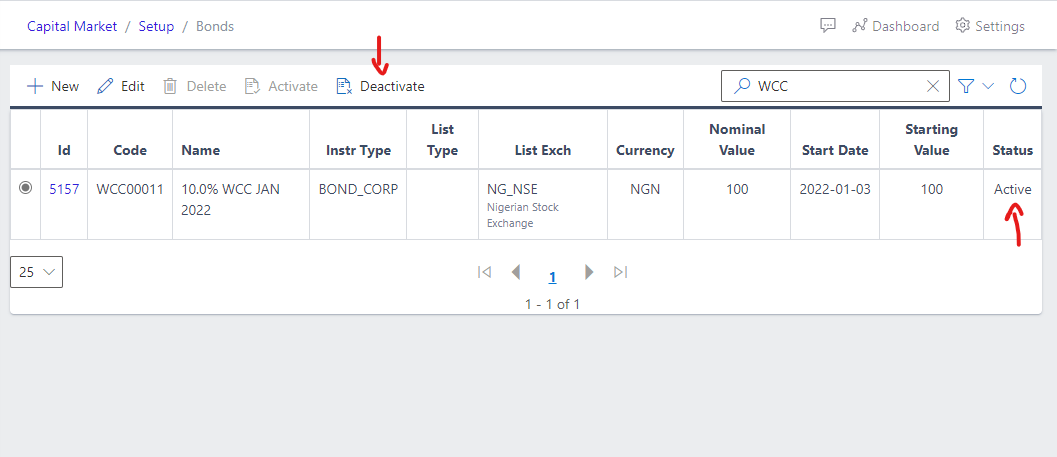
In Deactivating an Bond, user has to select the active Bond’s ID shown in fig 5 below. Seleting the ID will automatically highlight the Deactivate button as shown below. The user can then proceed to deactivating the selected Bond.
Fig 5 Showing selected ID for deactivation
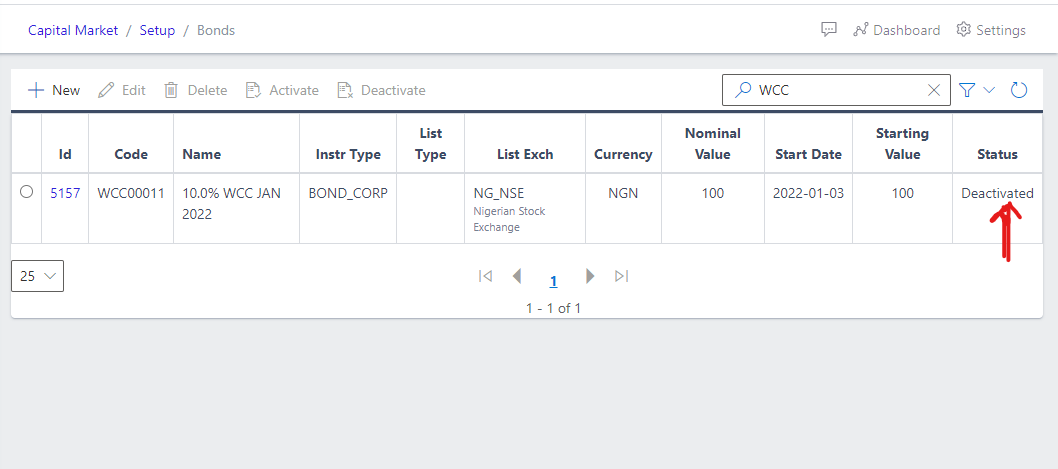
Once the user has deactivated the selected Bonds, the status immediately changes from the inital active state to an deactivated state. Fig 5.1 below shows the new state of the deactivated Bonds.