The Case management feature provides admins the ability to log, keep track and manage customer complaints, having a centralized and organized view of the complaint information of any customer and knowing which complaint has been resolved or is outstanding so it can be treated on time.
Navigating through to the case management submodule#
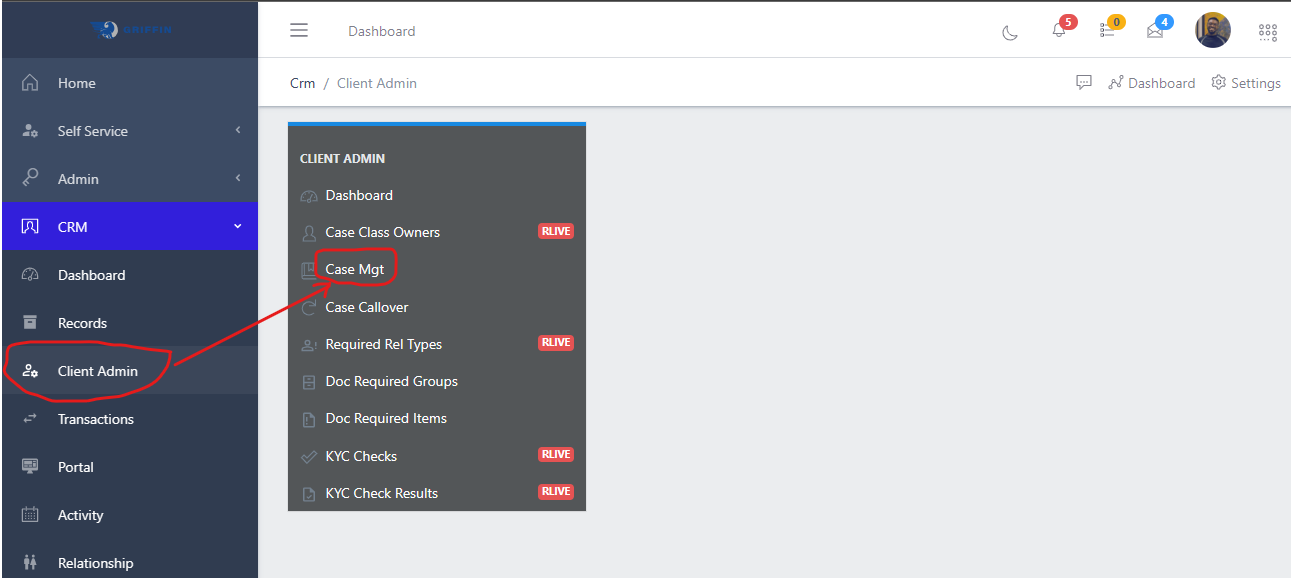
To navigate to case management, from the homepage of the ERP, on the side bar navigation locate the “CRM” module and click on it, you will see a list of drop down menus, select the “Client Admin” sub menu in the dropdowm menus, you will see a list of menus on the client admin dashboard, now select the case management menu. see image below
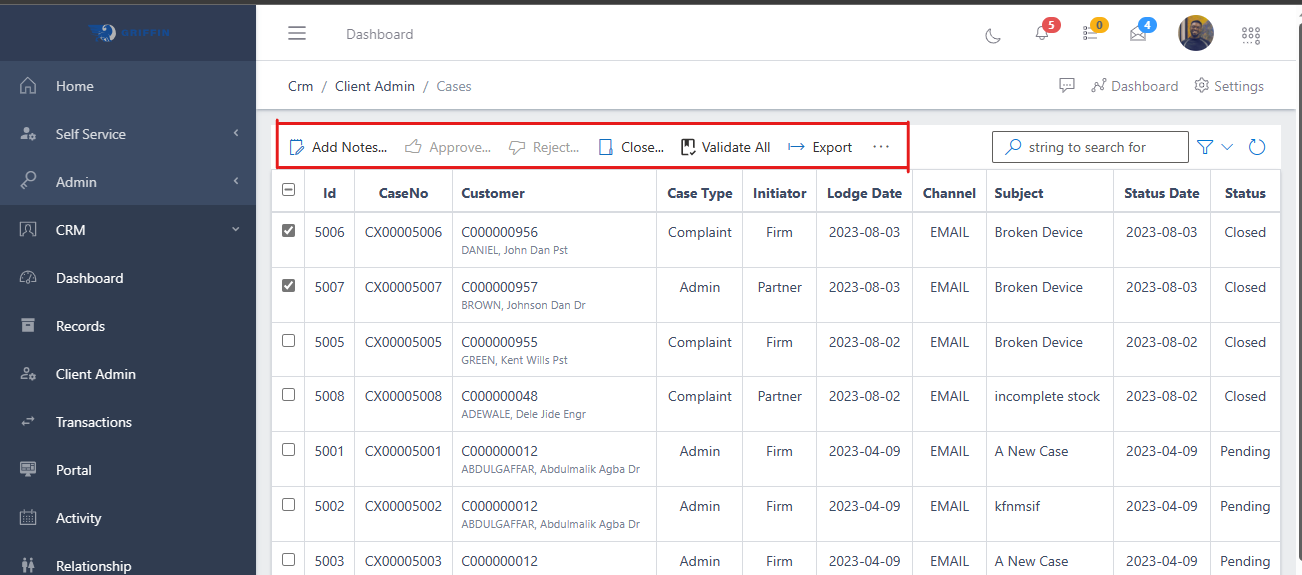
In the customers view you have a centralized list of all customer complaints with a summarized information view. You also have a group of commands (highlighted in the image below) above the list of cases, that you can use to perform various actions on a particular case by selecting the checkbox on the left hand side of the case ID.
Fig 1.1 showing centralized list of customer cases
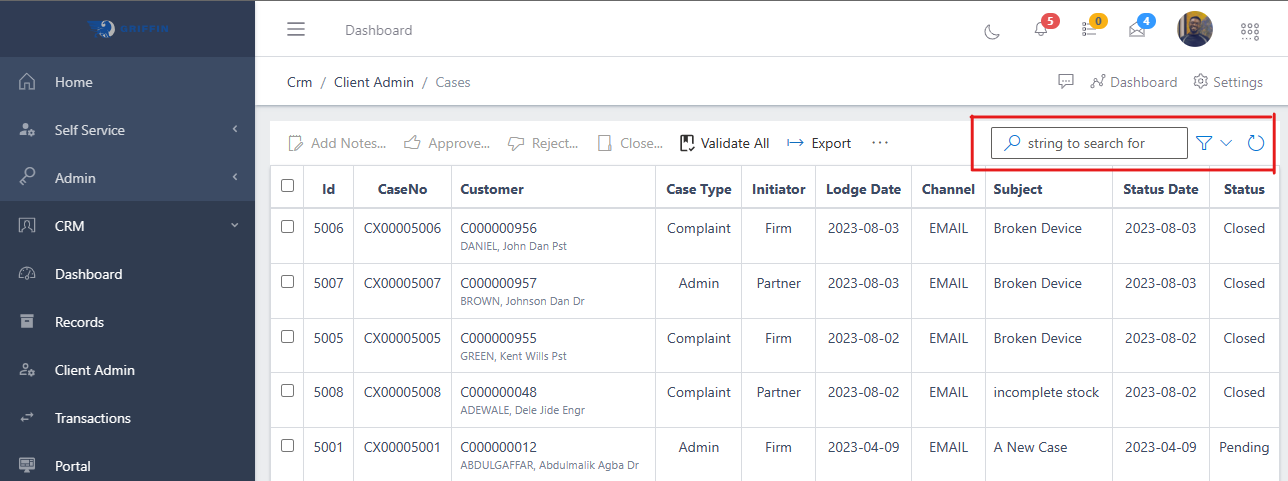
You can quickly search for a case by using the customer name, ID or customer number using the search bar and you can also narrow down the specifity of your search by using the filter button (funnel icon) on the right side of the search bar. You can search for a case and filter your search by the cases’ status, date logged, etc as shown in the image below.
Fig 1.2 showing filter & search function for customer cases
Finally to execute your search, press the enter key or the refresh icon on the right side of the filter button. see image above.
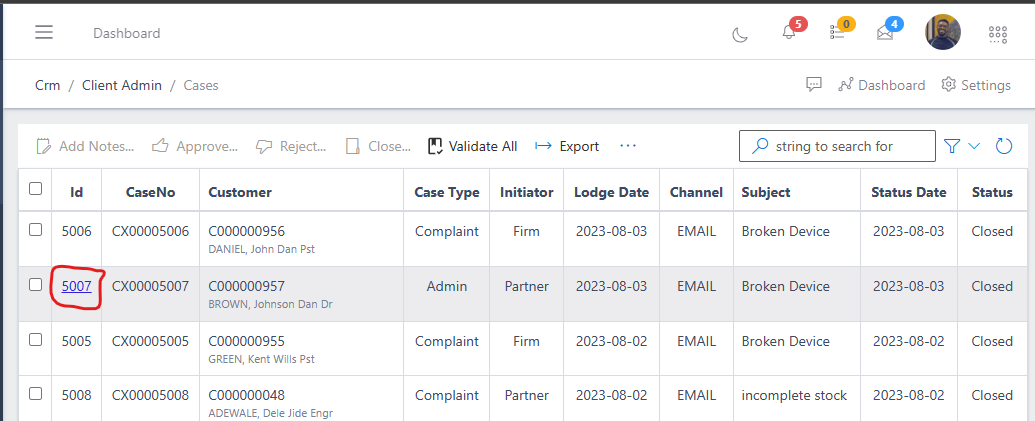
Also, to view the full information of a customers case, you click on the ID of the case.
Fig 1.2 Customer case ID
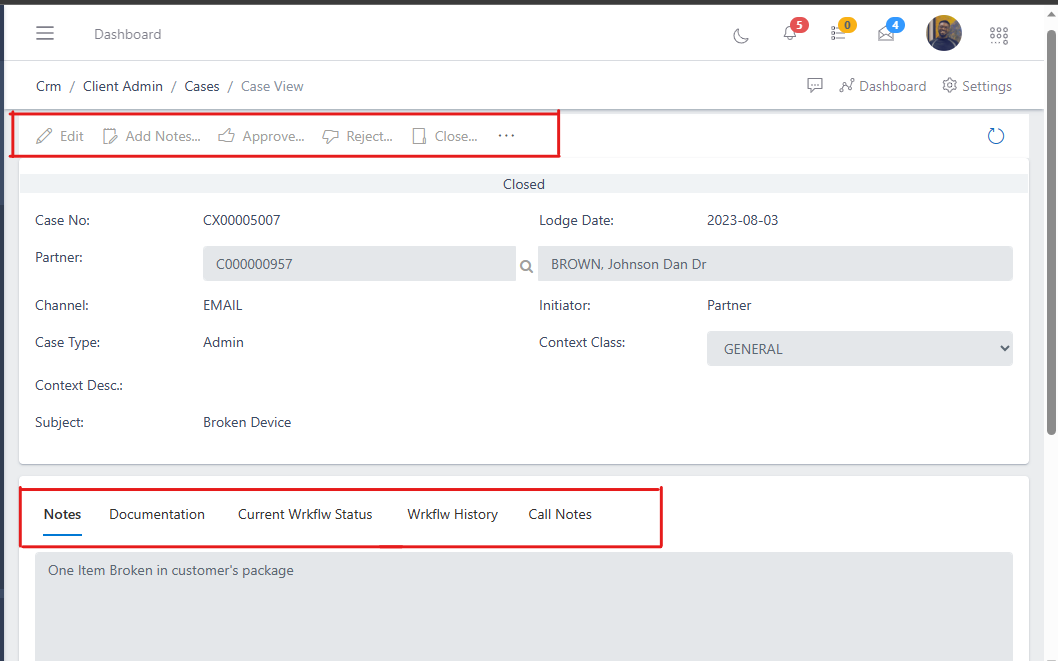
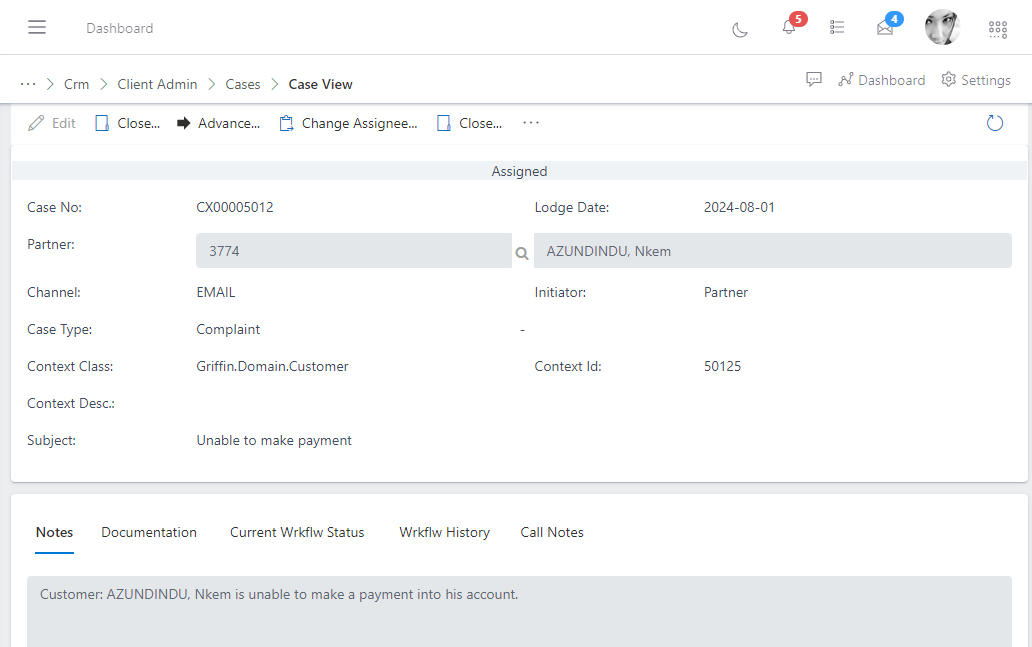
Fig 1.3 Customer case information view
In the image above you will notice the commands above that was highlighted, you can either choose to edit the customer case details, approve the customer case or whatever the case may be.
The second highlighted area below displays different tabs of information of the customers case, currently it's on the notes tab (showing the datailed information of the customer's case), you can click on other tabs to view their information.
To lodge a customer case, all you need to do is locate and select the customer you want to create a case for and then click on the create case button and then fill the necessary case details. follow the steps and images below:
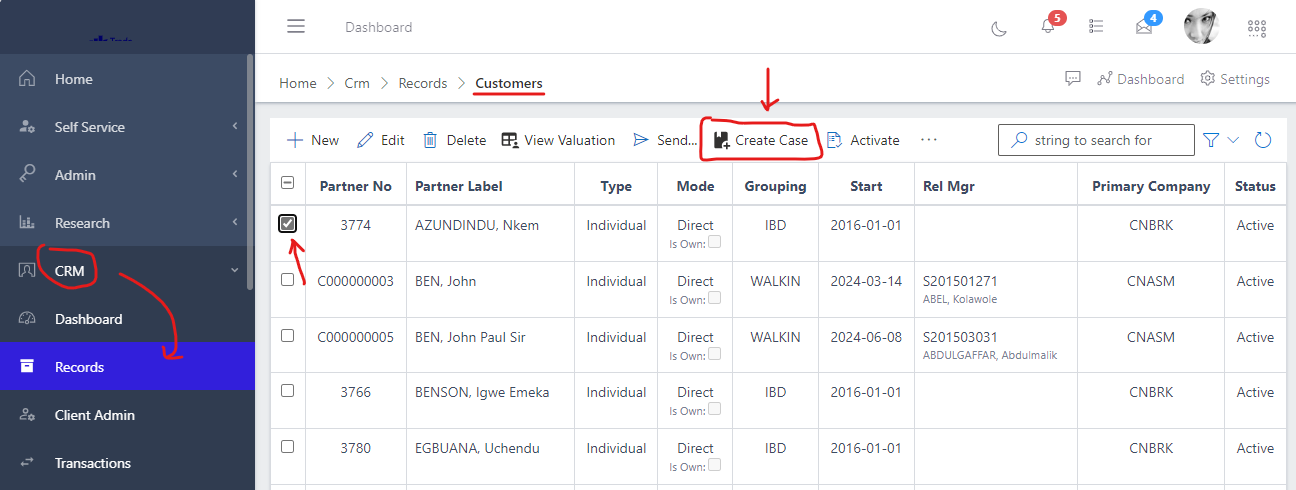
To locate the customer you want to create a case for, head to CRM -> Records -> Customers. from the list of your customers, select the customer you wnat to create a case for and click on the create case button, see image below:
Fig 2.0 showing list of customers and create case button
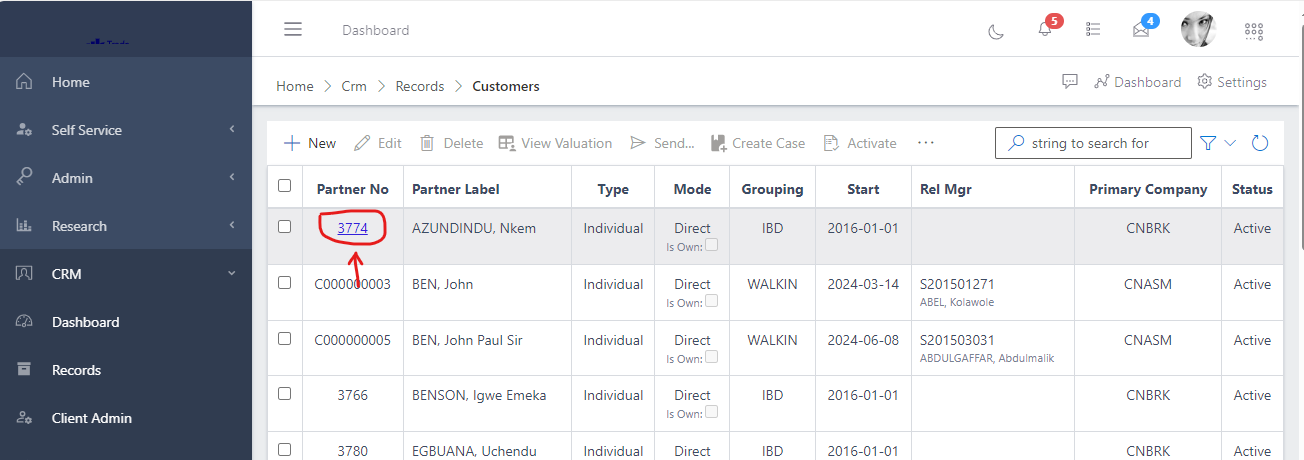
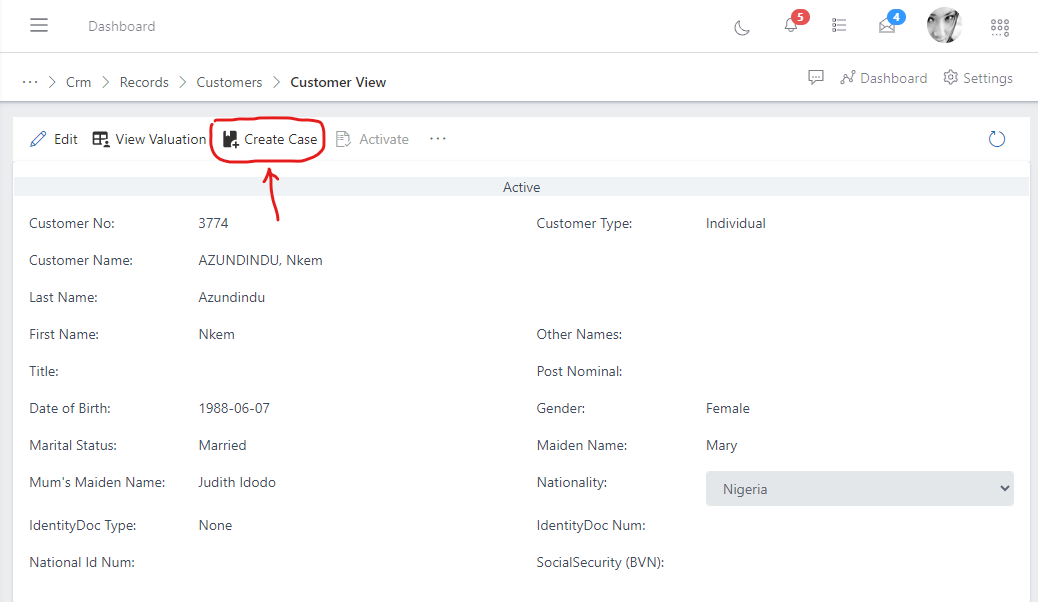
Alternatively, you can also click on the customer’s number to enter the customer’s full view and then click on the create case button see image elow:
Fig 2.1 Showing partner/customer number
Fig 2.2 showing customer's full view and create case button
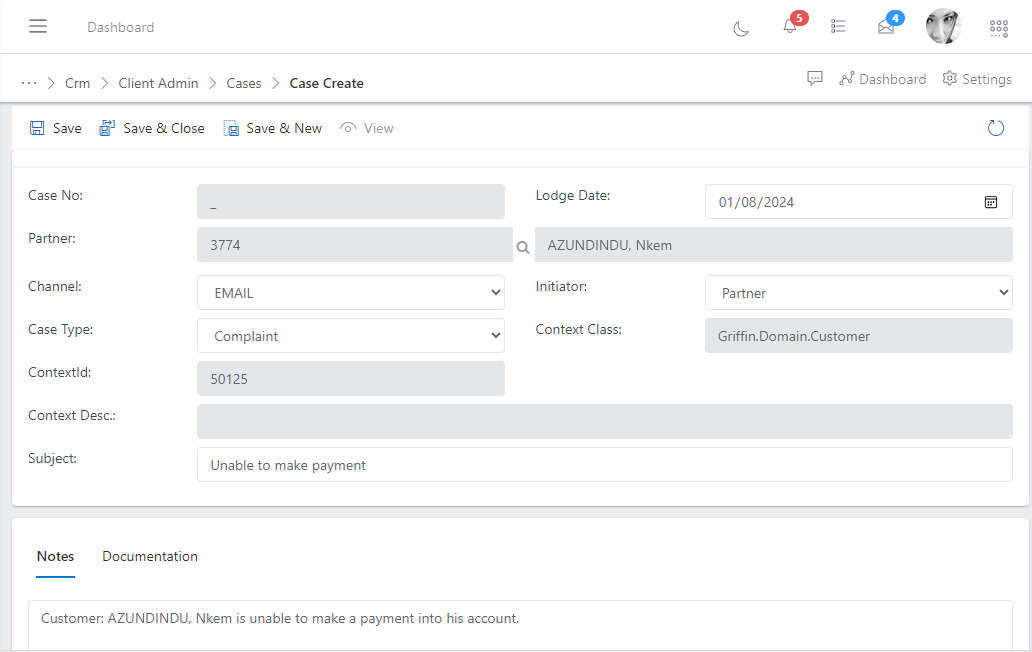
After clicking on the create case button, you will see the form as shown below, fill up the fields with the necessary details.
Note: You can not fill the case number as it will be auto-generated by the app once the case has been lodged. see image below:
Channel: Provides you with options to choose how notifications for the case you want to lodge will be sent, either via email, sms, etc. Initiator: Provides you with options to choose which entity is initiated the case, it could be either the firm, or the customer (partner), etc Case type: Provides you with options to choose what type of case is being lodged, either it is a customer complaint or admininstrative defect. Subject: Here you type in a phrase or short sentence that gives a high level information about the case that is being lodged. Notes: Here you type in the full details of the customer case, making more emphasis on the subject. Documentation: Here you can attach any sort of documentation provided to back up the case that is being lodged.
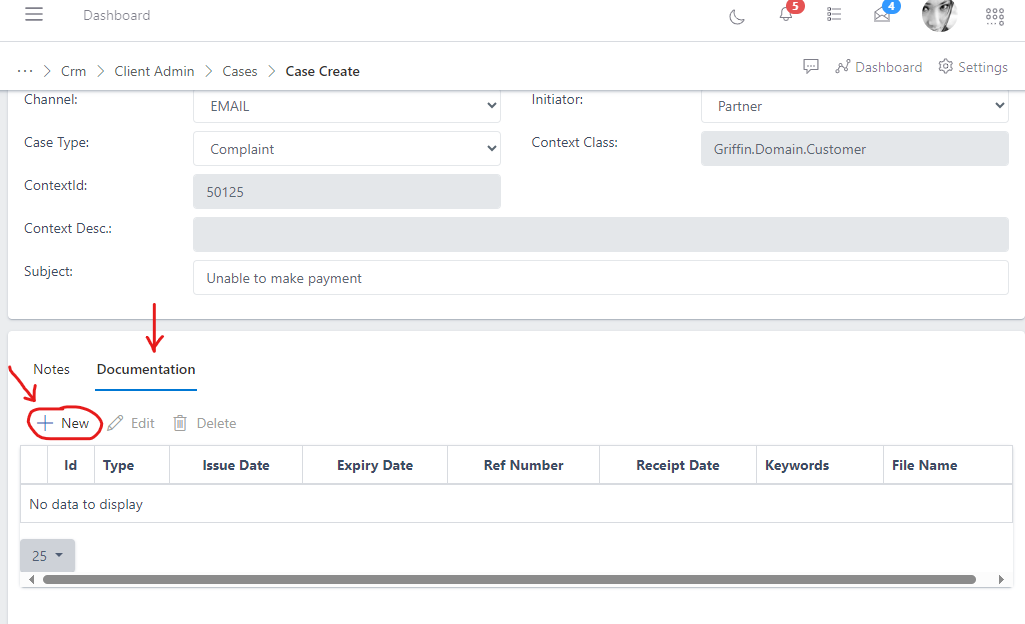
To add documentation after filling the necessary case details, click on the documentation tab on the form section below and click the new button.
Fig 4.0 image showing case documentation section
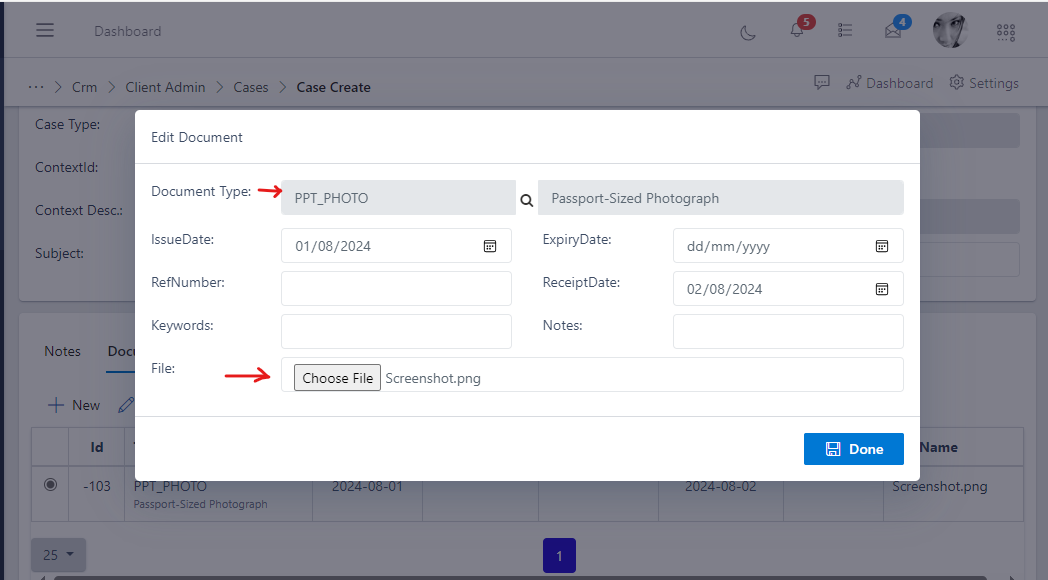
After clicking on the new button, a modal box will pop up as show in the image below. choose the document type you want to upload and also choose the document (file) from you device (PC), if the document has other information in it such as Expiry date or Receipt date, kindly fill it else leave those fields blank, for example in our case we are uploading a screenshot, which is just an image thus we do not need to fill details like Expiry date or Receipt date, so we leave it blank and click the done button to upload the document. see below:
Fig 4.1 image showing modal box for uploading case documentation
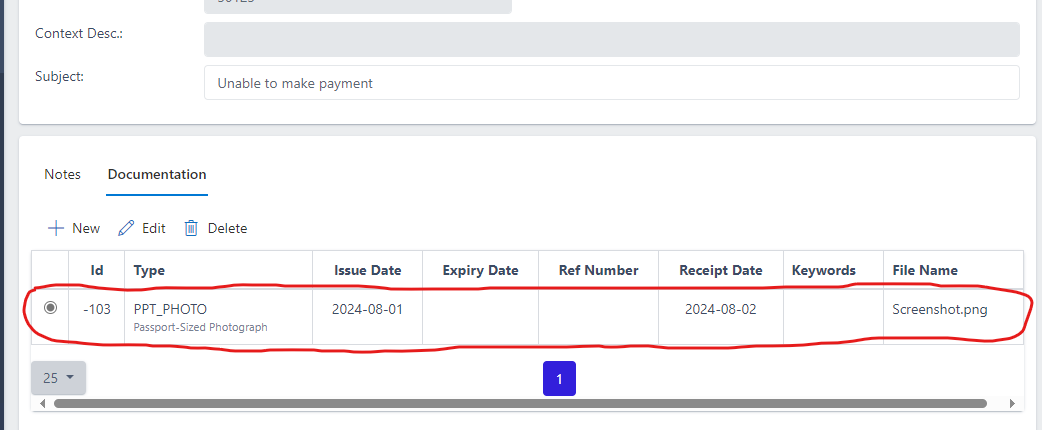
After the documentation has been uploaded successfully, you should have a view as show below.
Fig 4.2 image showing modal box for uploading case documentation
You can also choose to add more documents by clicking the new button again, or replace the document by clicking the edit button or delete the document by clicking the delete button, view fig 4.2 above.
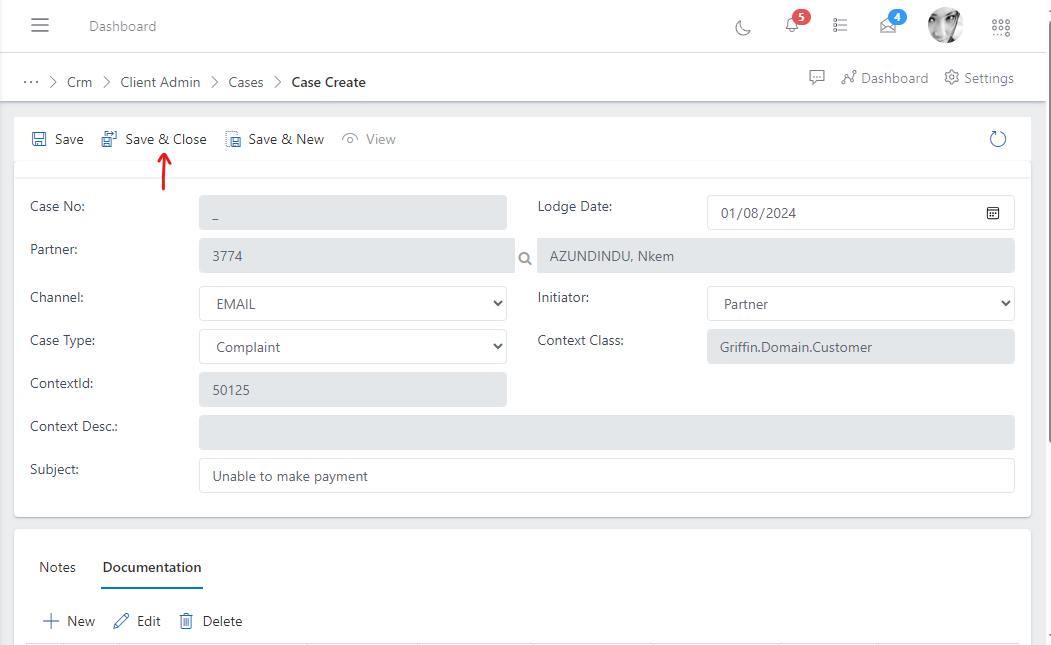
To save the lodged case, click on any of either “save” or “save & new” or “save & close” buttons. Note: the save button saves the case details and remains on the same page view, the “save & new”: saves the case and automatically takes you to the view where you can lodge another case for a customer and “save & close” saves the case details and takes you back to where you can see the list of lodged cases.
see image below:
Fig 5.0 image showing button to save lodged case
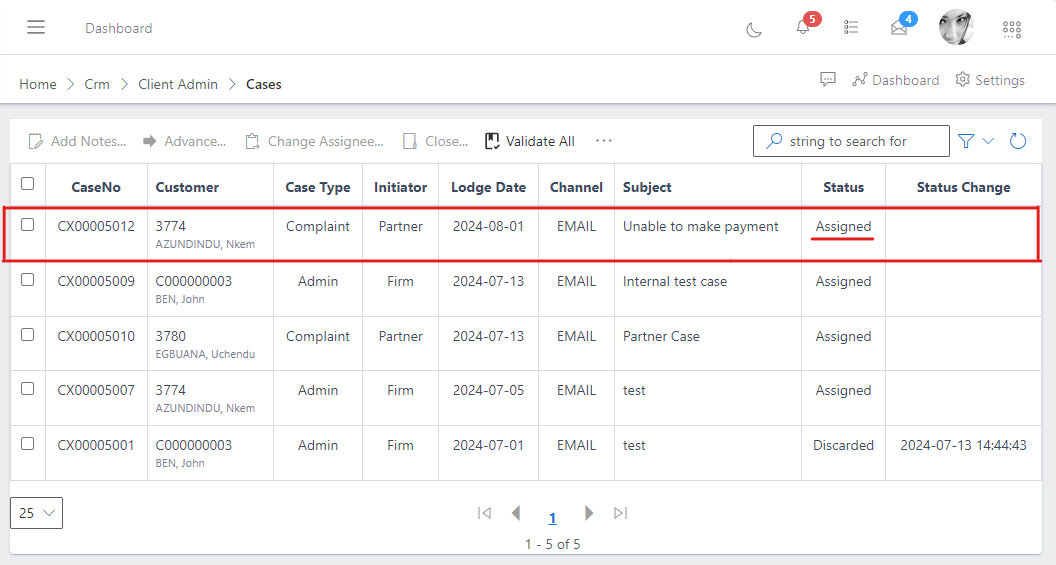
After clicking the save and close button, you are taken to the view where you have all the list of lodged cases as you can see in the image below. Also notice that you can see the case we just lodged in the list below and it has a status of Assigned, this is because when a case is newly created, it is automatically assigned to specific unit (default unit) within your organization, depending on the case type that was seleted during the lodging of the case. to learn more read Managing Case Assignments
Case assignment allows you to assign a newly created case to specific department or unit in your organization as well assiging a staff from that department / unit to handle the case. When a case is newly created, it is automatically assigned to specific unit (default unit) within your organization, depending on the case type that was seleted during the creation of case. To fully manange case assignments, follow the steps below:
For this scenario, we will continue with the case we created from the “lodging a customer case” section above. To locate a case, navigate to the CRM module and select the Client Admin submodule and then select the case management option. see fig 1.0 above.
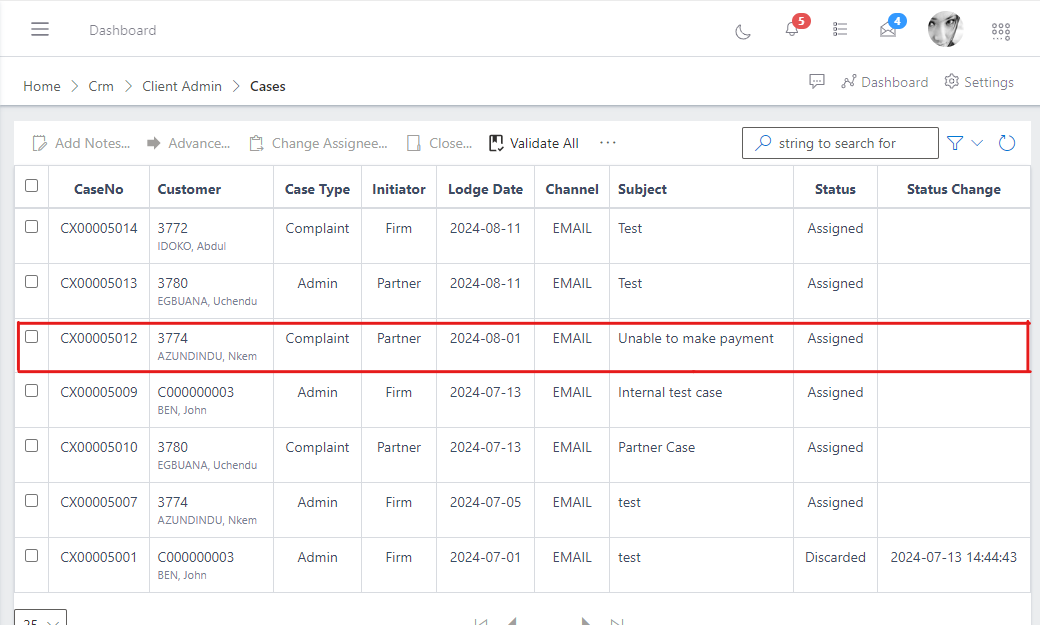
After clicking on case management, you will be routed to a screen showing you a list of all cases that has been created in the app. see image below:
Fig 6.0
Also notice in the image above, you see a case that is highlighted, which is the case we created earlier in the Lodging a customer case section above. we will use this same case to demonstrate how to manage case assignments.
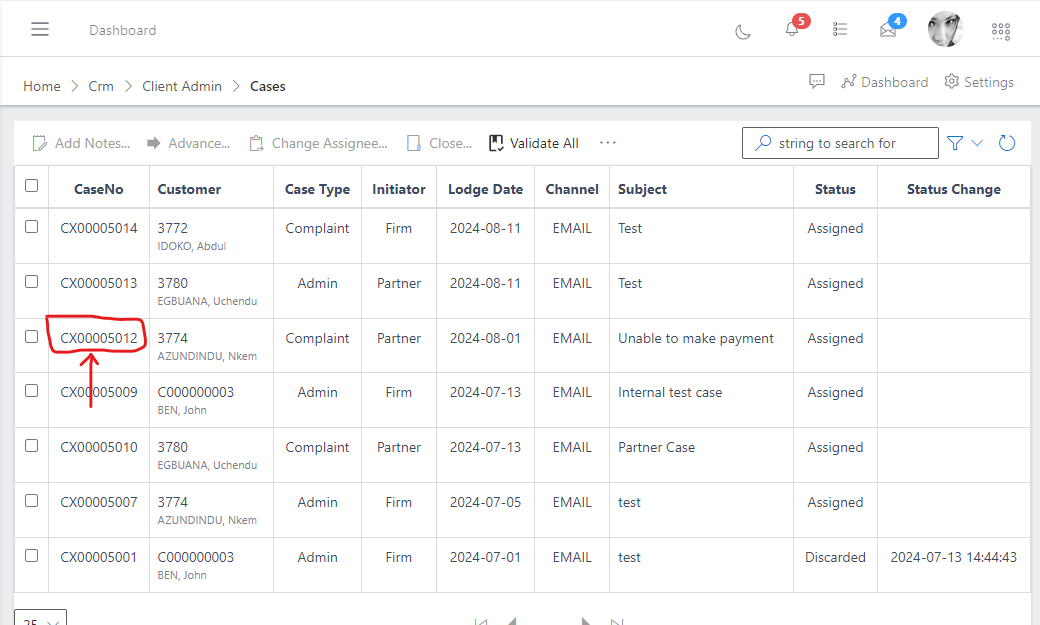
Click on the case ID to view the case full details. see image below:
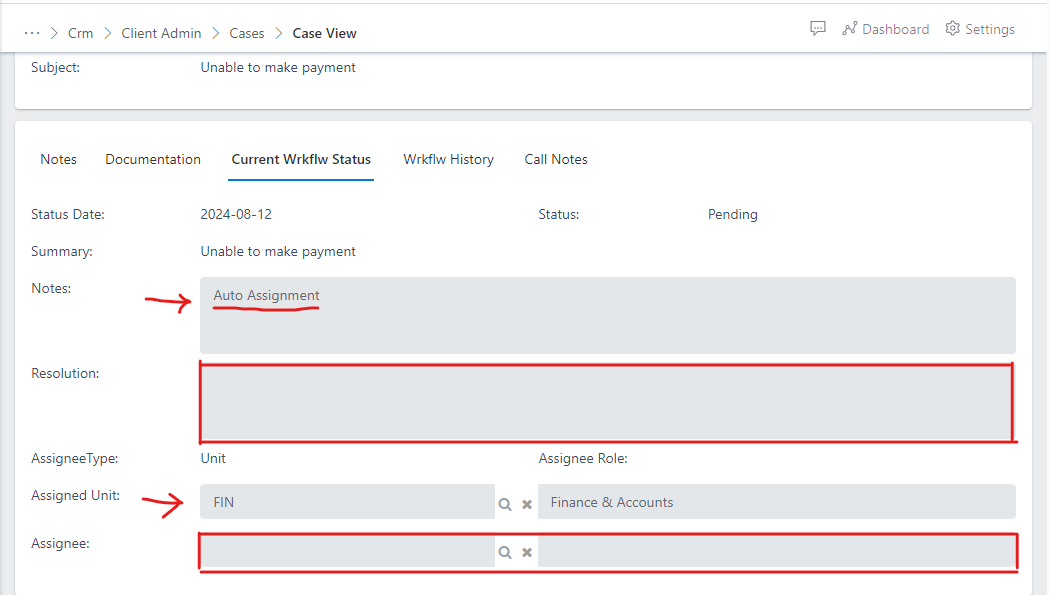
From the image above - Fig 6.2, you see some tabs with the following headers: “Notes, Documentation, Current Wrkflw Status, Workflow History”, click on Current Wrkflw Status see image below:
Fig 6.3
From the current work flow status we can see key highlihgted sections:
Notes: The notes keeps a record history of the actions that has happened in respect to how a case has been re-assigned from unit to unit, as well as how the case assignees (staff assigned to manage a case) is being re-assigned with a unit. You will notice that current the note displays auto-assignment, this entails that the case has not been re-assigned to a unit or staff, hence it stays in the default unit that it was automatically assigned to by the app.
Assigned Unit: Displays the Unit that a case is currently assigned to. in the image - Fig 6.3 above, the case is currently assigned to the (Finance Unit) by default.
Assignee: Displays the current staff within a unit that a case is currently assigned to. in the image above - Fig 6.3, the doesn’t have an assignee/staff assigned to it yet.
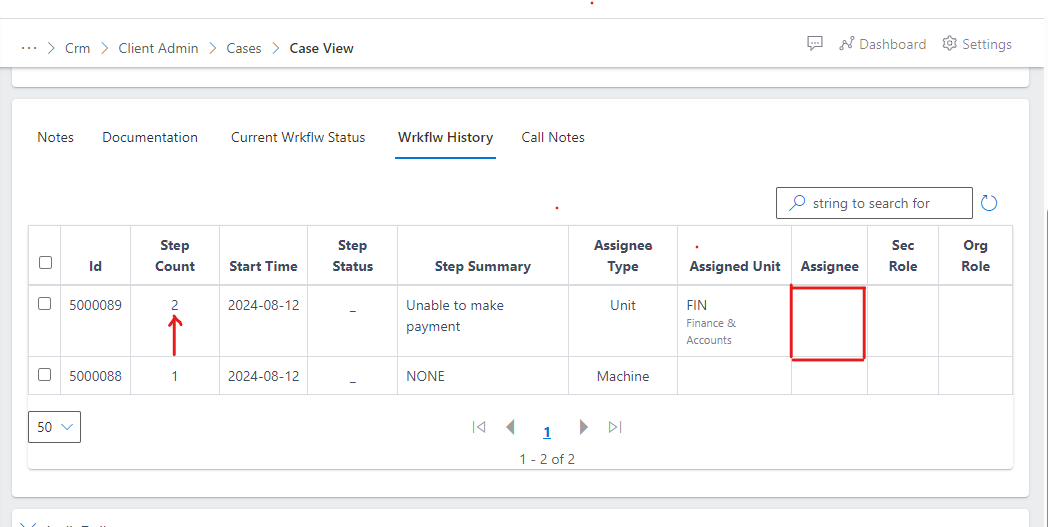
The Work flow history shows us the record of actions from the beginning of when the case was created and through it's life-cycle.
From the image - Fig 6.4 above you will notice how the work flow progress from step 1 to step 2 (current step), by default the app is responsible for starting any work flow process, that is why we have the assignee type as "Machine" for step 1 and then once the case is created, the system auto-assigned it to the Finance Unit, that is why we have the Assignee type for step 2 as "Unit". Now that the current work flow assignee type shows Unit, and the Assigned Unit is Finance, this entails that someone from the Finance unit or a super-admin will need to take over the case managment process from there. The user can either re-assign the case to another unit, re-assign to another staff or go ahead to complete to close case. You will also Notice that the Assignee box is empty: which indicates that there is no one from the finance unit currently assigned to manage the case.
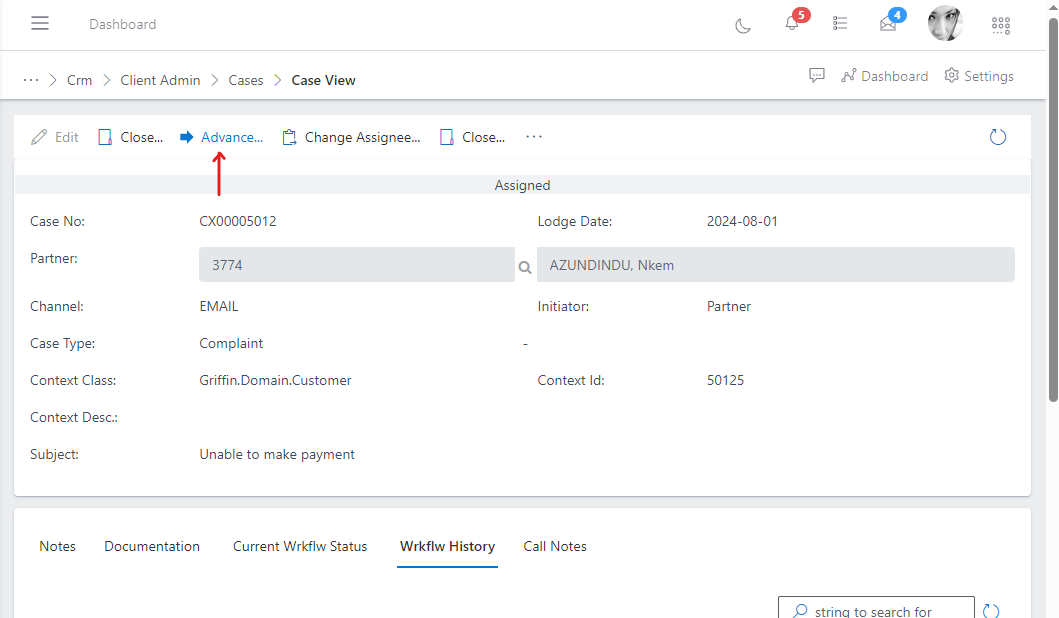
From the image Fig 6.4 above, notice that the current assigned Unit is Finance unit, we will be advancing / re-assigning the case to the HR (Human Resource) unit. follow the steps below to advance a case.
on the case view, click on the Advance button
Fig 6.5
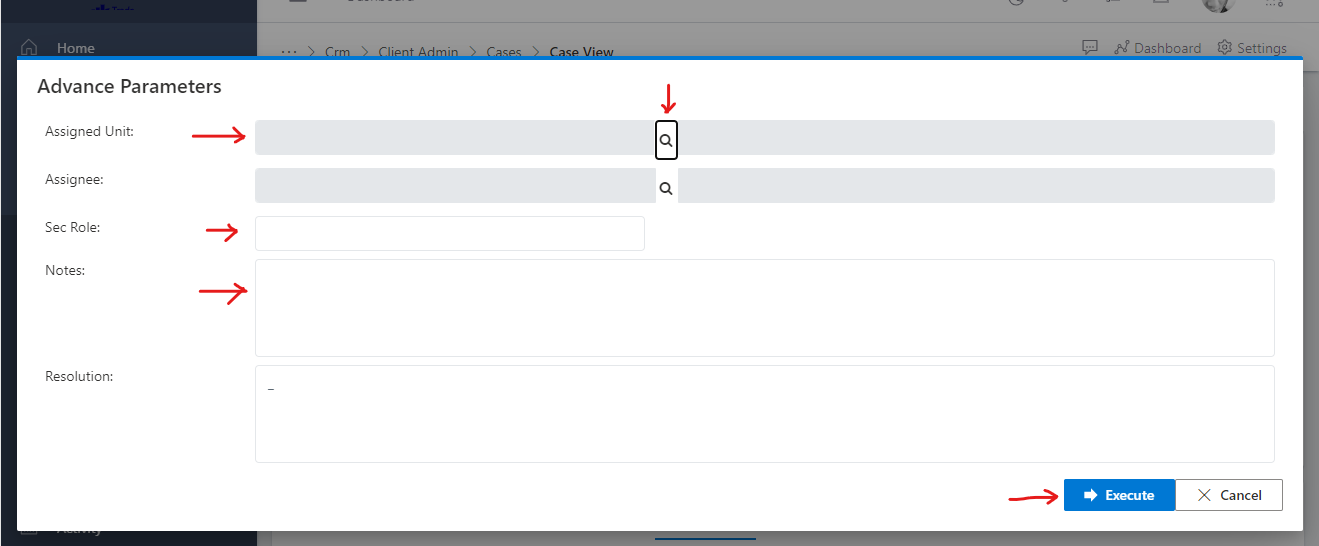
- Fill the necessary fields: Assigned unit, Sec Role and Notes.
Fig 6.6
Fig 6.7
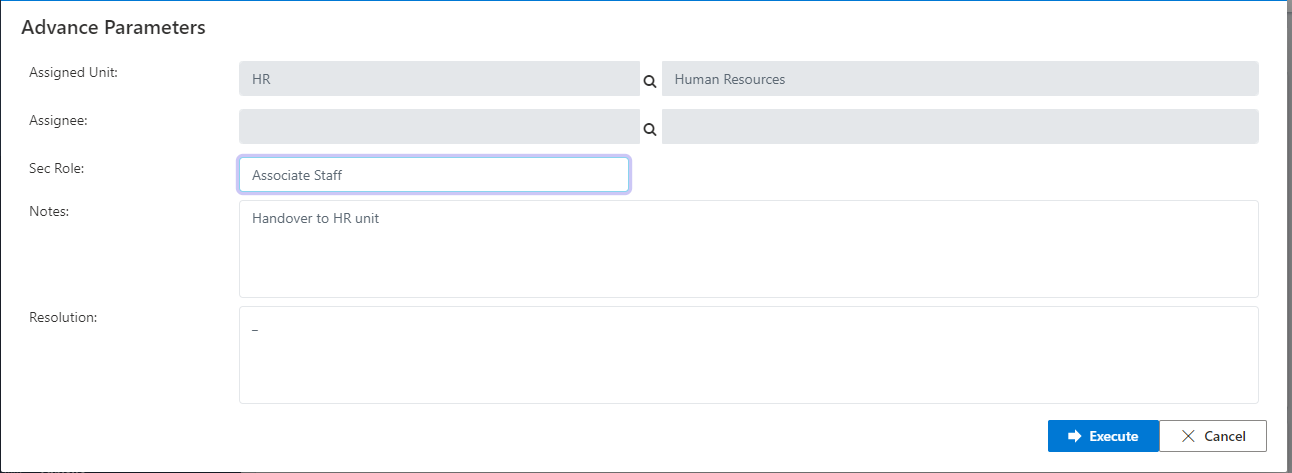
From Fig 6.7 above, you have the following fields populated: Assigned unit: Here you choose the unit that you want to advance the case to. Sec Role: Notes: Here you can add a note to add context to the case advancement process. Resolution: Here you fill in the details of how the case was resolved, but since the case hasn't be resolved you can leave the field as it is.
Next, Click on the execute button to complete
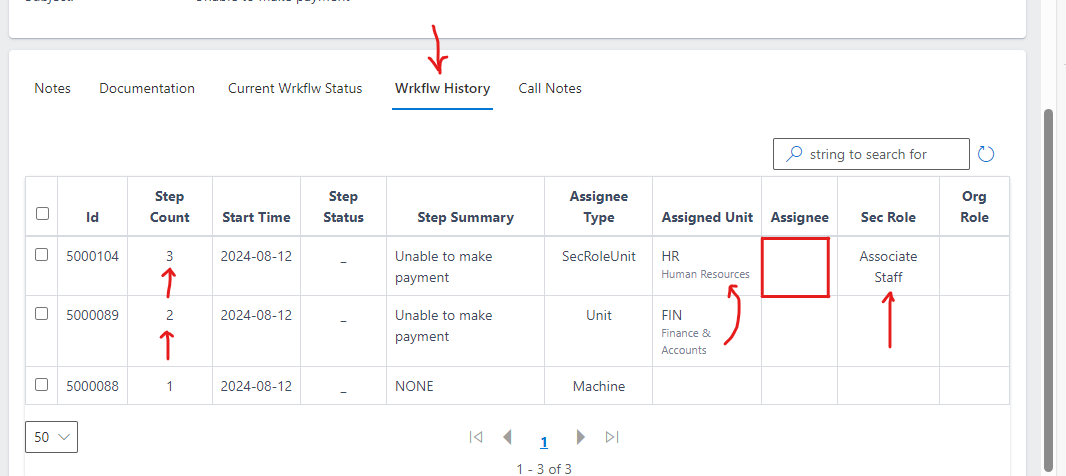
Navigate back to the work flow history tab, you will notice that a third step has been added, as it shows now that the case has been advanced from the Finance Unit to the HR Unit see image below:
Fig 6.8
To Advance the case from a Unit to another Unit, simply repeat the process: 2. Advancing a case to a Unit
From the Image Fig 6.8 above you will notice that no staff has been assigned to the HR Unit yet, we will look at how to assign / re-assign a staff to a case in section 3 below:
To re-assign a staff to a case, follow the steps below:
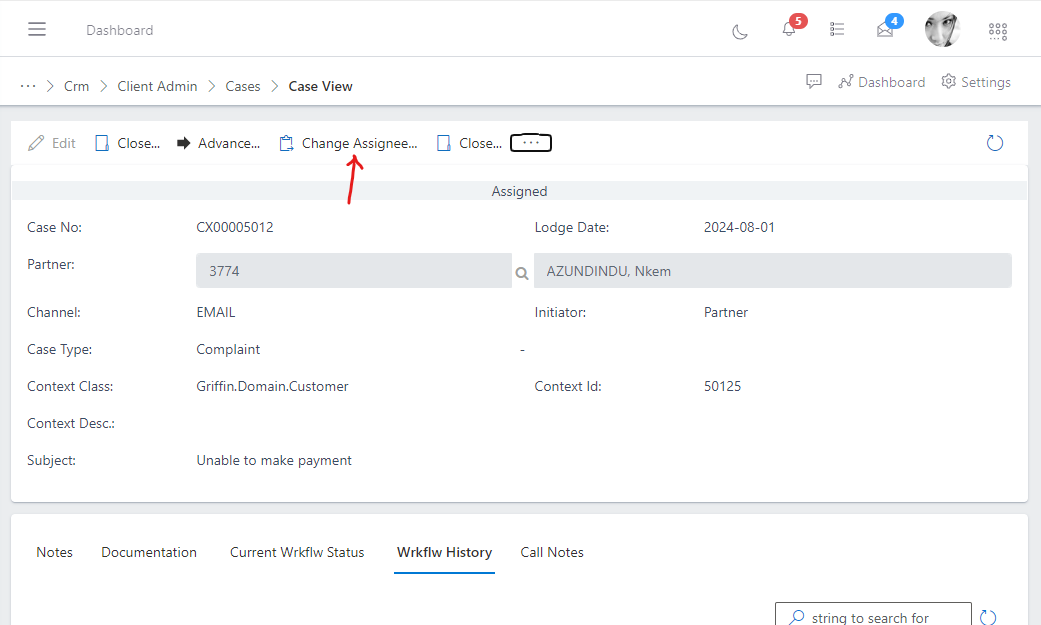
on the case view, click on the Change Assignee button
Fig 6.9
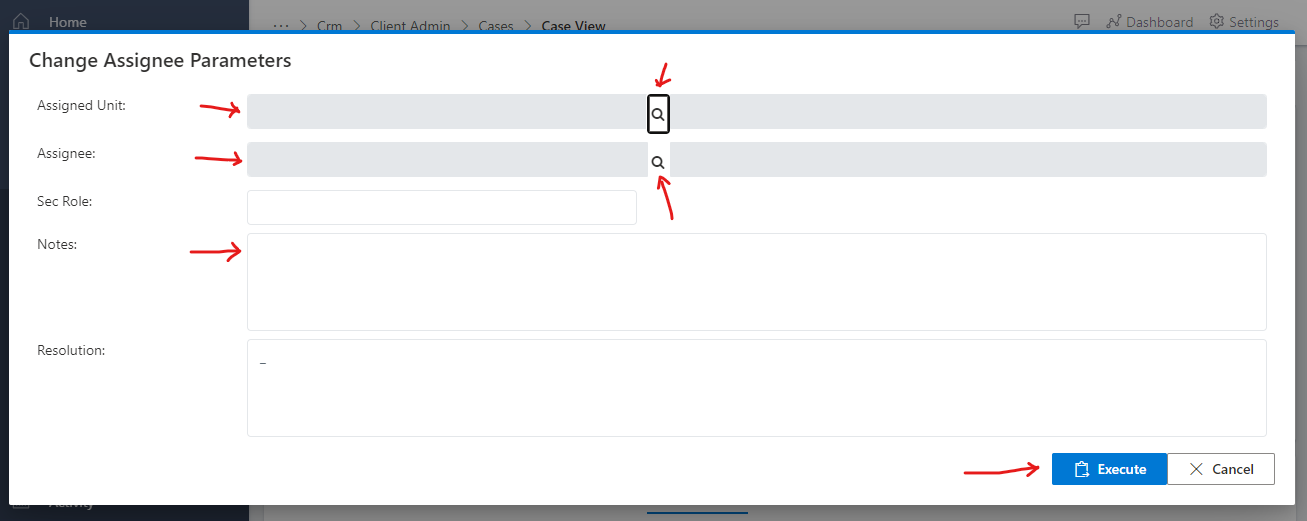
- Fill the necessary fields: Assigned unit, Sec Role and Notes.
Fig 6.10
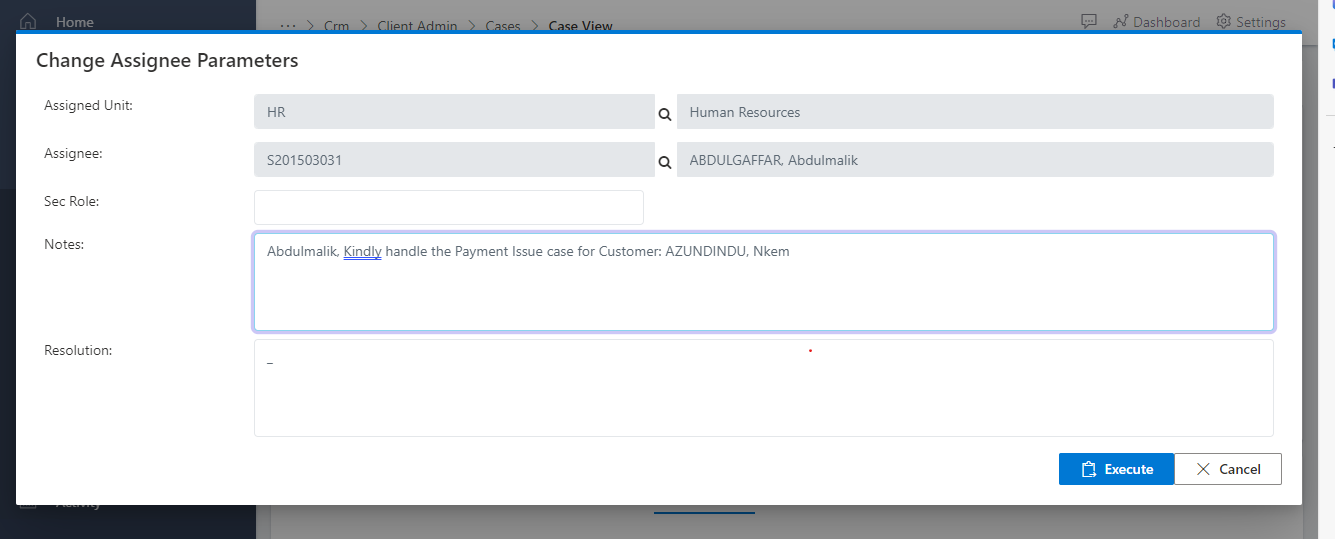
Fig 6.11
From Fig 6.11 above, you have the following fields populated: Assigned unit: Showing the unit you are selecting the staff to whom you are assigning a case to, in this case since we want to assign the case to a staff from the HR Unit, we leave it as HR unit. Assignee: Display the name of the staff from the HR Unit that the case has been assigned to, in this scenario the staff name is "Abdulgafaar Abdulmalik"
Sec Role: Notes: Here you can add a some notes to add context to the detais of the case to the newly assigned staff. Resolution: Here you fill in the details of how the case was resolved, but since the case hasn't been resolved yet, it should be left as it is.
Next, Click on the execute button to complete.
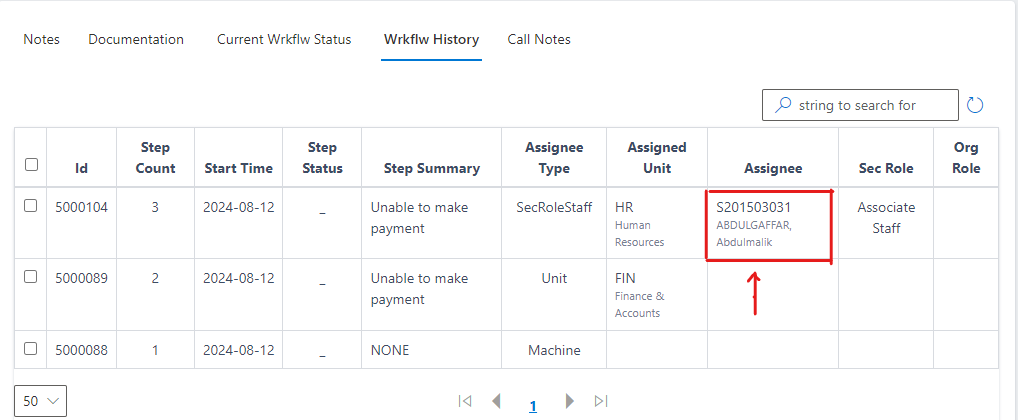
Navigate back to the work flow history tab, you will notice that the staff (Abdulgafaar Abdulmalik) from the HR unit is now assigned to the case.
Fig 6.12
To re-assign the case from a staff to another staff, simply repeat the process: 3. Assigning / Re-assigning a Staff to a case.
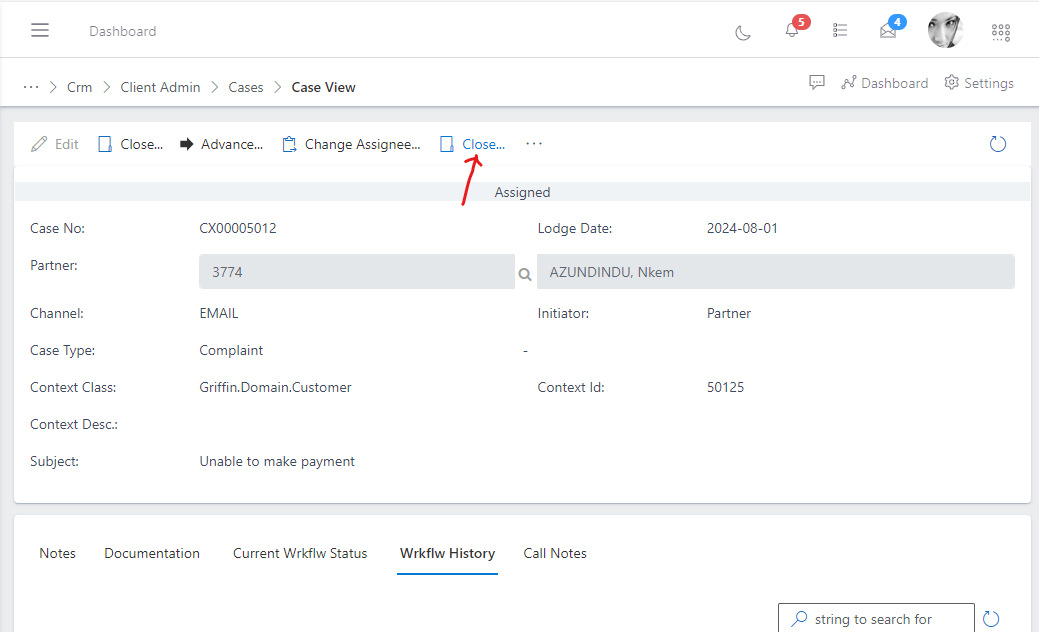
Closing a entails that the case must have been resolved. To close a case follow the steps below:
on the case view, click on the Close button
Fig 6.13
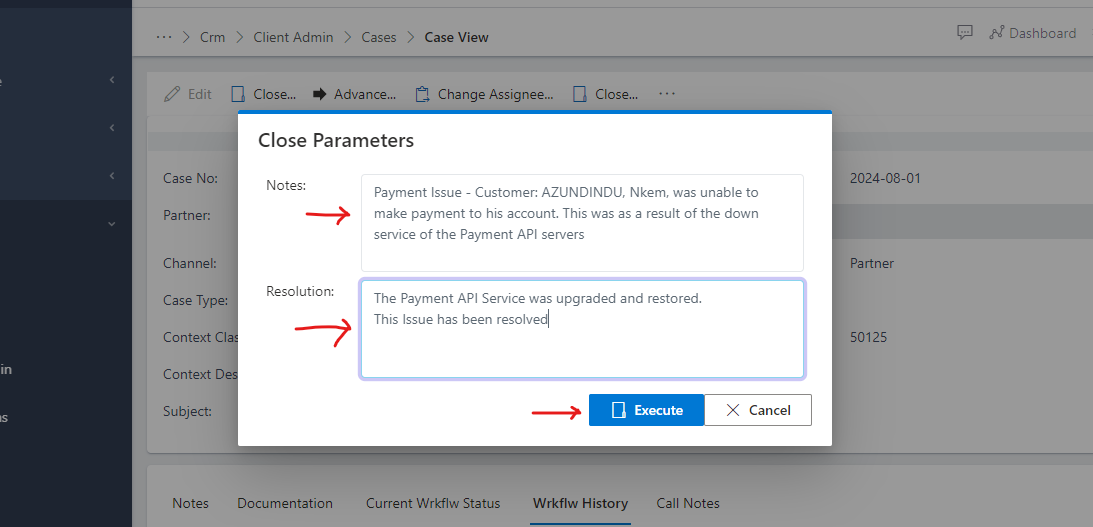
- Fill the necessary fields: Notes and Resolution.
Fig 6.14
From Fig 6.14 above, you have the following fields populated: Notes: Provides a field to add key information about the case Resolution: Provides a field to add key information about how the case was resolved.
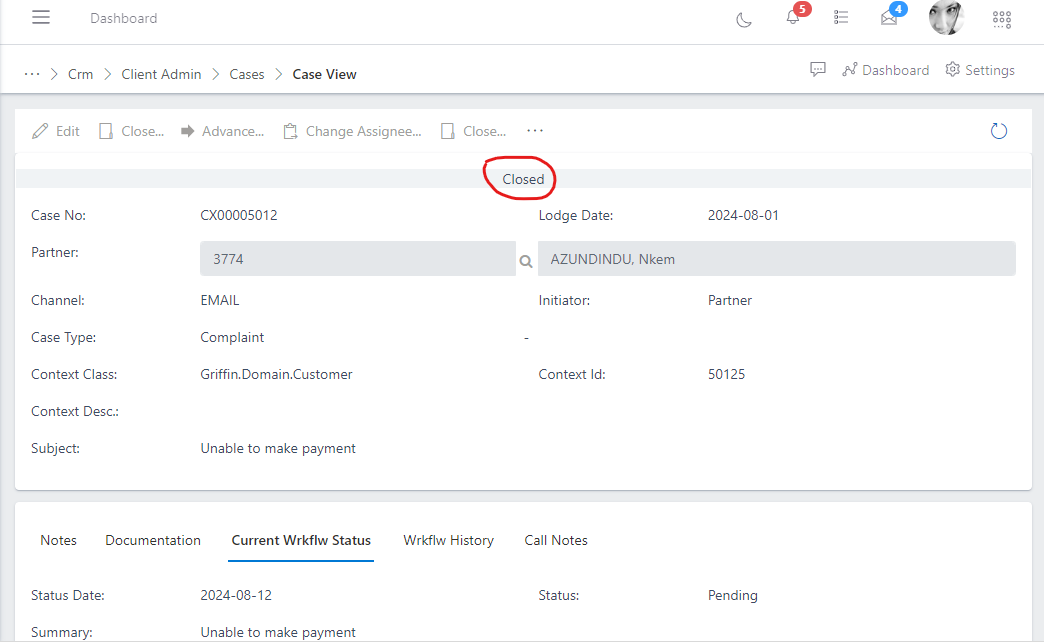
Next, Click on the execute button to complete.You will notice that the status of the case is now “closed” see image belwo
Fig 6.15
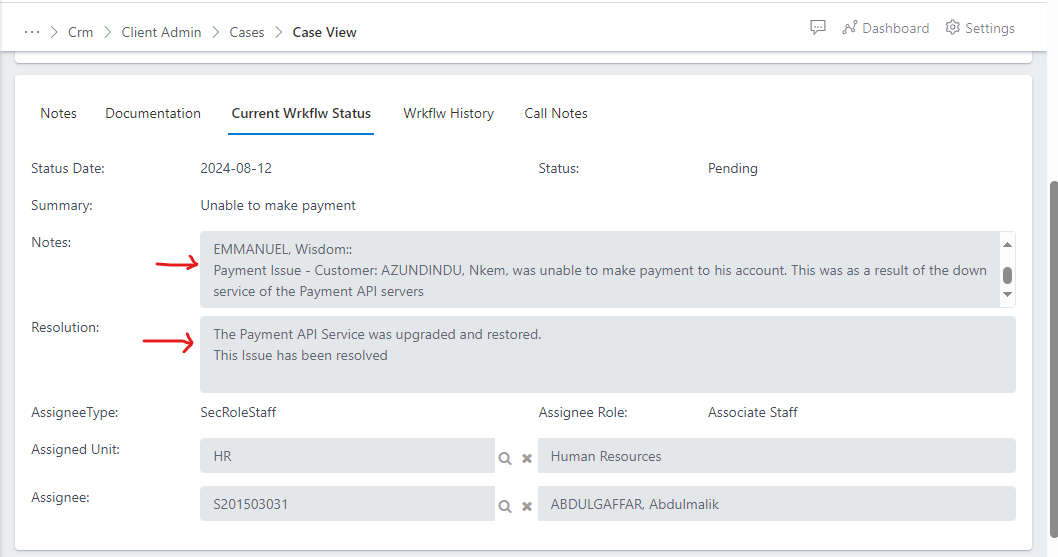
Navigate back to the current work flow tab, you will notice that you can now see the full details of the closed case, the details of the notes and the resolution as well. see image below:
Fig 6.16
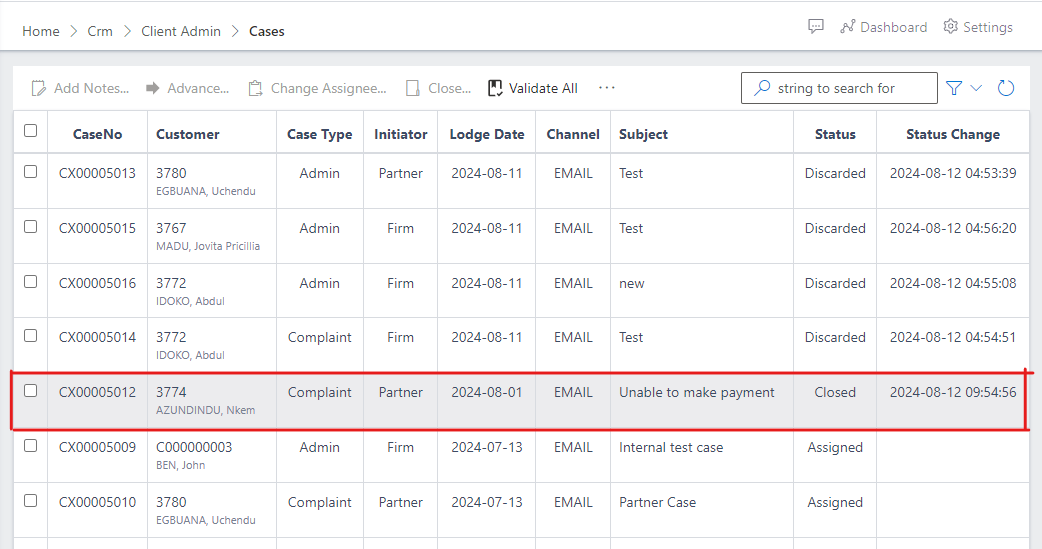
Also, if you navigate back to case management view to view the list of cases and filter for all or closed cases, you can see the case appearing in the list with a closed status as well as the status change(which indicates the date/time the case was closed), see image below: