Title here
Summary here
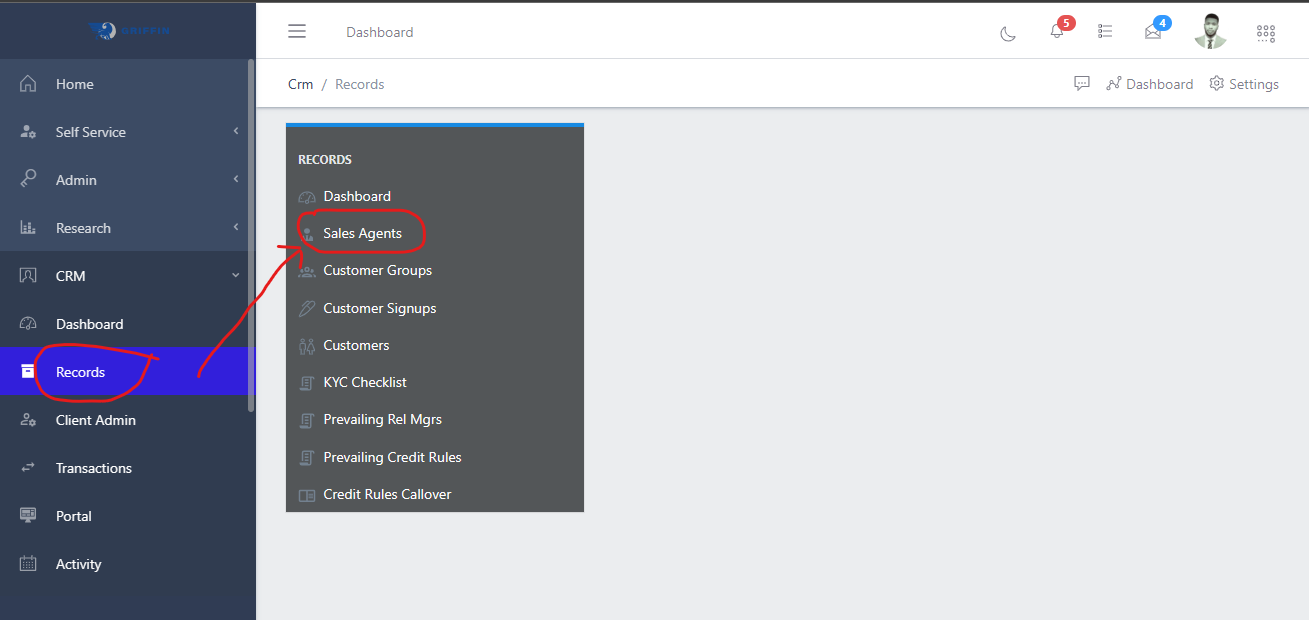
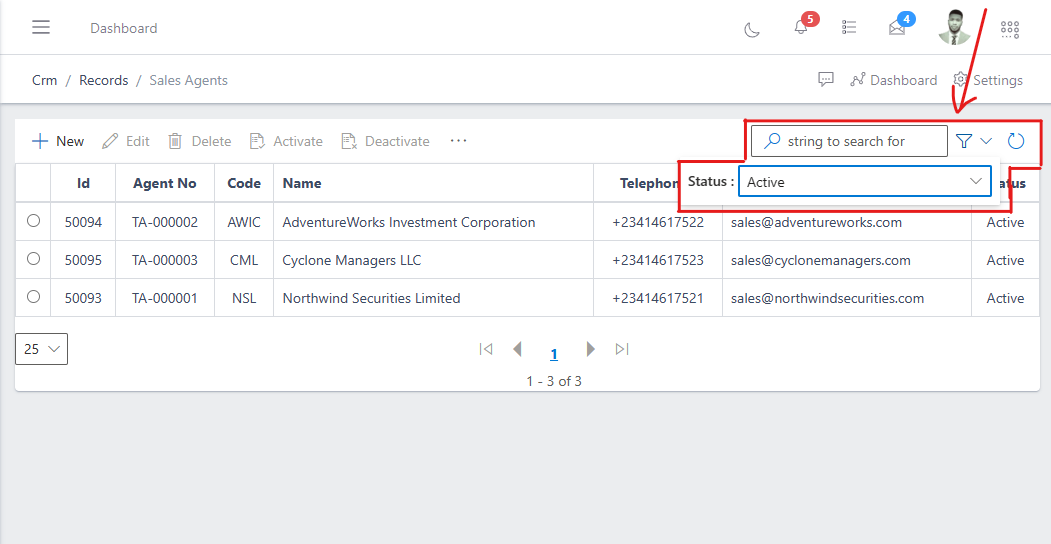
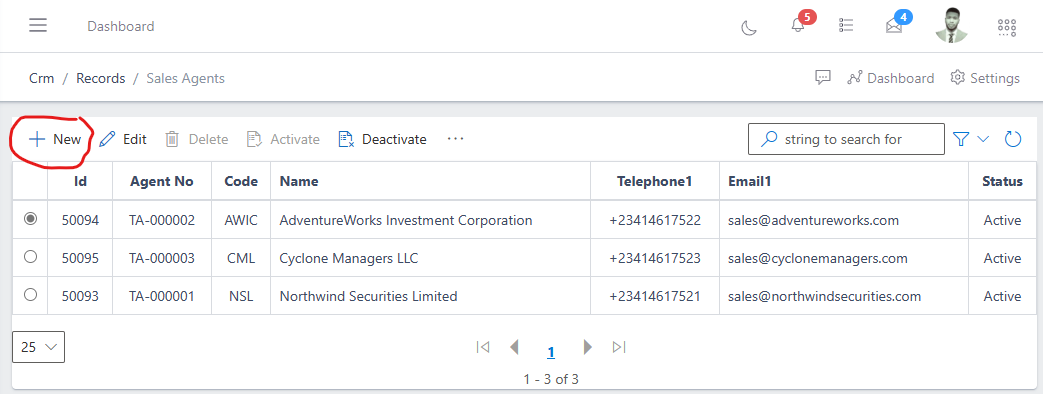
To navigate to the sales agent submodule, from the homepage of the ERP, on the side bar navigation locate the “CRM” module and click on it, you will see a list of drop down menus, select the “Records” sub menu in the dropdowm menus, you will have the records dashoard displayed with different sub modules, now select the sales agents menu. see image below
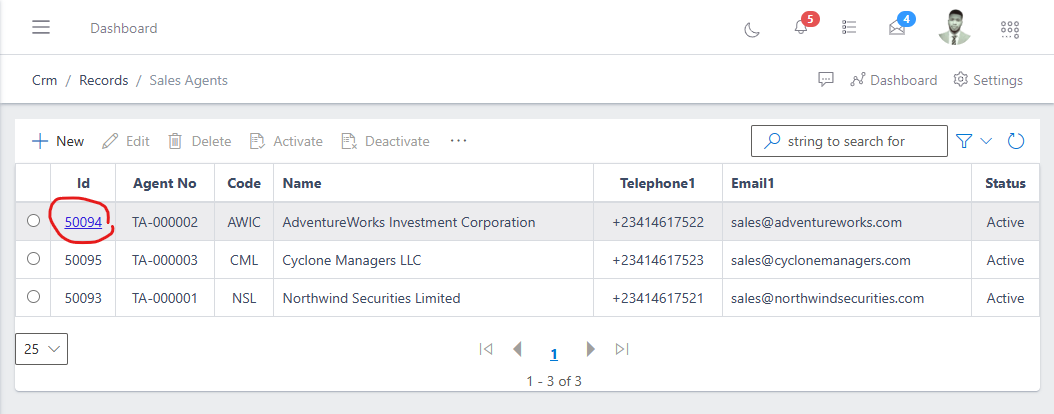
In the sales agent view you have a centralized list of all sales agent with a summarized information view. You also have a list of commands (highlighted in the image below) above the sales agent list that you can use to perform various actions on a particular sales agent or group of sales agent by selecting the checkbox on the left hand side of the sales agent’s ID.
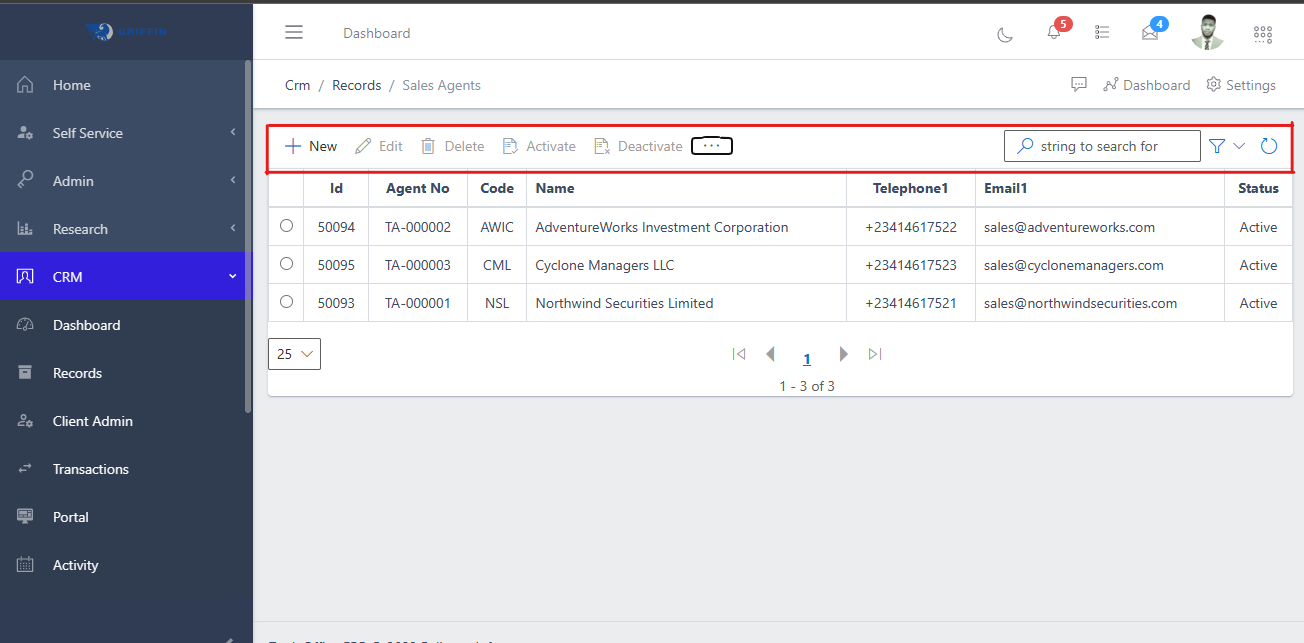
You can quickly search for a sales agent with thier names, ID or sales agent number using the search bar and you can also narrow down the specifity of your search using the filter button (funnel icon) on the right side of the search bar. You can search for a sales agent and filter your search by the sales agent’s company, group, status, etc as shown in the image below.
Also, to view the total information of a sales agent, you click on the ID of the sales agent.
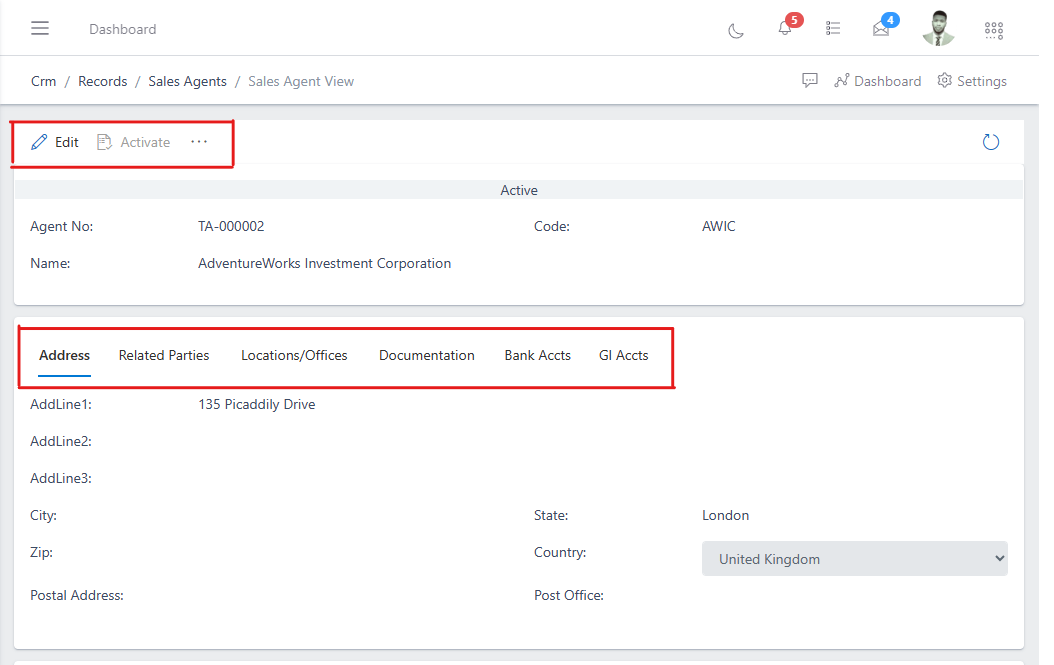
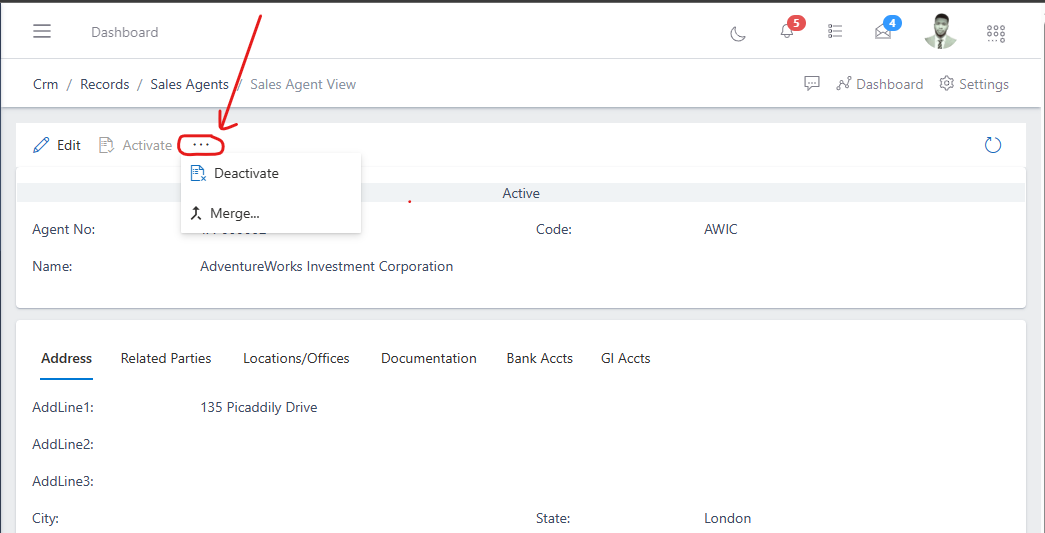
You will notice the ellipsis (…) after the activate command, you can click on it to access more command options as shown below.
To onboard a new sales agent, follow the steps below:
Navigate to the sales agent section under the records sub-module of CRM module: see how to navigate in the section above.
In the sales agent section you will see the list of existing sales agent and a button named “new” at the top left corner where you have a list of commands. click on the “new” button.
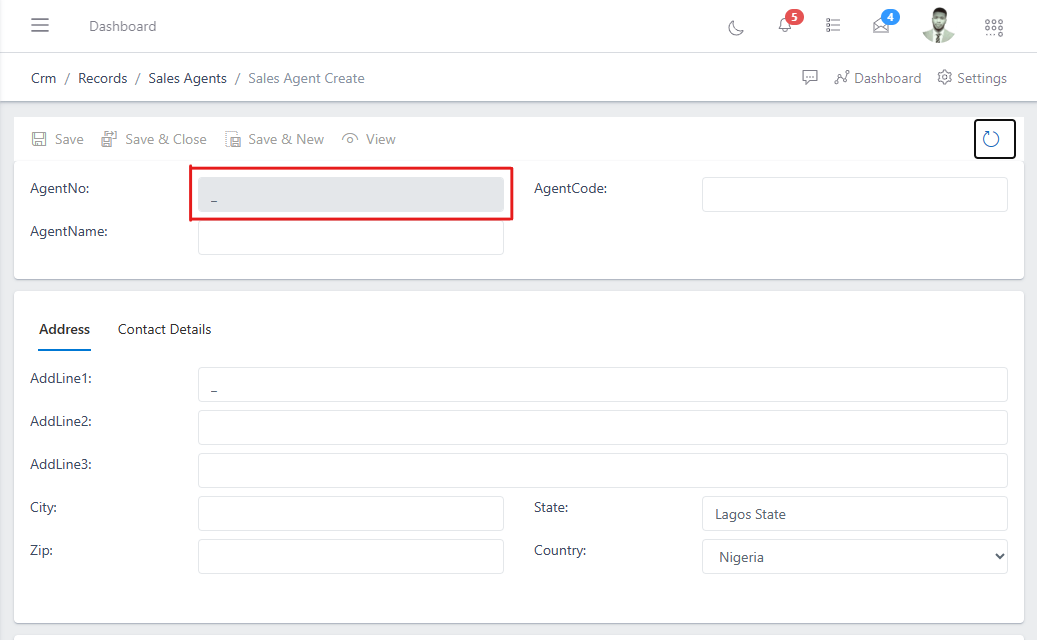
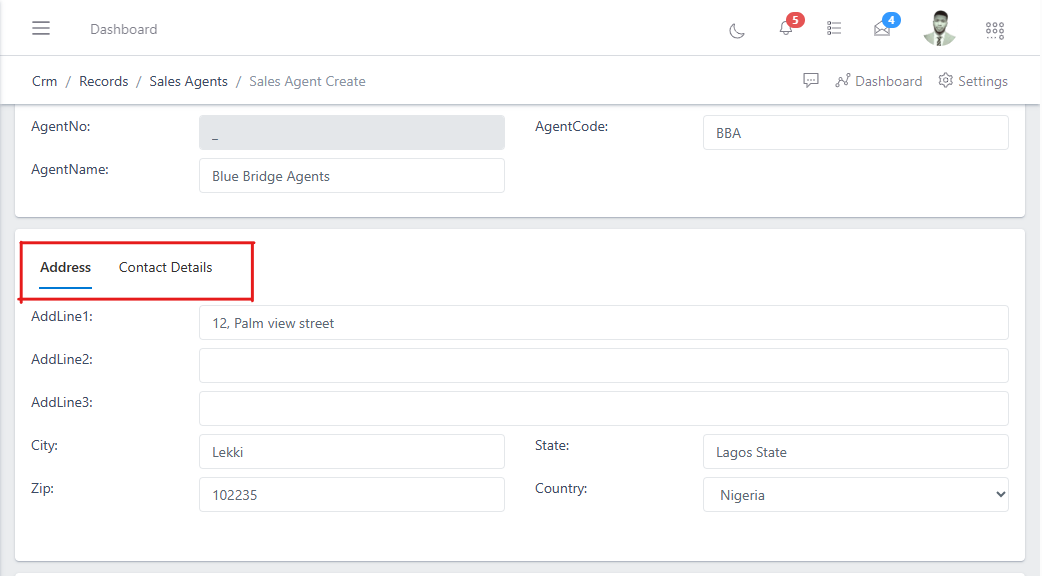
In the image above you will notice the “Agent no” field is greyed out, this field is also known as the “sales agent number”, it will be automatically generated once the sales agent information is saved. And on the right you have the “sales agent code” which is basically where you define an abbreviation for the sales agent name
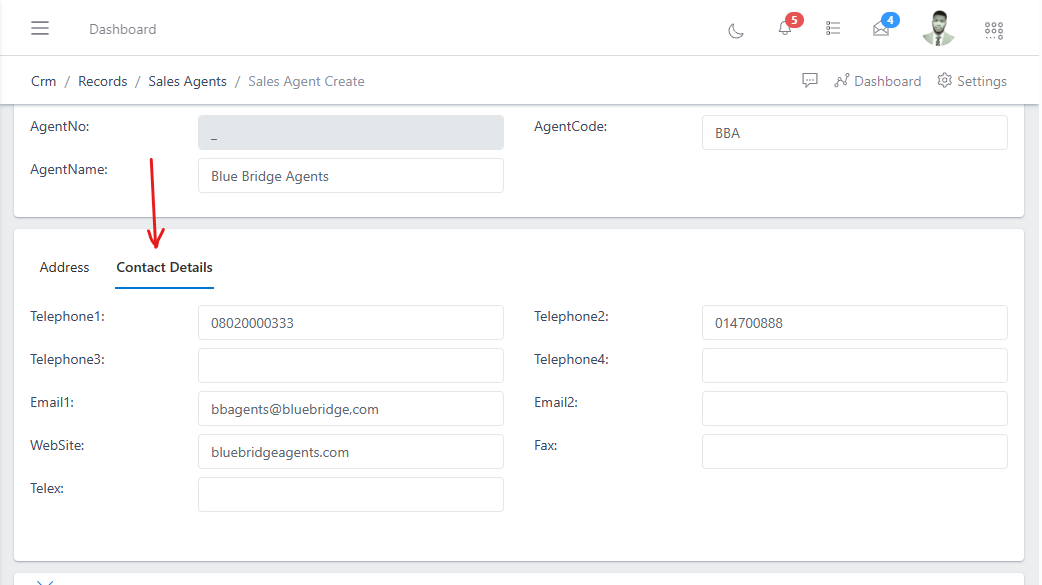
In the image below, still on the same page of the sales agent onboarding form, at the bottom you have a table of sections to fill in the address, contact details, Documentation, First RelMgr (Relationship manager) and profile information of the sales agent that is being onboarded. note: The necessary details in these fields must be filled.