Title here
Summary here
Creating and processing PartnerPayments (and PartnerReceipts) is an activity that can be initiated from CRM > Transactions > Payments as shown in Fig 1a or Finance > PartnerTransactions > Payments as shown in Fig 1b.
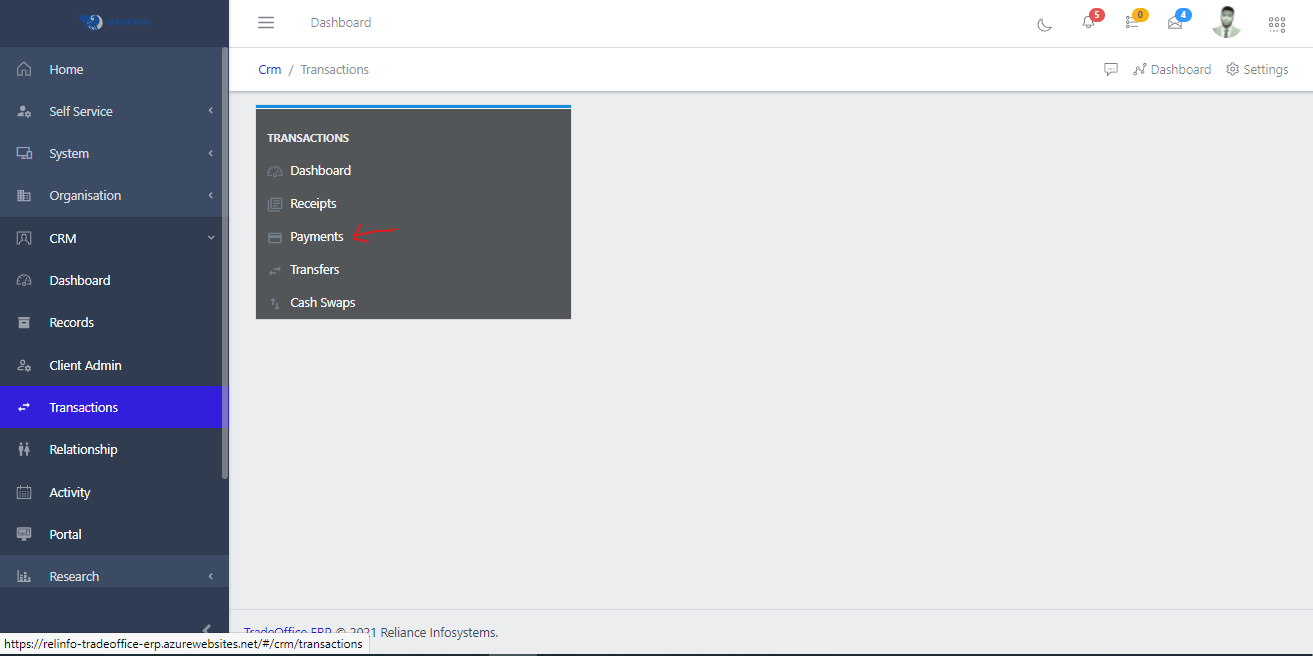
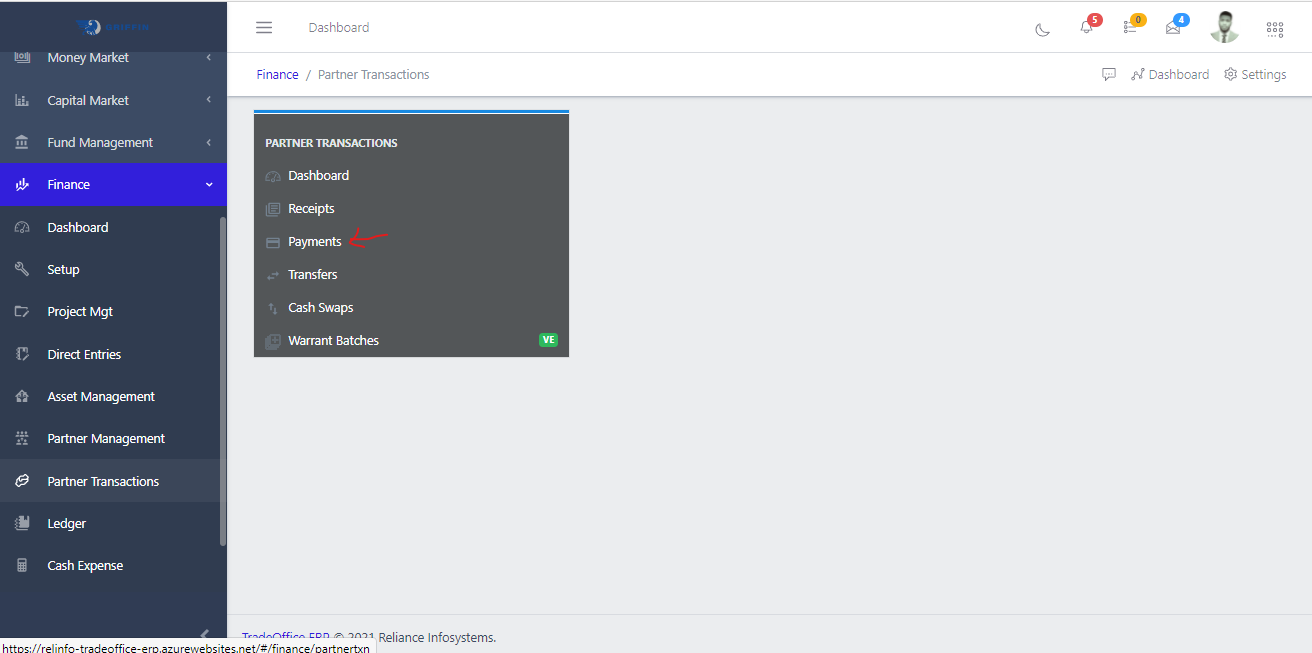
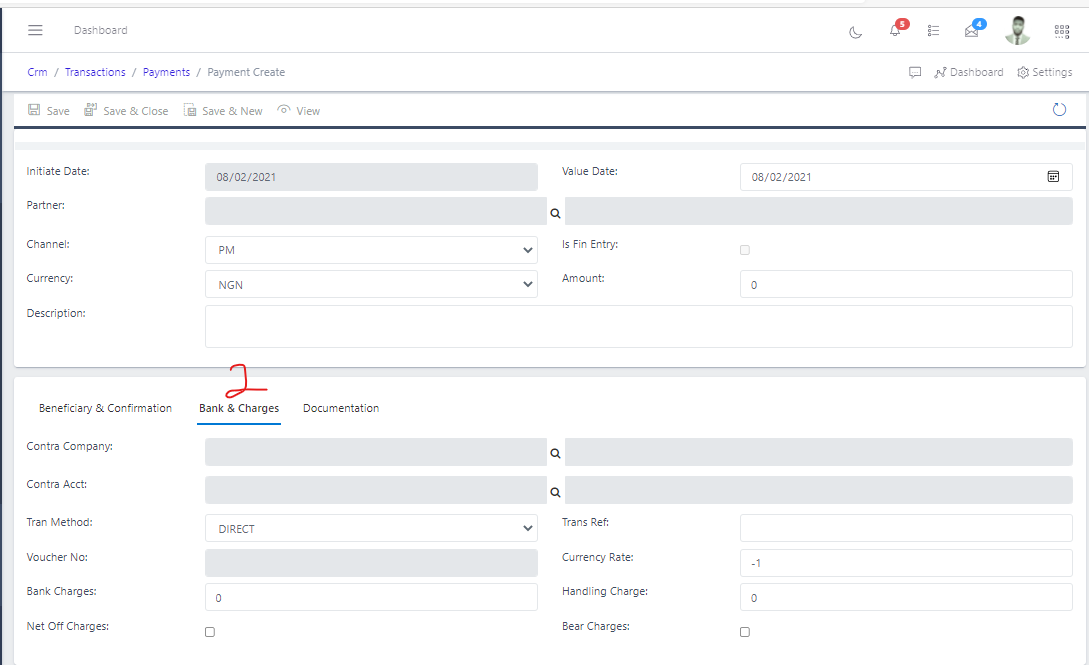
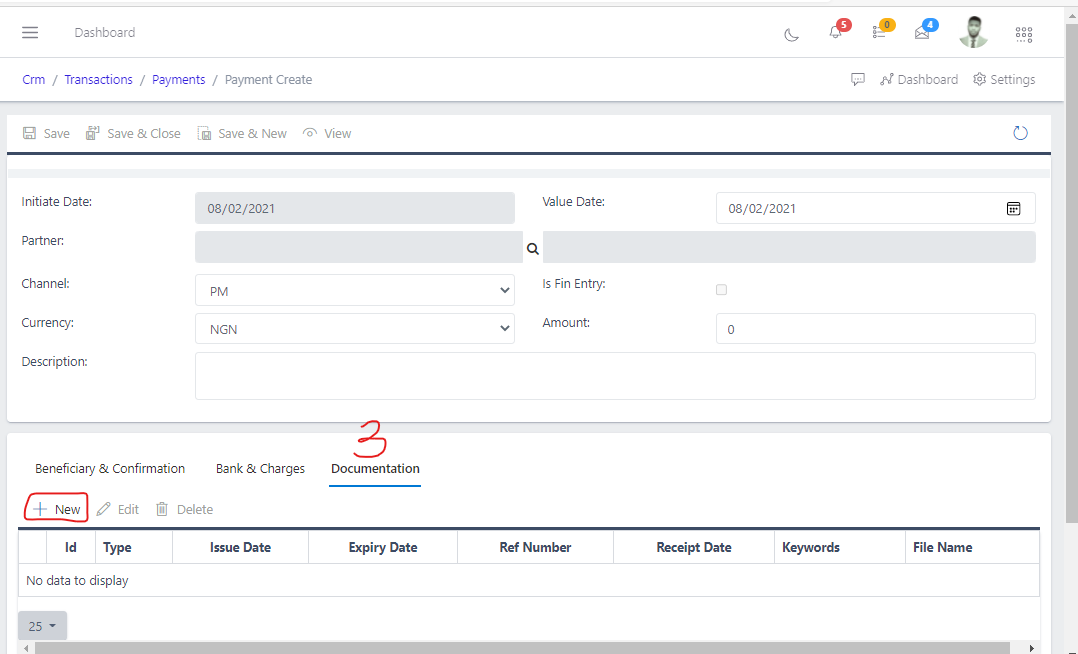
Fig 2a, 2b, 2c and 2d below shows the view and button to create a new transaction and also the transaction form to be filled respectively as shown below. Also take note of Fig 2b, 2c and 2d as you will notice numbers 1, 2 and 3 on the image indicating some tabs below on form which is also part of the total form fields.

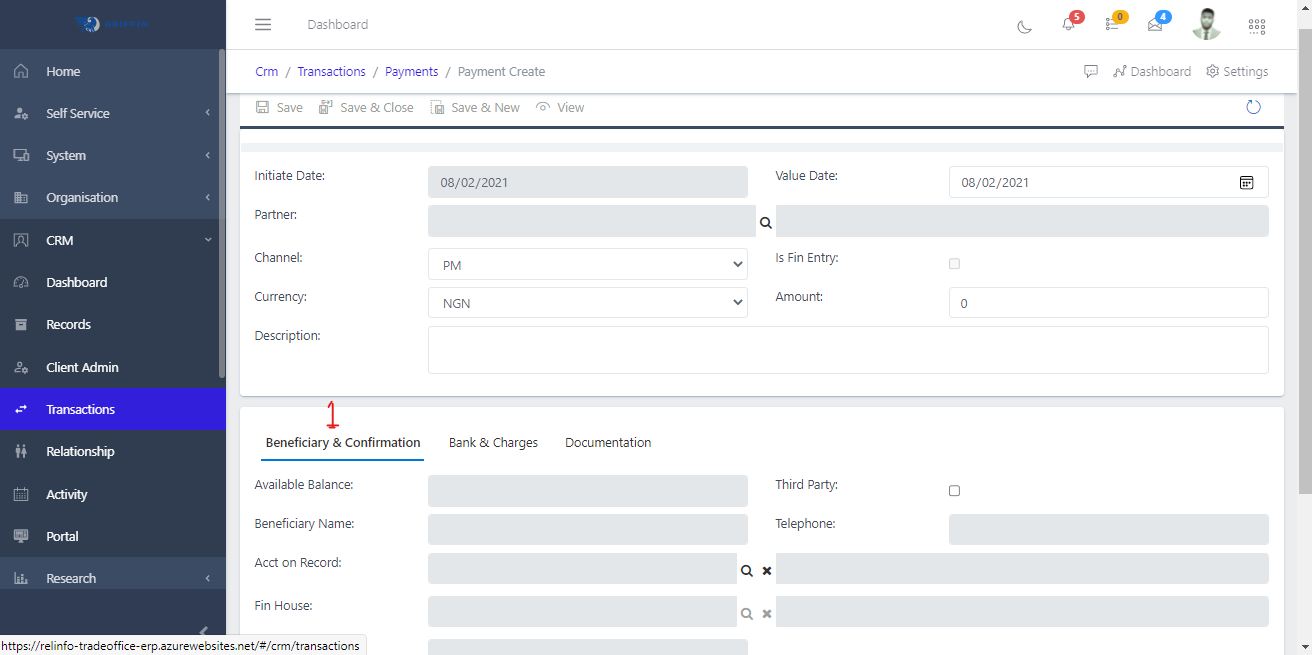
Note that under the hood, the application behaves the same way. So, transactions entered by a staff of the Finance Unit will not trigger a workflow. You will notice that the saved transaction in Fig 2d marked the field Is Fin Entry as true. Also, the details relating to Bank & Charges were not filled in, but defaults were selected that can be overridden at the point of posting (as with the Desktop App).
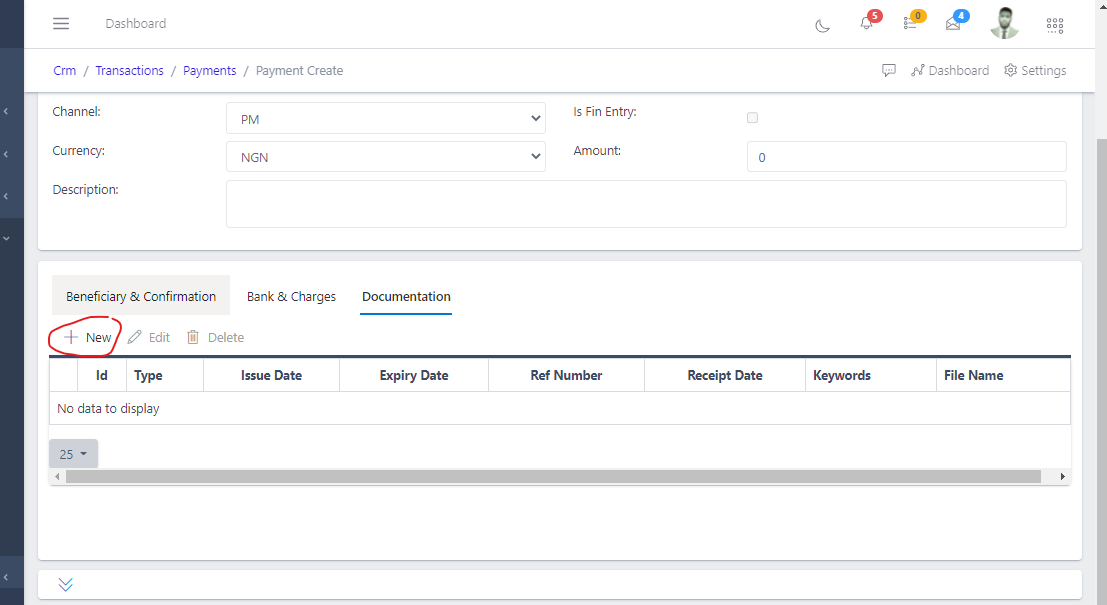
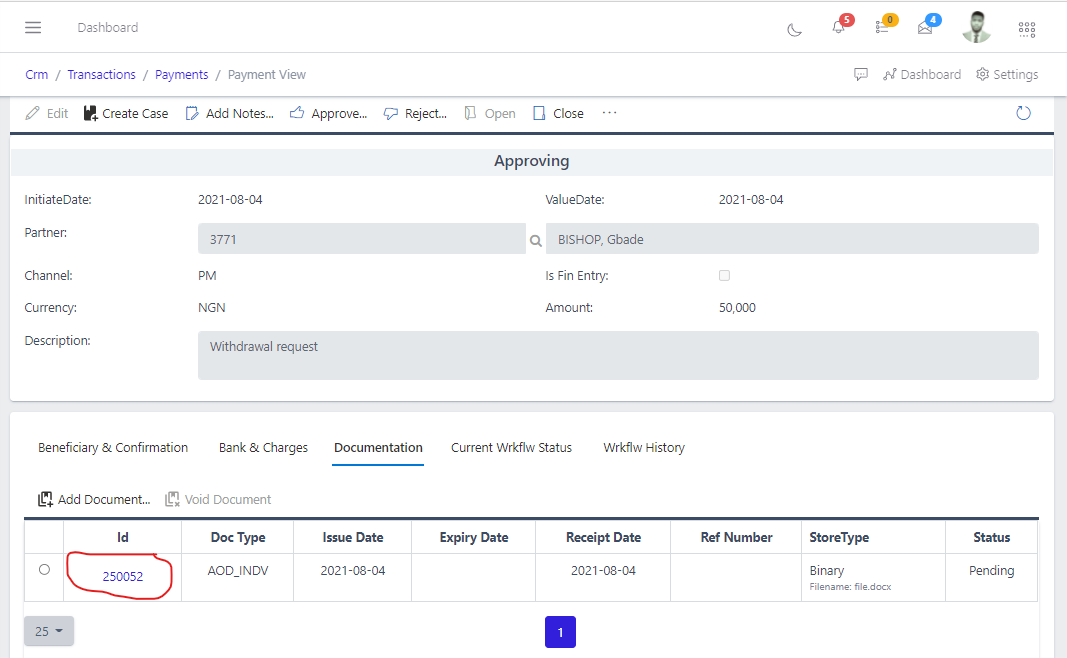
A new feature on the ability to add documentation to transactions after they had been served and sent for approval or even posted is now available across all transaction types that support documents (without needing to edit the document). Fig 2d below shows the addition of validating documents e.g. Letter, Signed Mandate, or Email.
For a reviewer to check any of the attached documents, click the document ID to download and view the attachment as shown in Fig 3b below: (we will add the ability to view documents in place in a later version of the app).
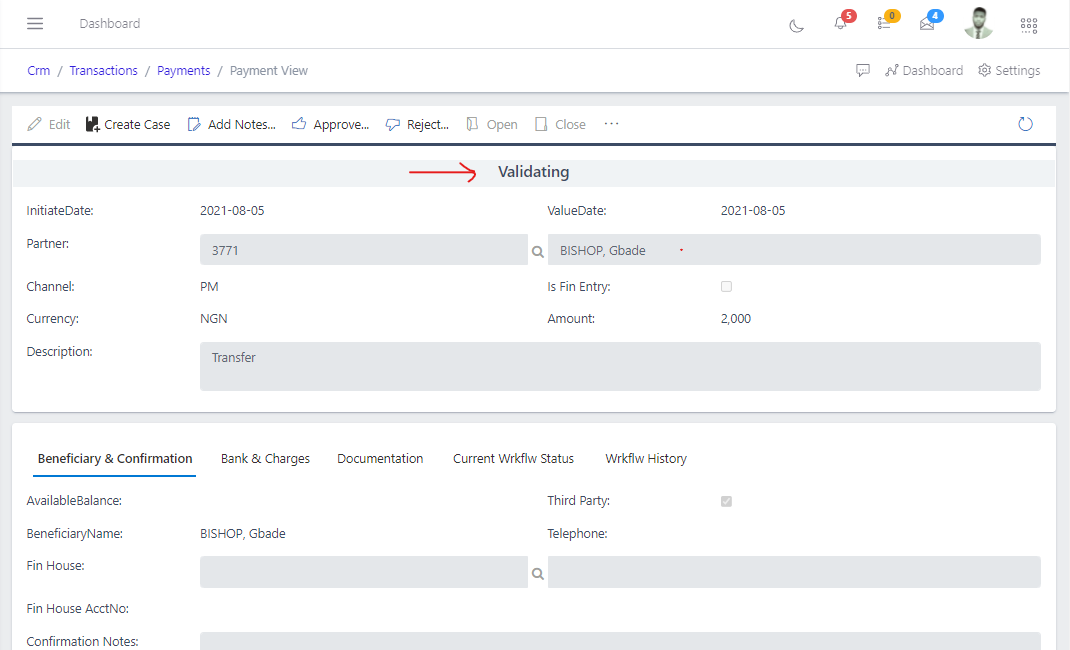
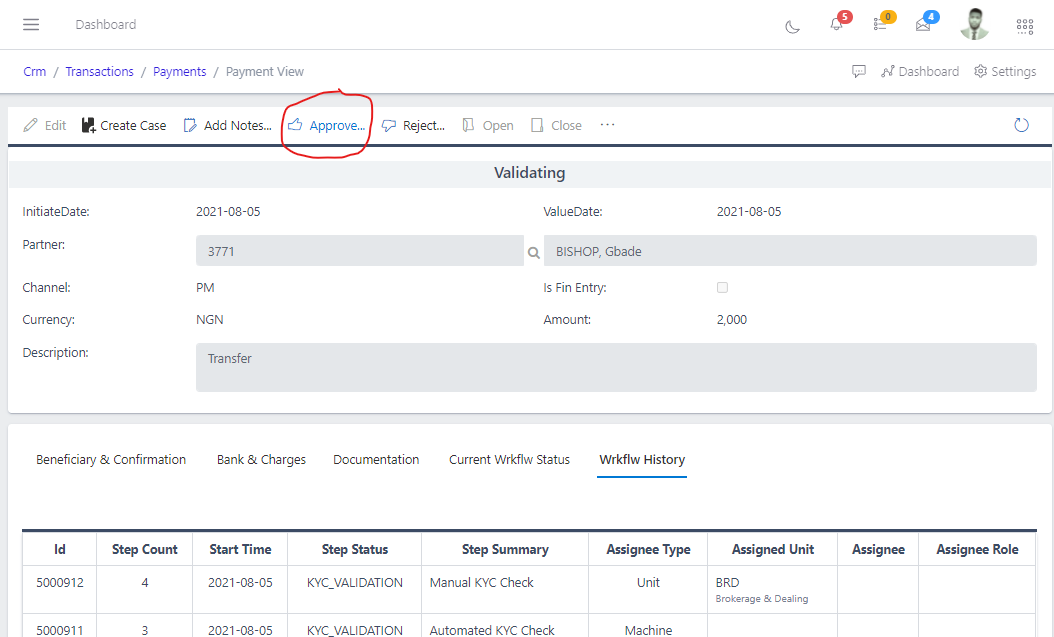
On creating a payment successfully, it assumes the state “Validating”, at this point the workflow is triggered, certain steps are automatically validated by the system while some are manually validated by a staff who has the necessary rights and role to make the necessary validations or approvals.
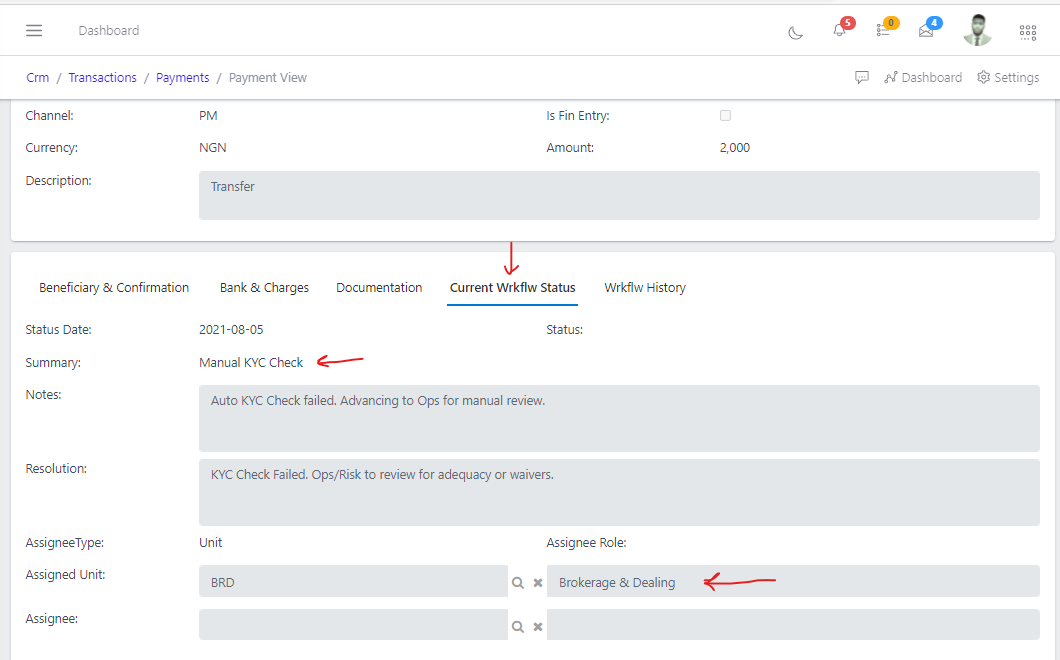
The current workflow can be accessed under the current workflow status tab as show below in Fig 4.1. The current workflow status shows you the next step that requires validation or approval from a staff with the required rights and assigned role. In Fig 4.1 below, it shows the next step of validation which is “Manual KYC Check” and the required staff unit and role that can carry out the approval which is “BRD - Brokerage and Dealing” as highlighted by the arrows in Fig 4.1 below:
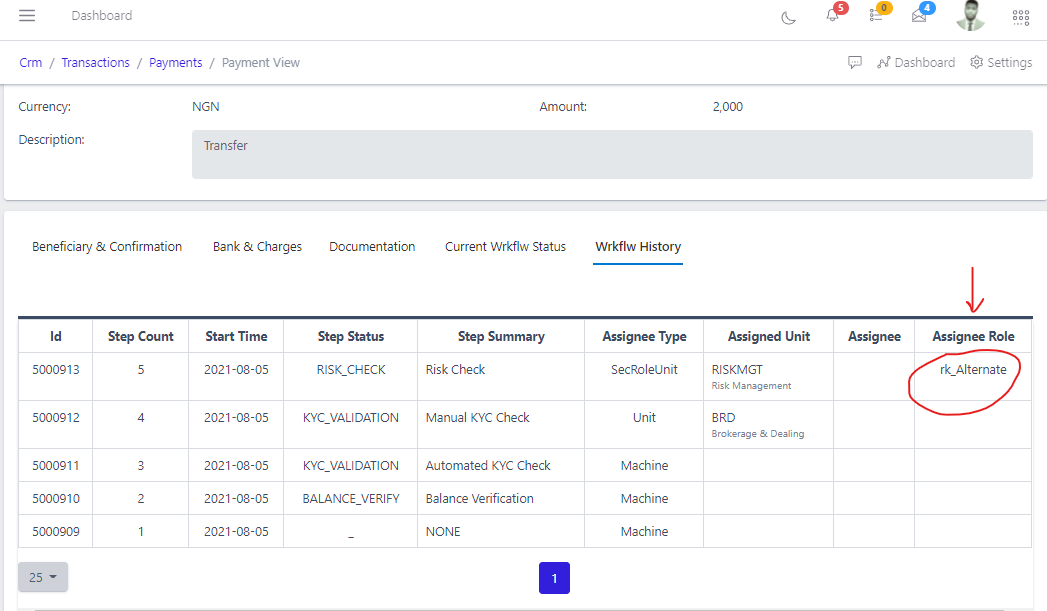
The workflow history can be accessed under the workflow history tab as show below in Fig 4.2. The workflow history shows you the series of steps that has been validated or failed validation and also the current step to be validated as highlighted in Fig 4.2 below:
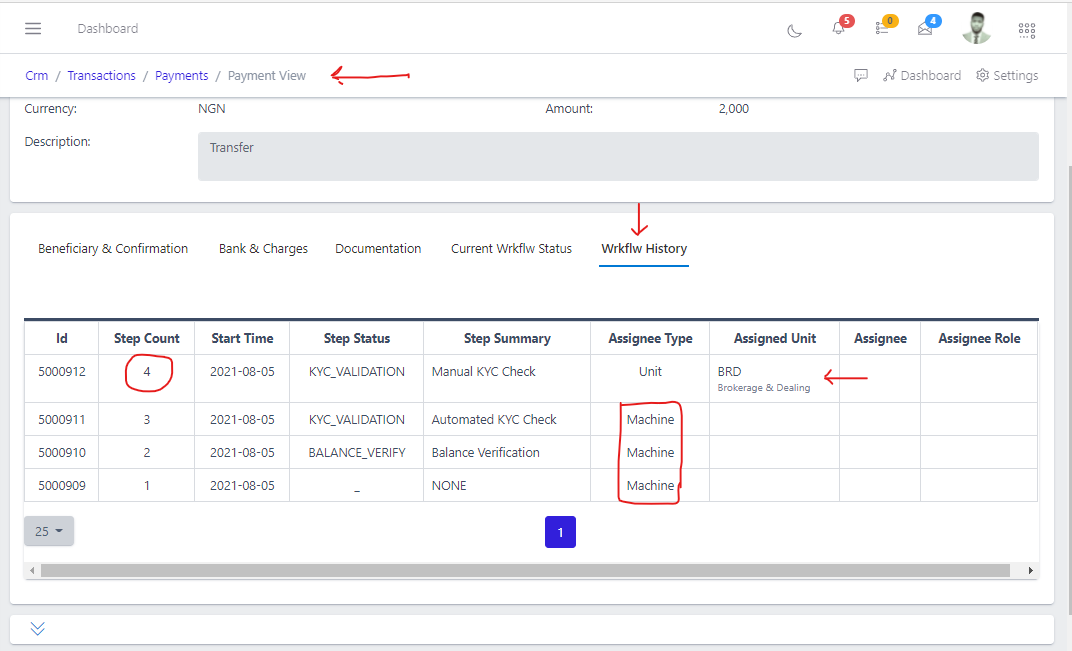
Also the workflow history in Fig 4.2 above, it shows you the assignee type, as show in Fig 4.2 above, Assignee type is Asignee types having a value of Machine indicates the steps in the workflow that is executed automatically by the system.
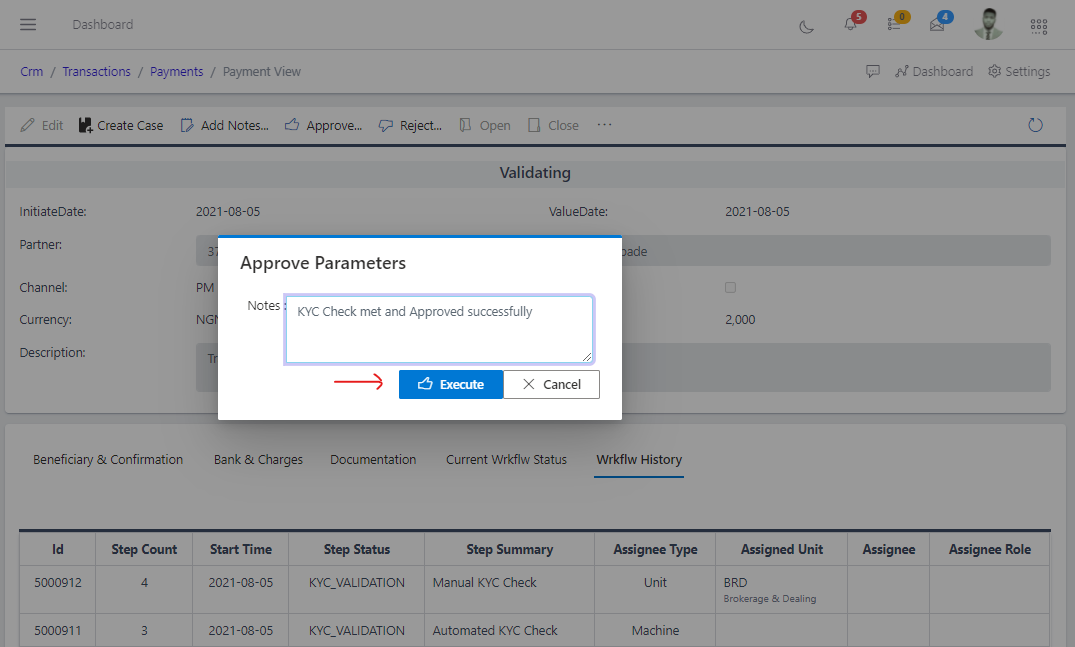
A staff from the required unit can appove by clicking on the approve button as shown below in Fig 4.3 below:
Note: In situations where the staff from the assigned unit to perform the approval is absent, another staff with the required Assignee role can carry out the approval process as shown if Fig 4.5 below:
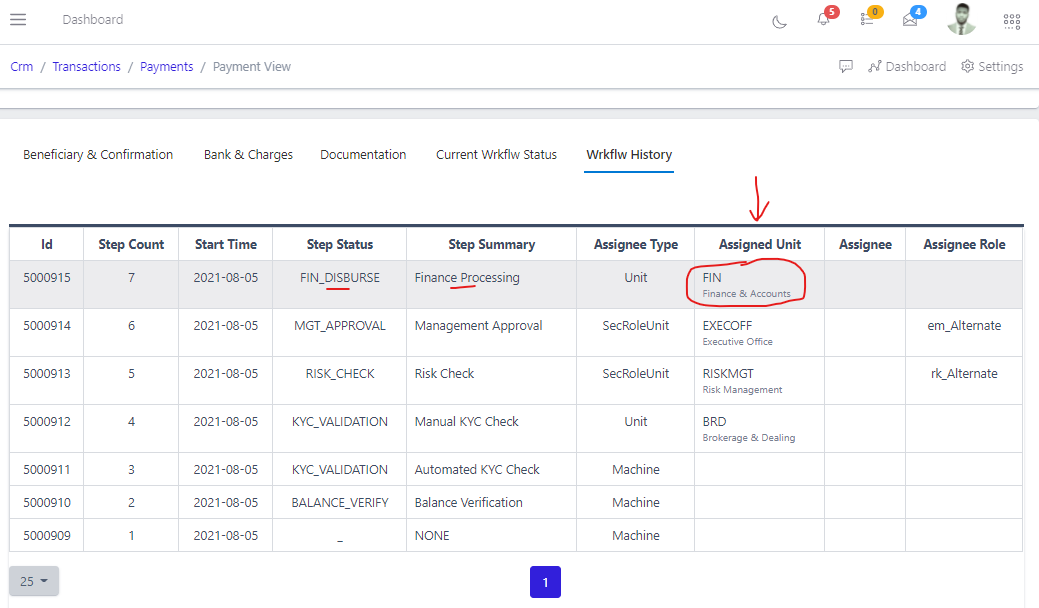
Note: Operations that are being assigned to the Finance Unit (FIN) can only be carried out by a staff from the finance unit. To post PartnerPayments, PartnerReceipts, and PartnerTransfers, they must be accessed from the Finance module. If you take a critical look at the screenshots, the POST and UNFINALIZE buttons are not present. as shown in Fig 4.6 below:
Rejection can be done simply by clicking on the Reject button as show below in Fig 4.7
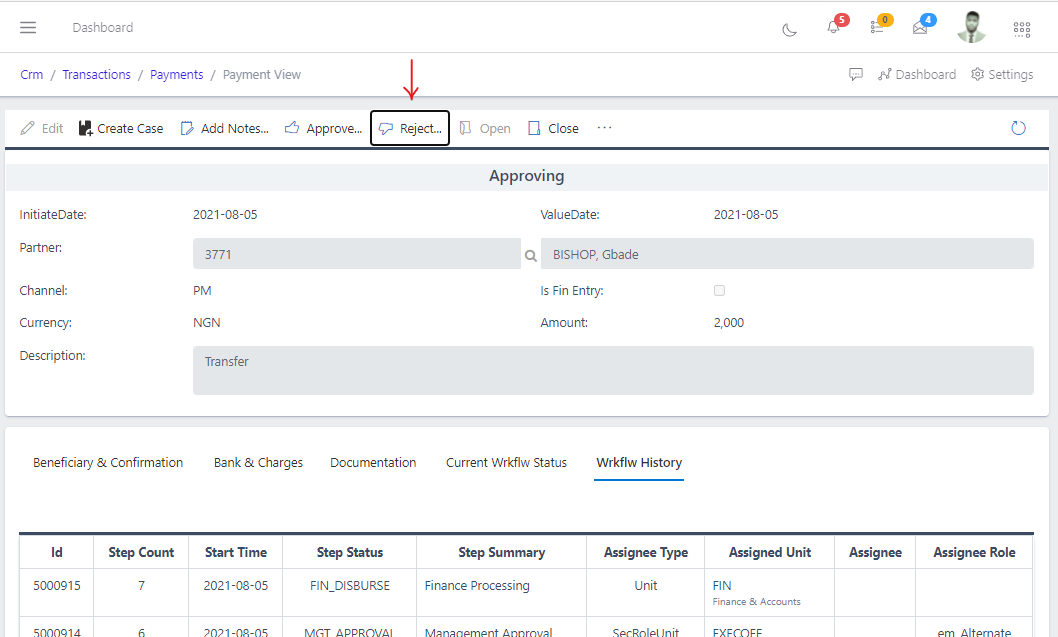
Upon rejection, an option for adding notes is provided for you to fill out reasons for rejecting a step in the workflow.
Adding Notes can be done simply by clicking on the Add notes button as show below in Fig 4.7

After the final approval has been done by the staff from the Finance unit, the payment process will be in a closed state and now is ready for posting, as shown in Fig 4.8 below:
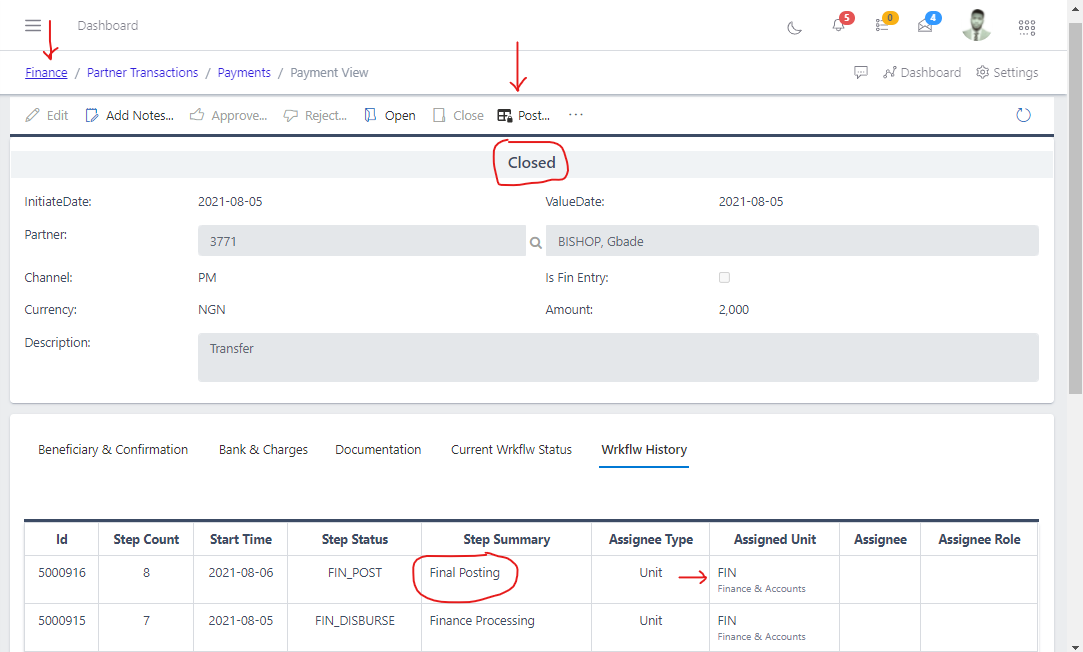
Remember the posting action can only be carried out by a staff from the Finance unit.
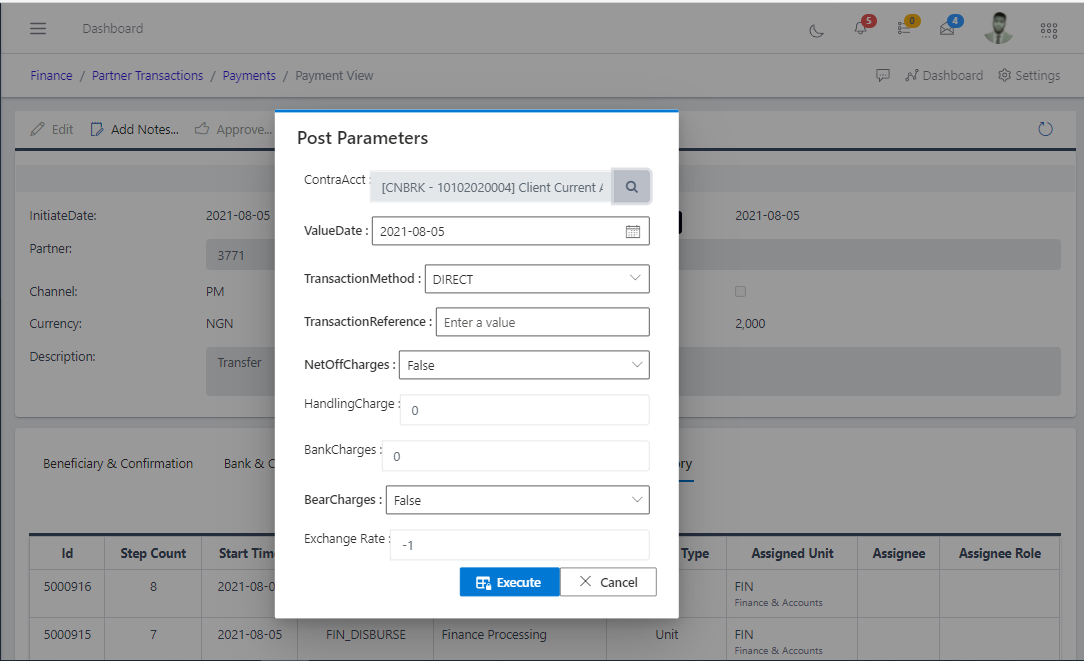
On clicking the post button, a form pops up for the staff to fill the posting parameters as shown in Fig 4.9 below
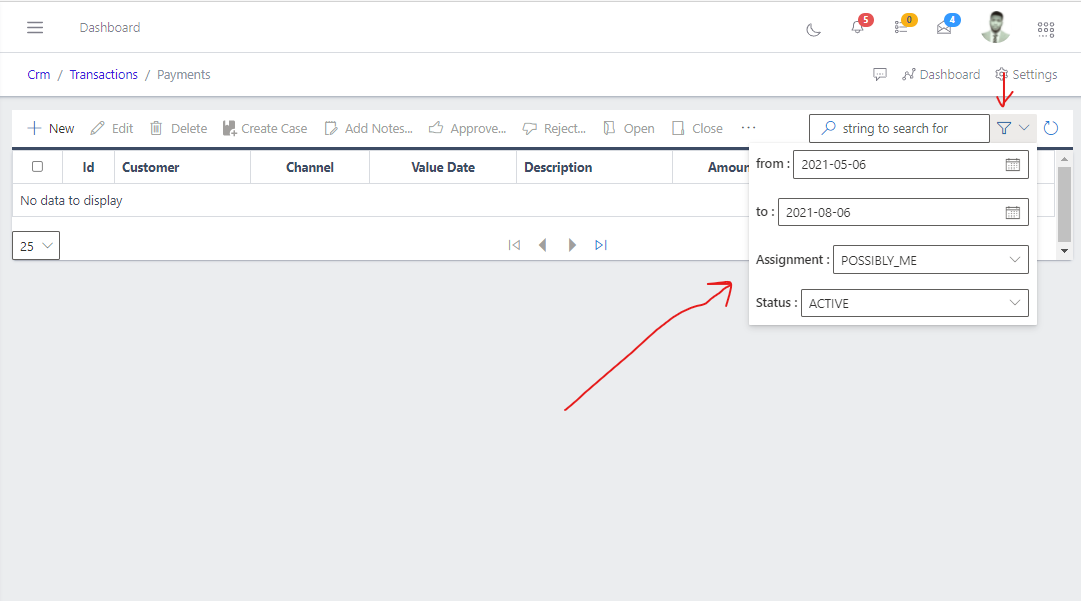
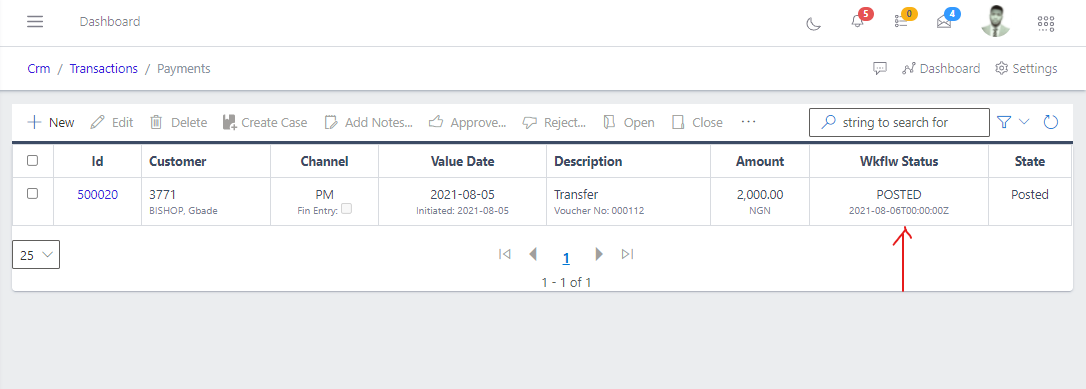
once payment is posted successfully, it can be viewed under payments in CRM module (CRM/Transactions/Payments) or partner payments in Finance Module (Finance/Partner Transactions/Partner Payments) and you are provided the ability to filter search for the payment see image below: