GL Accounts
Navigate to GL Accounts#
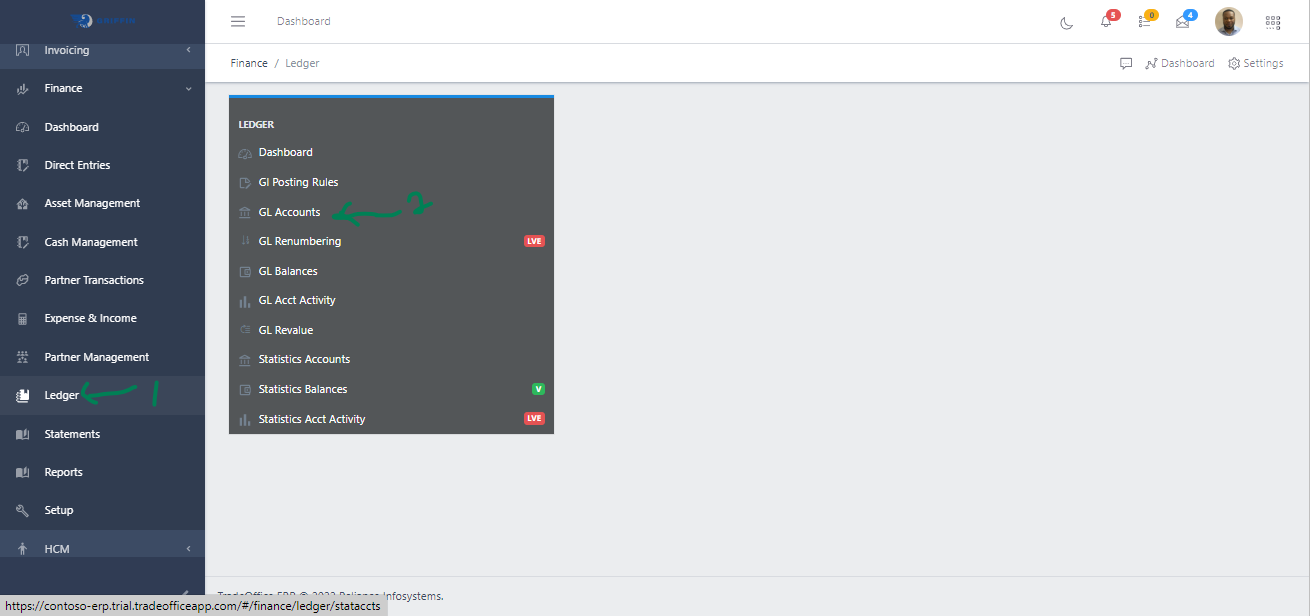
- Step 1: Access the Ledger sub-module of the Finance module from the left sidemenu as shown in the fig1 below.
- Step 2: Click on GL Accounts as shown in the fig1 below.
Fig 1.0 Image showing GL Account Navigation view.
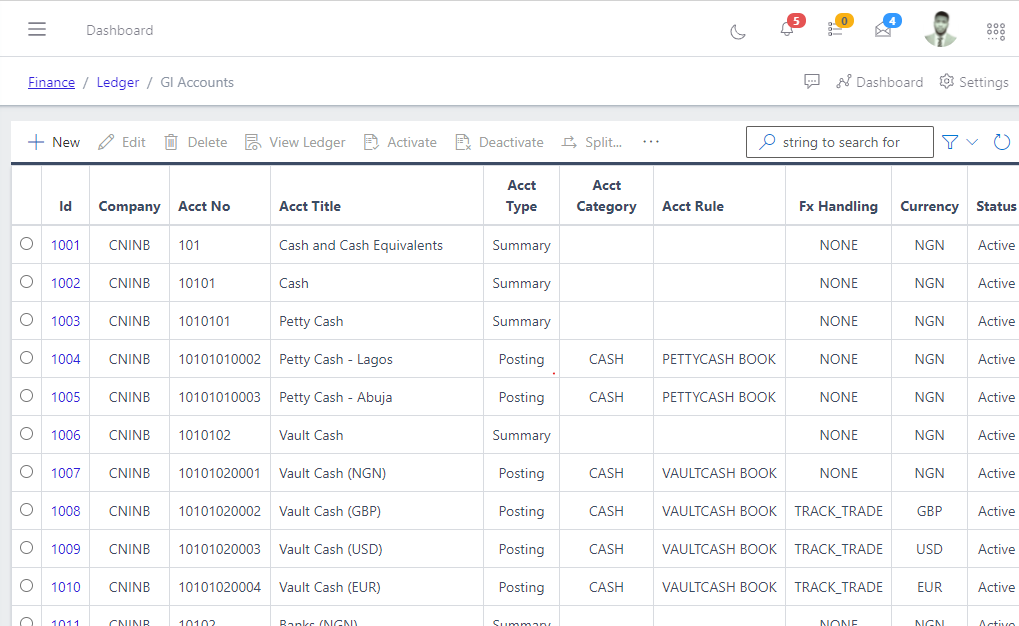
- This displays a list view of GL Accounts.
Fig 1.1 Image showing list of existing GL Accounts.
Create a GL Account#
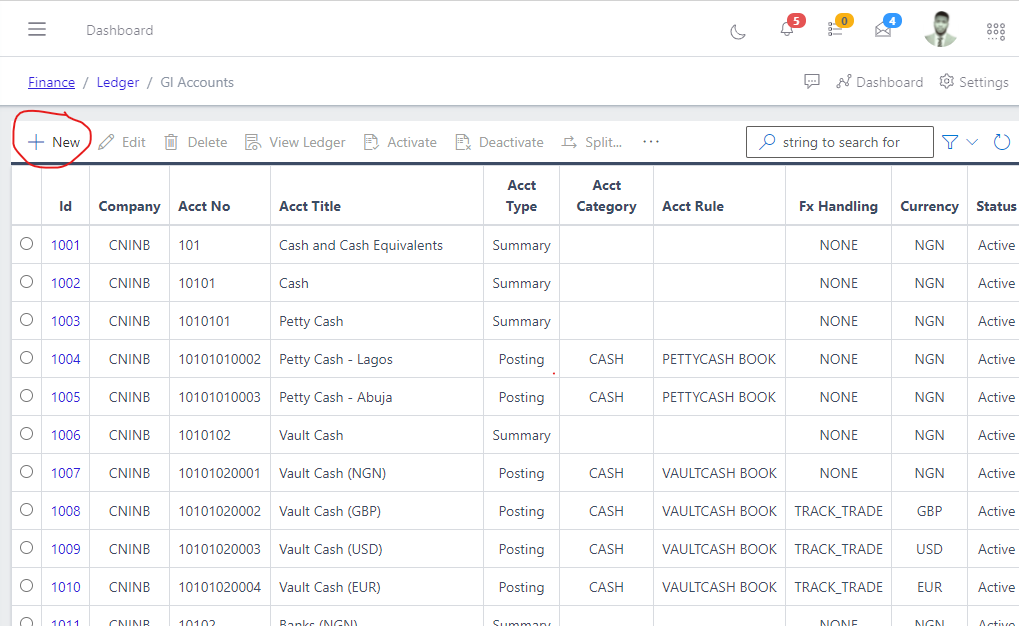
- To create a GL account, hit the New button in the toolbar area and populate the form fields.
Fig 2.0 Image showing the new button to create a GL Account.
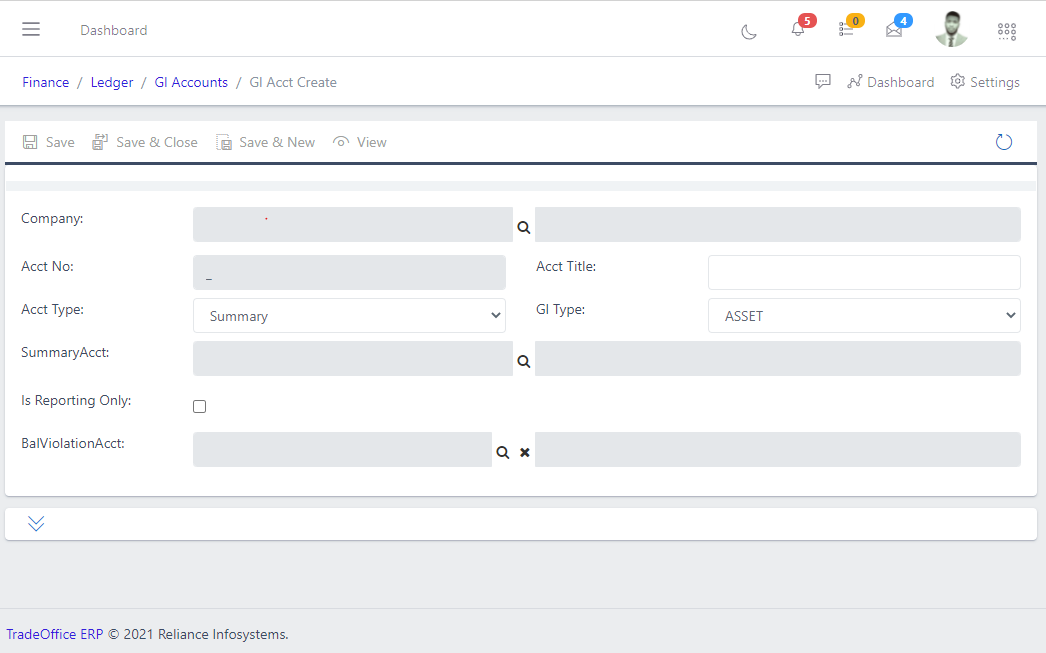
- The following are some of the fields that needs to be populated:
- Company
- Account Number
- Account Type
- GL Type
- Account Title
- Summary Account
Fig 2.1 Image showing GL Account creation form.
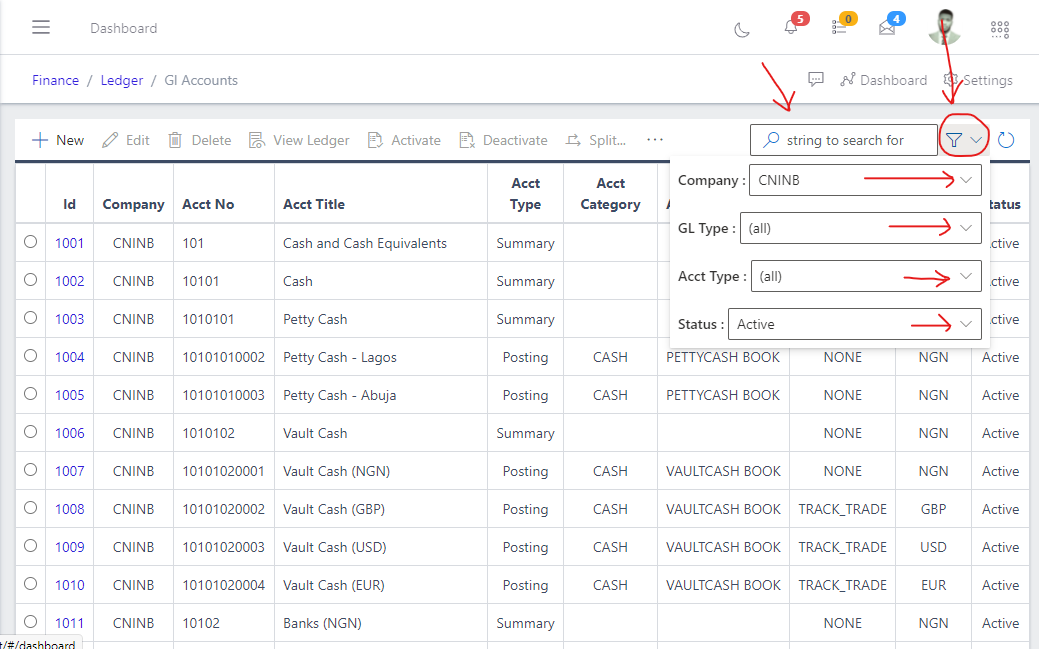
Filtering GL Account#
- Use the Filter button, when clicked, gives you a dropdown where you can specify various parameters for filtering the records:
- Search string: for filtering records
- Company: A dropdown list of companies
- GL Type: A drop-down list to select the type of ledger
- Account Type
- Status
Fig 3.0 Image showing filter options for GL account.
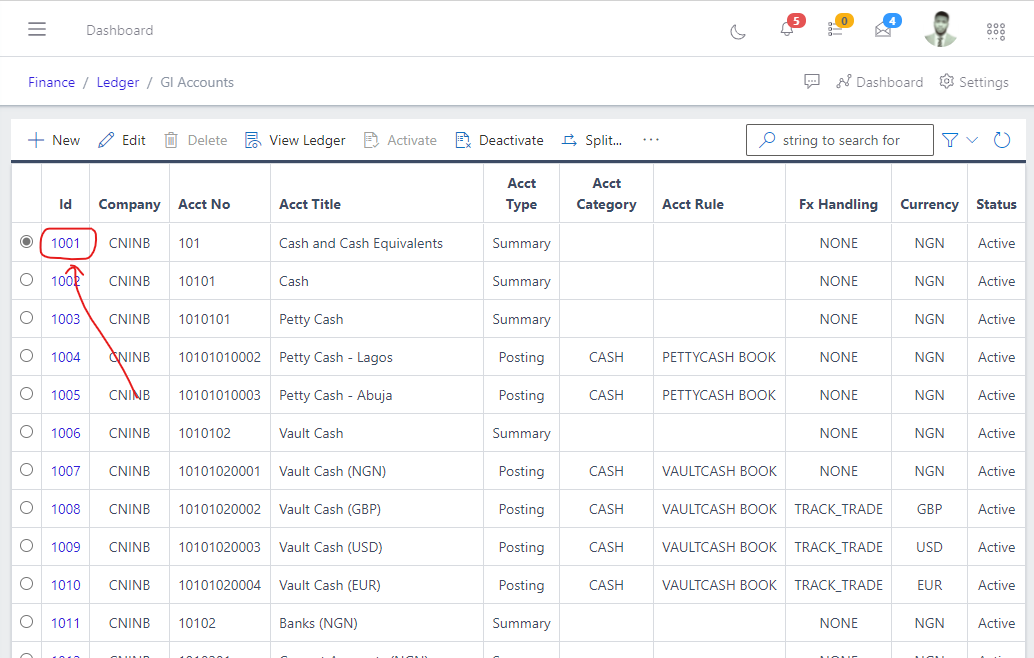
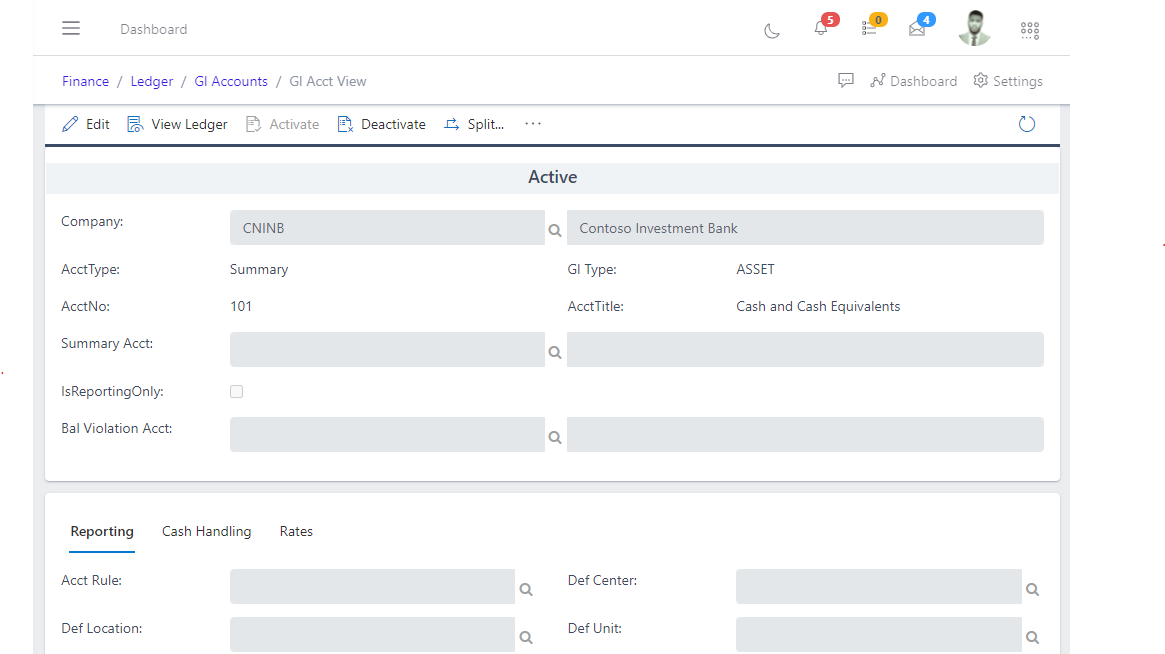
View a GL Account#
- From the List view, click the Id of the account to view it
Fig 4.0 Image showing the id of a GL account.
Fig 4.1 Image showing GL account view.
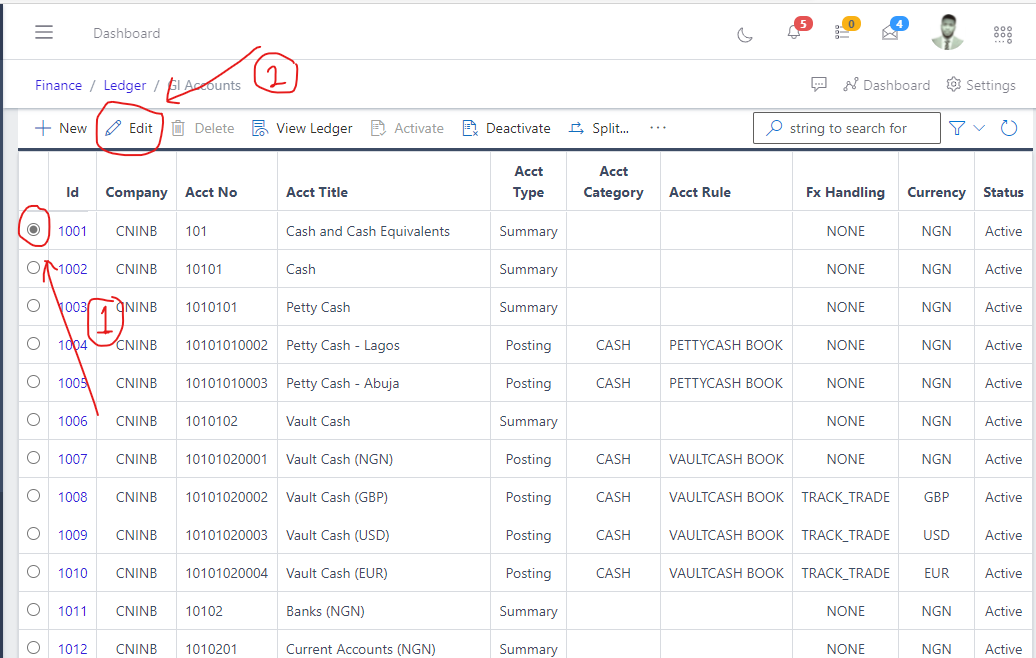
Edit a GL Account#
You can only merge a pending GL account.
- From the list view, select the GL account you want to edit by clicking on the radio button
- Click the edit button to edit the account you just selected
Fig 5.0 Image showing how to edit an existing GL Account.
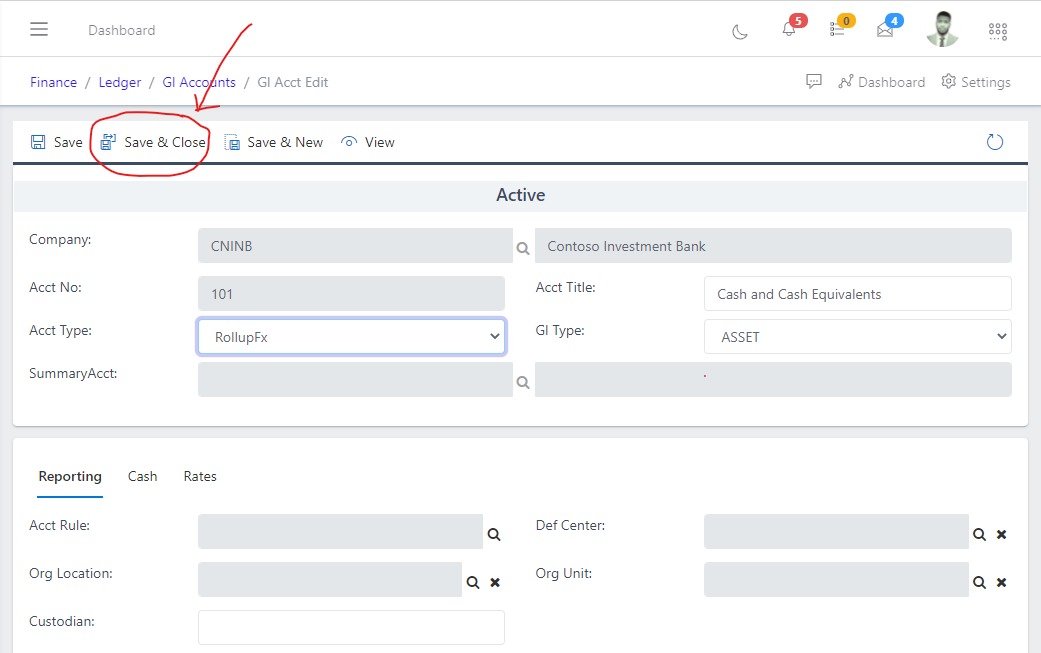
- After editing, save the changes.
Fig 5.1 Image showing how to save changes to an existing GL Account.
Delete a GL Account#
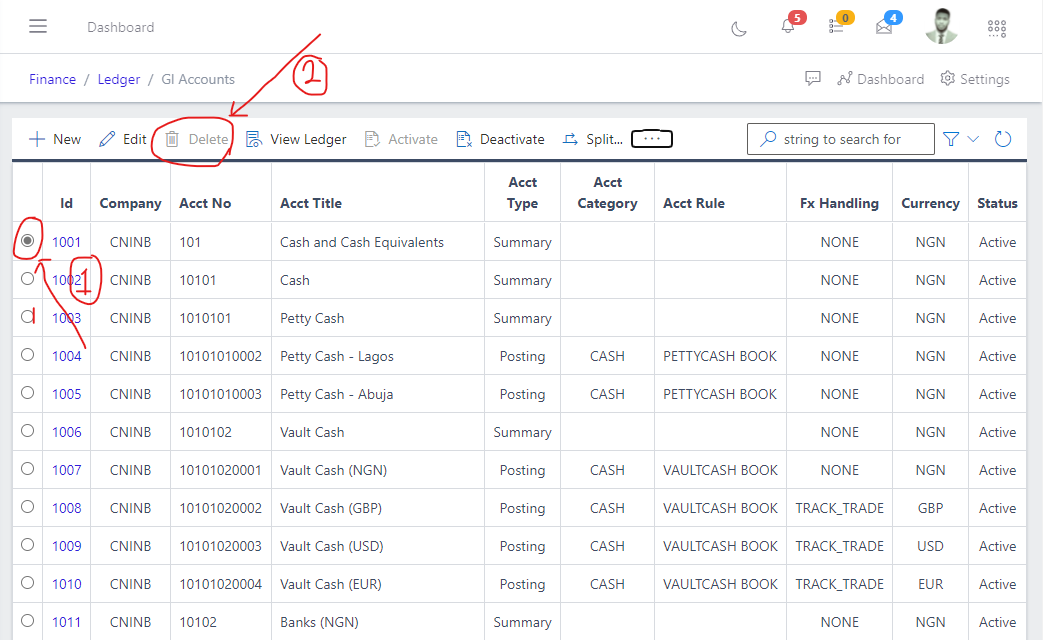
- From the list view, select the account you want to delete using the radio button
- Click on the Delete button to delete it
Fig 6.0 Image showing how to delete an existing GL Account.
Activate a GL Account#
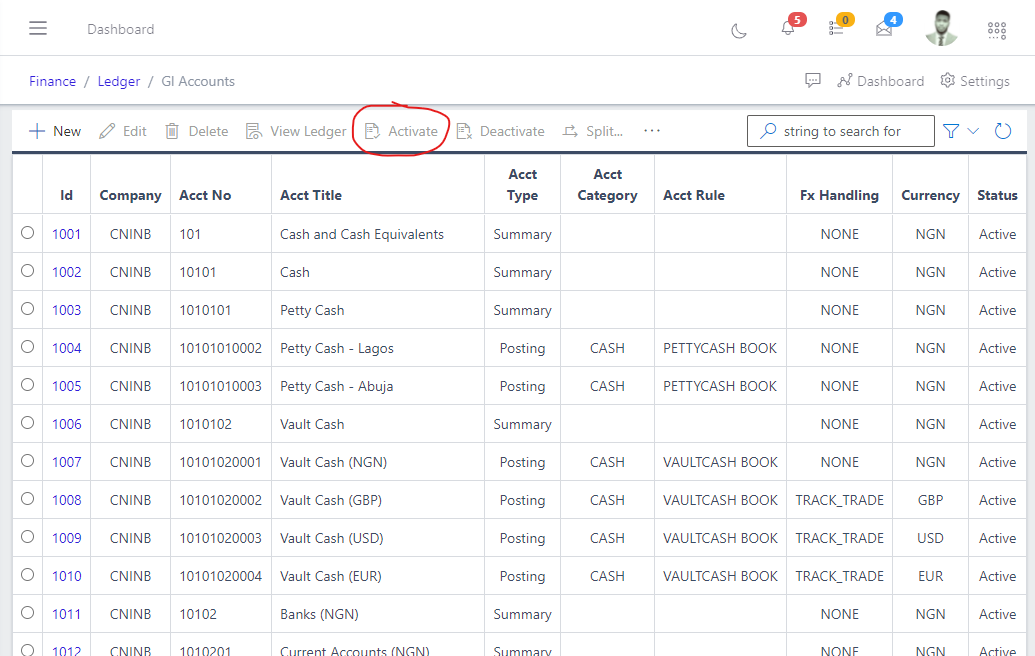
- When you create a GL account, its status will be pending
- To activate the newly created account, search for it using the search filter
- Then click the Activate button to activate the account (it status will change to Active)
Fig 7.0 Image showing activate button for GL Account.
Deactivate a GL Account#
Only an active posting rules can be deactivated:
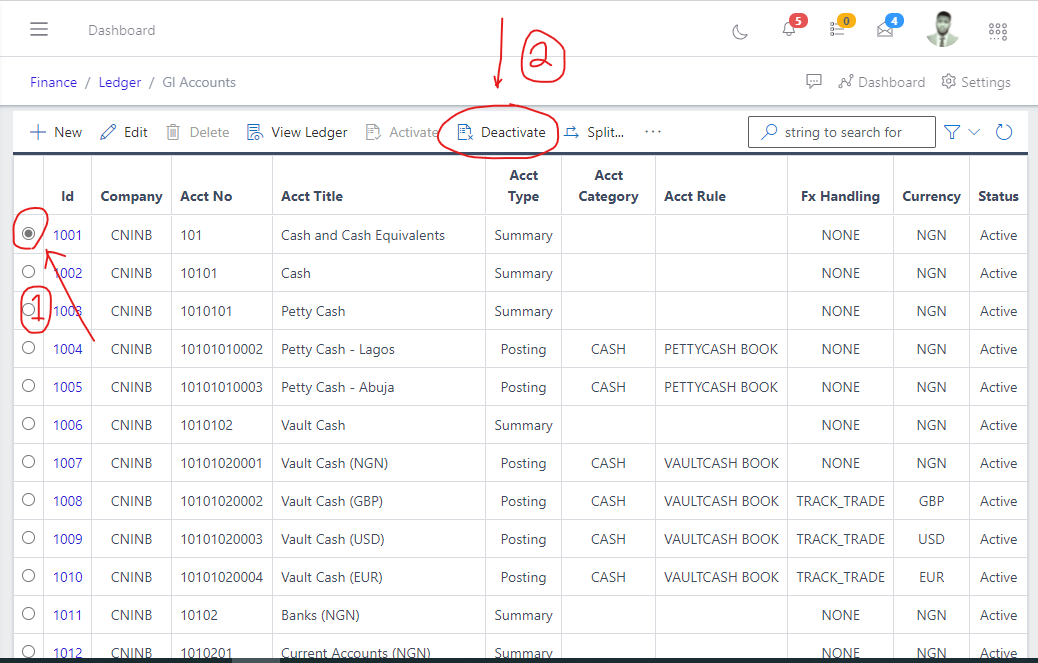
- To deactivate a GL account, search for the account using the search filter
- Then click the Deactivate button to deactivate it
Fig 8.0 Image showing deactivate button for GL Account.
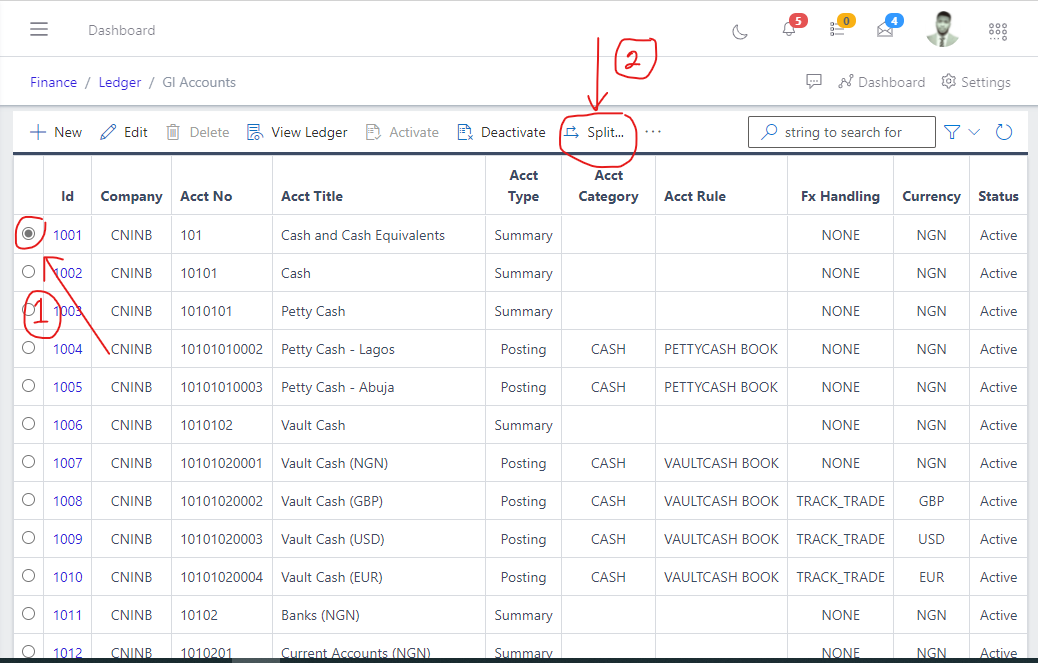
Split#
Fig 9.0 Image showing deactivate button for GL Account.
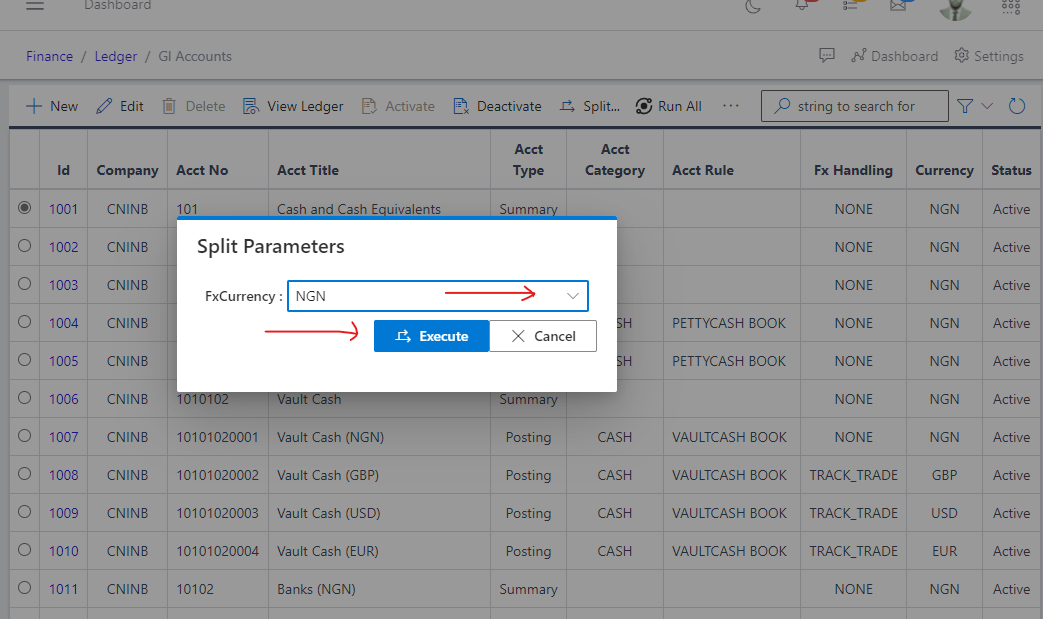
Fig 9.1 Image showing deactivate button for GL Account.
Run All#
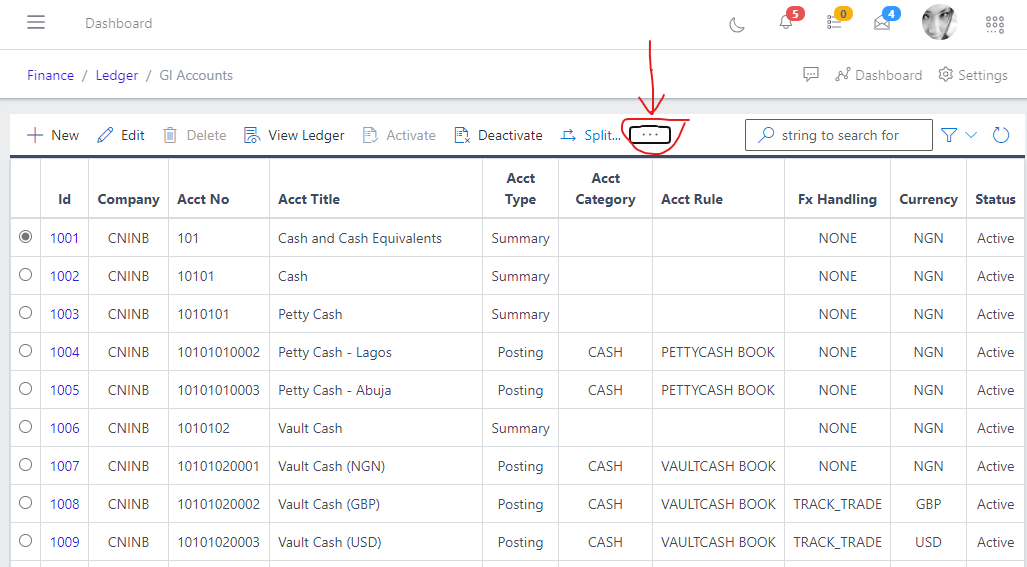
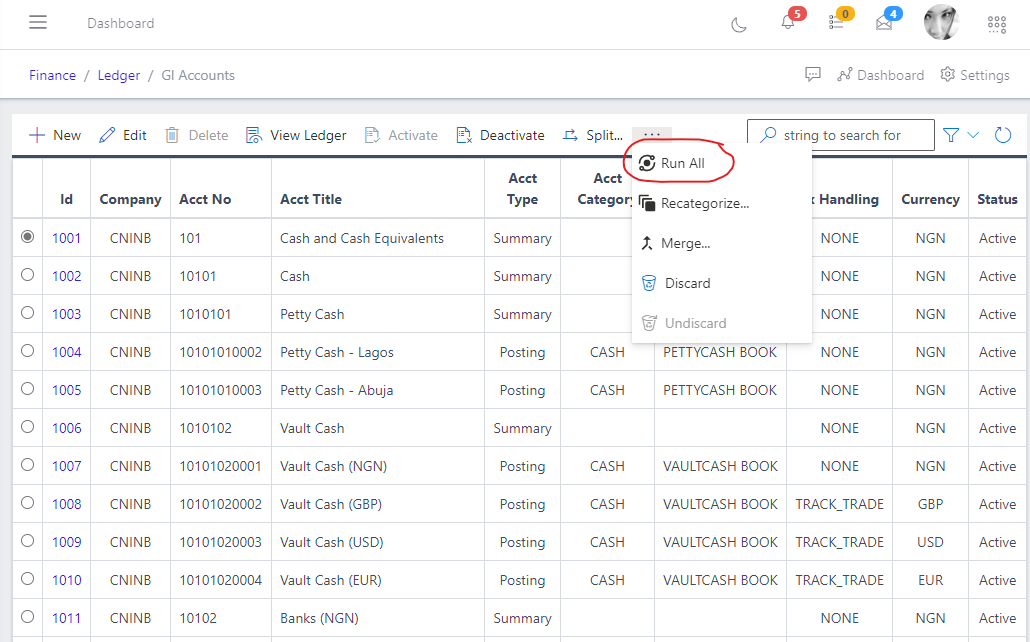
- Click the ellipsis(…) and hit the button
Fig 10.0 Image showing ellipsis button for GL Account.
Fig 10.1 Image showing run all button for GL Account.
To recategorize, merge or discard, click the ellipsis(…) and hit the button as seen above in Fig 10.0.