Customers

  • Step 1: Access the Partner Management sub-module of the Finance module from the left sidemenu as shown in the fig1 below.
  • Step 2: Click on Customers as shown in the fig1 below.
image showing customers navigation
Fig 1.0 Customers navigation.

  • This displays a list view of Customers.
Image showing list of existing customers.
Fig 1.1 Image showing list of existing customers.

Filter a Customer

  • Use the Filter button, when clicked, gives you a dropdown where you can specify various parameters for filtering the records:
    • Search string: for filtering records
    • Company: A dropdown list of companies
    • Customer Group
    • Type: A dropdown list of partner groups.
    • Mode - A dropdown list of modes
    • Status: dropdown list of status types.
Image showing filter button and options for customers
Fig 2.0 Image showing filter button and options for customers.

Create a Customer

  • To create a transfer, hit the New button in the toolbar area and populate the form fields.
Image showing button to create customers
Fig 3.0 Image showing button to create customers.

  • The following are some of the fields that needs to be populated:
    • First Name
    • Last Name
    • Title
    • Date of Birth
    • National ID
    • Gender
  • You also need to populate the fields in the following tabs:
    • Address
    • Contact Details
    • Related Parties
    • Documentation
    • Bank Accounts
    • First Rel Manager
    • Profile
    • GL Accounts
  • After filling out the forms, hit the Save and Close button.
Image showing save and close button after craeting customer
Fig 3.1 Image showing save and close button after creating customer.

View a Customer

  • From the list view, click on the ID of the customer to view it
Image showing ID of a customer
Fig 3.2 Image showing ID of a customer.

Edit a Customer

  • From the list view, select the customer you want to edit by clicking on a checkbox
  • Click the edit button to edit the customer you just selected
 Image showing button to edit a customer
Fig 4.0 Image showing button to edit a customer.

  • After editing, save the changes.
Image showing button to save changes after editing a customer.
Fig 4.1 Image showing button to save changes after editing a customer.

Delete a Customer

  • From the list view, select the customer you want to delete
  • Click on the Delete button to delete the customer
Fig 5.0 Image showing button to delete a customer
Fig 5.0 Image showing button to delete a customer.

Activate a Customer

  • When you create a customer, it status will be pending
  • To activate the newly created customer, search for the customer using the search filter
  • Then click the Activate button to activate the customer (it status will change to Active)
 Image showing button to activate a customer.
Fig 6.0 Image showing button to activate a customer.

Deactivate a Customer

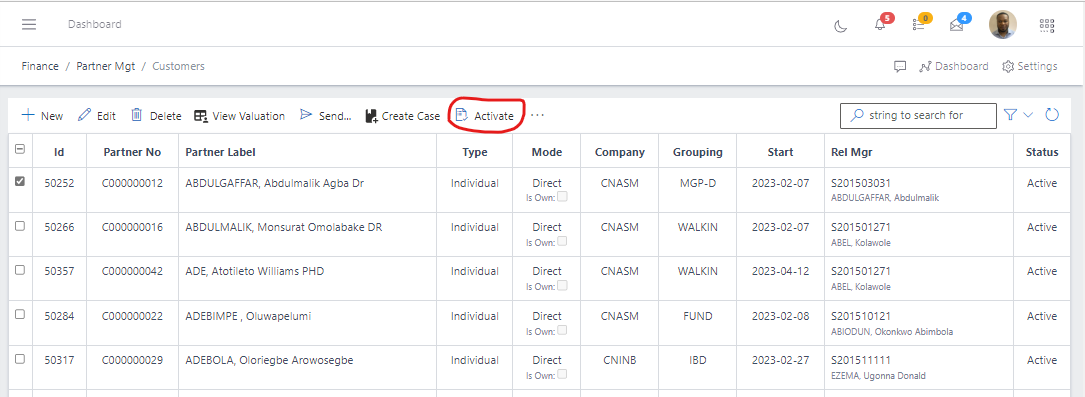
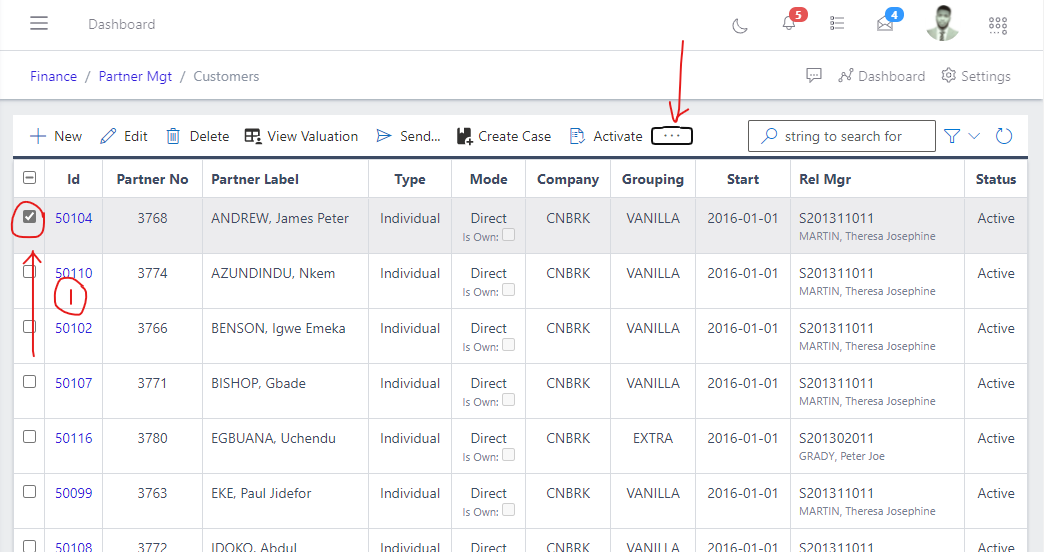
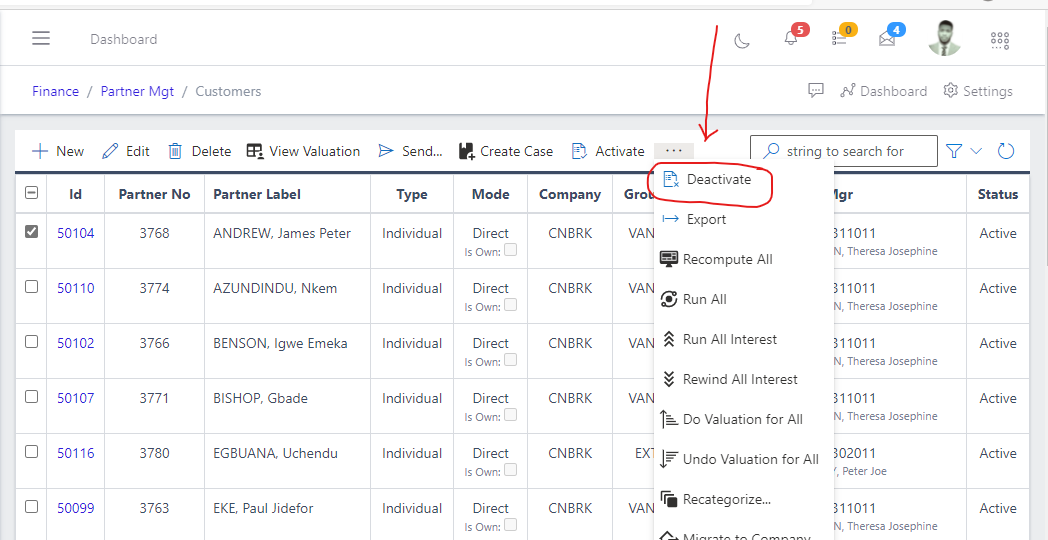
Only an active customer can be deactivated

  • To deactivate an active customer, search for the customer using the search filter
  • Then click the Deactivate button to deactivate the customer
Image showing menu button for extra options
Fig 7.0 Image showing menu button for extra options.

Image showing button to deactivate a customer
Fig 7.1 Image showing button to deactivate a customer.

Run All Customer

  • Click the run all button
Image showing run all button
Fig 8.0 Image showing run all button.

Merge Customers

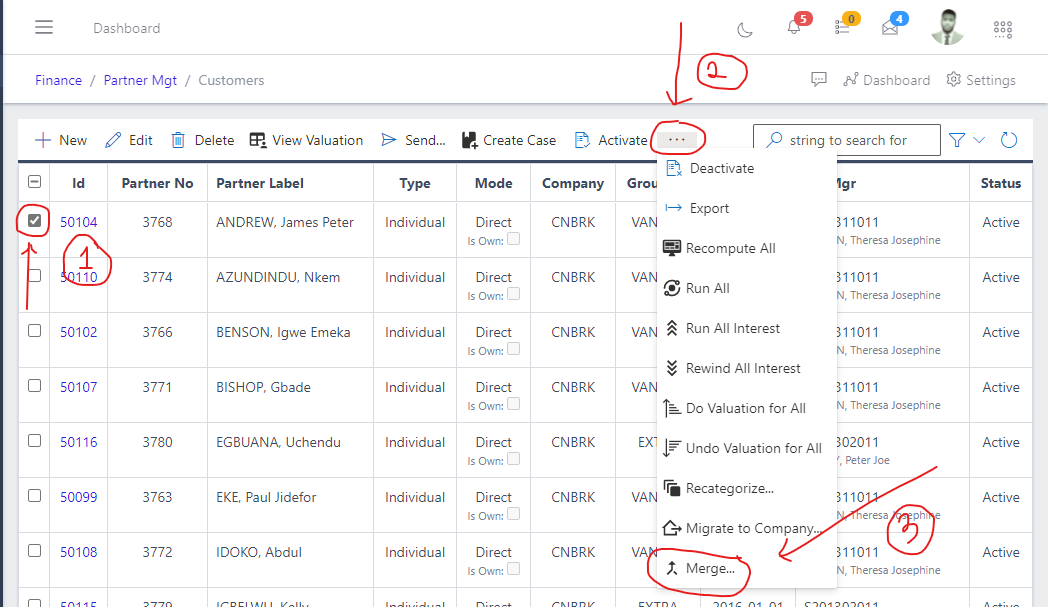
Two groups can be merge together

  • To merge 2 partner groups into a single group, select the first group by clicking on the radio button
  • Then click the ellipsis(…) in the tool bar area, then click the merge button
Image showing elipse icon for extra menus
Fig 9.0 Image showing elipse icon for extra menus.

  • Specify the parameters for both;
    • DeleteSource
    • Source
  • Hit the execute button
Image showing form containg merge parameters
Fig 9.1 Image showing form containg merge parameters.