Vendors

  • Access the Partner Management sub-module of the Finance module
  • Click on Vendors
image showing vendors navigation
Fig 1.0 Vendors navigation.

  • This displays a list view of Vendors.
Image showing list of existing vendors.
Fig 1.1 Image showing list of existing vendors.

Filter vendors

  • Use the Filter button, when clicked, gives you a dropdown where you can specify various parameters for filtering the records:
    • Search string: for filtering records
    • Grouping: A dropdown list of vendor types
    • Status: dropdown list of status types.
Image showing filter button and options for vendors
Fig 2.0 Image showing filter button and options for vendors.

Create a Vendor

  • To create a vendor, hit the New button in the toolbar area and populate the form fields.
Image showing button to create vendors
Fig 3.0 Image showing button to create vendors.

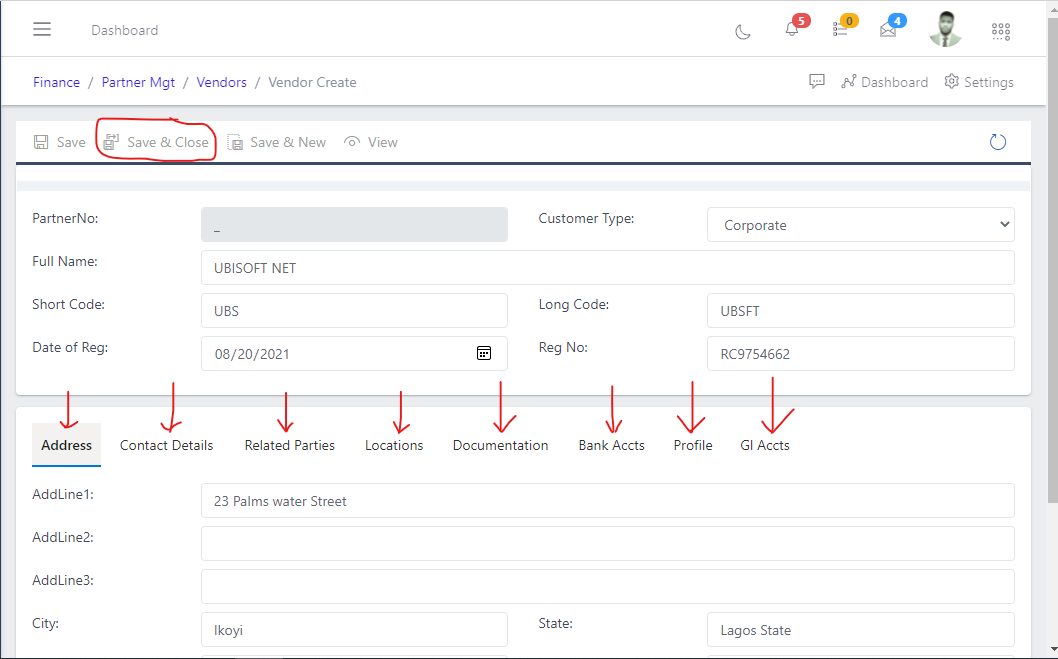
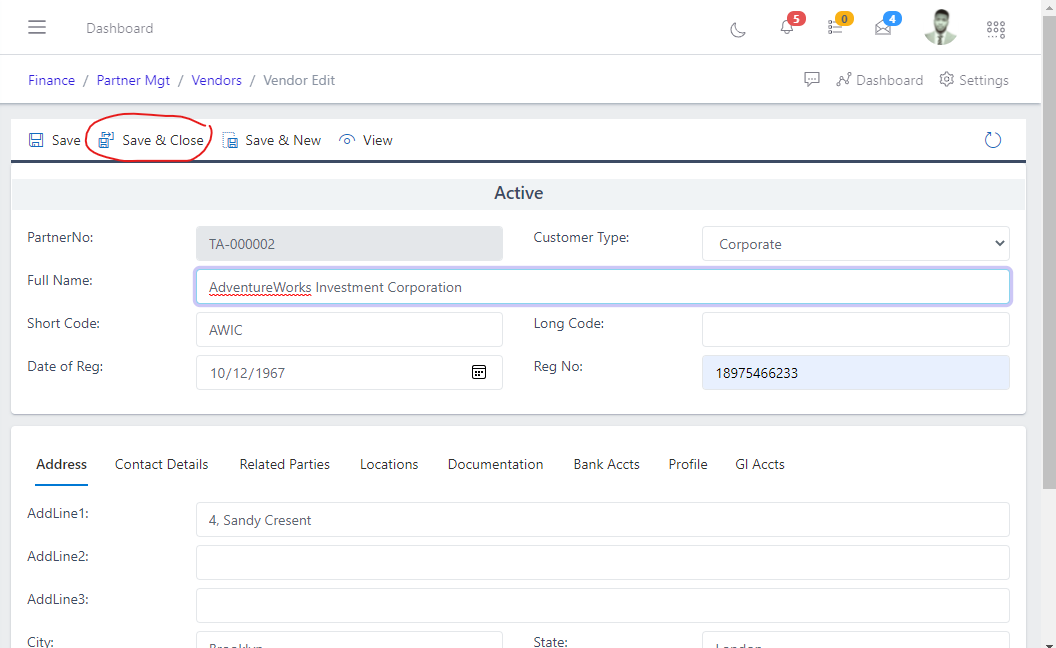
  • The following are some of the fields that needs to be populated:

    • Full Name
    • CUstomer Type
    • Date of Registration
    • Registration Number
    • Short Code
  • You also need to populate the fields in the following tabs:

    • Address
    • Contact Details
    • Related Parties
    • Locations
    • Documentation
    • Bank Accounts
    • Profile
    • GL Accounts
  • After filling out the forms, hit the Save and Close button.

Image showing save and close button after creating vendors
Fig 3.1 Image showing save and close button after creating vendors.

View a Vendor

  • From the list view, click on the ID of the vendor to view it
Image showing ID of a vendors
Fig 4.0 Image showing ID of a vendors.

Edit a Vendor

  • From the list view, select the vendor you want to edit by clicking on a checkbox
  • Click the edit button to edit the vendor you just selected
 Image showing button to edit a vendors
Fig 5.0 Image showing button to edit a vendors.

  • After editing, save the changes.
Image showing button to save changes after editing a vendors.
Fig 5.1 Image showing button to save changes after editing a vendors.

Delete a Vendor

  • From the list view, select the vendor you want to delete using the checkbox
  • Click on the Delete button to delete the vendor
Image showing button to delete a vendors
Fig 6.0 Image showing button to delete a vendors.

Activate a Vendor

  • When you create a vendor, its status will be pending
  • To activate the newly created vendor, search for the vendor using the search filter
  • Then click the Activate button to activate the vendor (it status will change to Active)
 Image showing button to activate a vendors.
Fig 7.0 Image showing button to activate a vendors.

Deactivate a Vendor

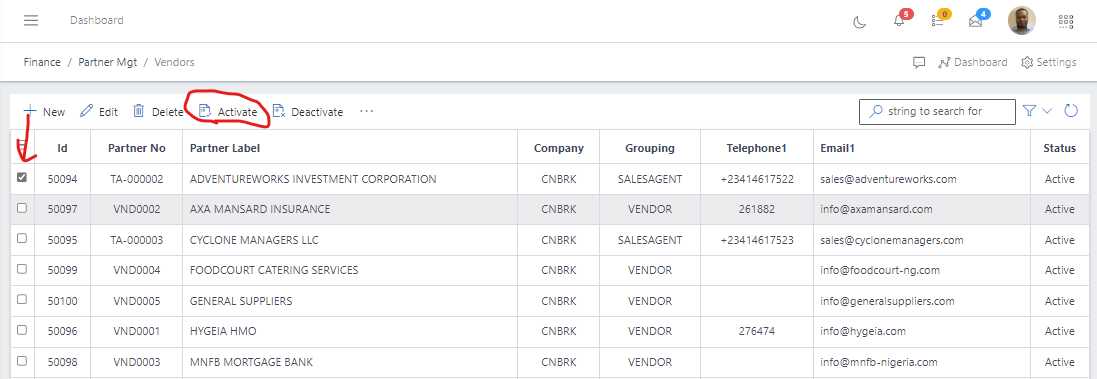
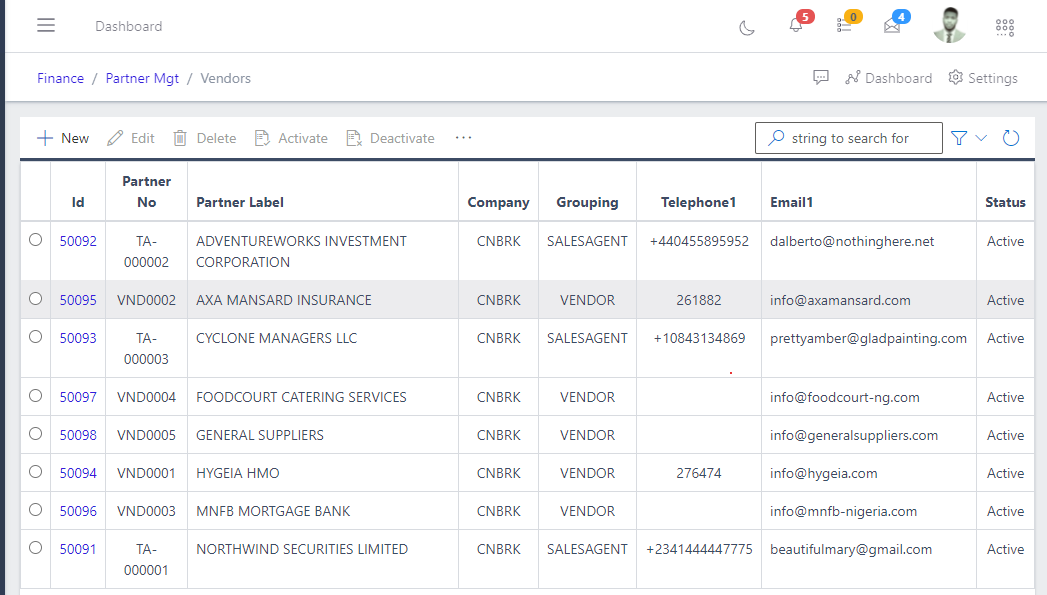
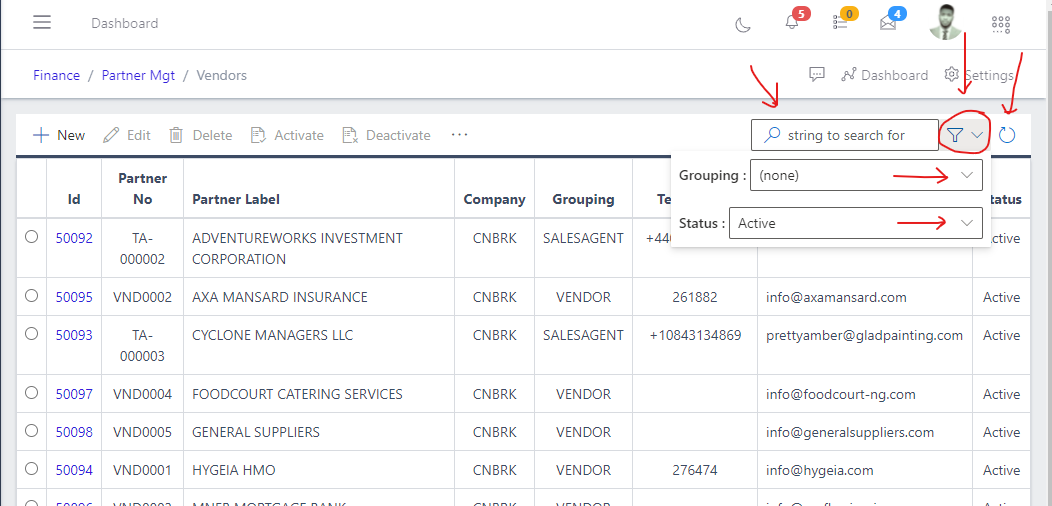
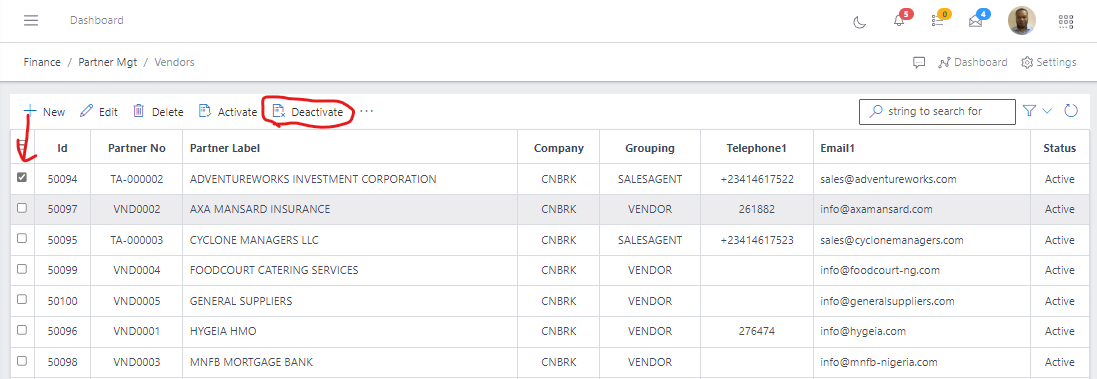
Only an active vendors can be deactivated:

  • To deactivate a vendor, search for the vendor using the search filter
  • Then click the Deactivate button to deactivate the vendor
Image showing button to deactivate a vendor
Fig 8.0 Image showing button to deactivate a vendor.

Merging Vendors

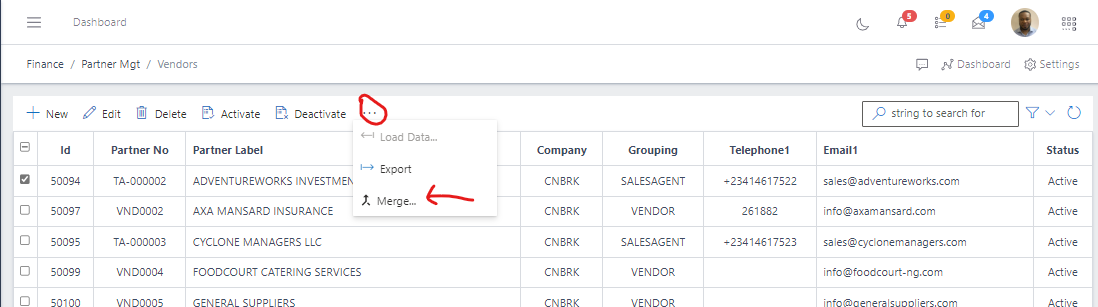
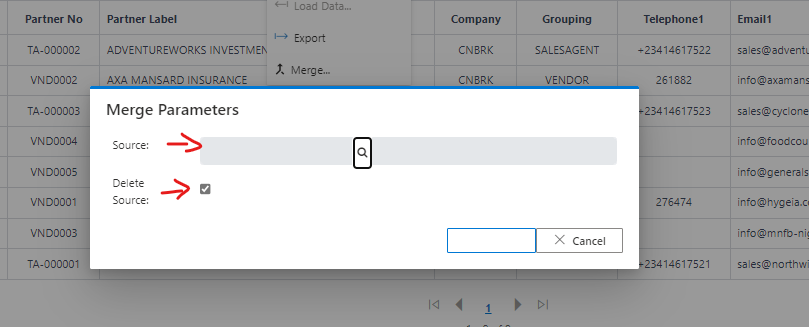
Two vendors can be merge together

  • To merge 2 vendors into a single vendor, select the first vendor by clicking on the radio button
  • Then click the ellipsis(…) in the tool bar area, then click the merge button
Image showing elipse icon for extra menus
Fig 9.0 Image showing elipse icon for extra menus.

  • Specify the parameters for both;
    • DeleteSource
    • Source
  • Hit the execute button
Image showing form containing merge parameters
Fig 9.1 Image showing form containing merge parameters.