Payments

  • Step 1: Access the Partner Transactions sub-module of the Finance module from the left sidemenu as shown in the fig1 below.
  • Step 2: Click on Payments as shown in the fig1 below.
Fig 1 Navigating to Payment

  • This displays a list view of Payments.
Fig 2 Listing Payment

  • Use the Filter button, when clicked, gives you a dropdown where you can specify various parameters for filtering the records:
    • Search string: for filtering records
    • From
    • To
    • Assignment
    • Status
Fig 3 Searching Payment

Create a Payment

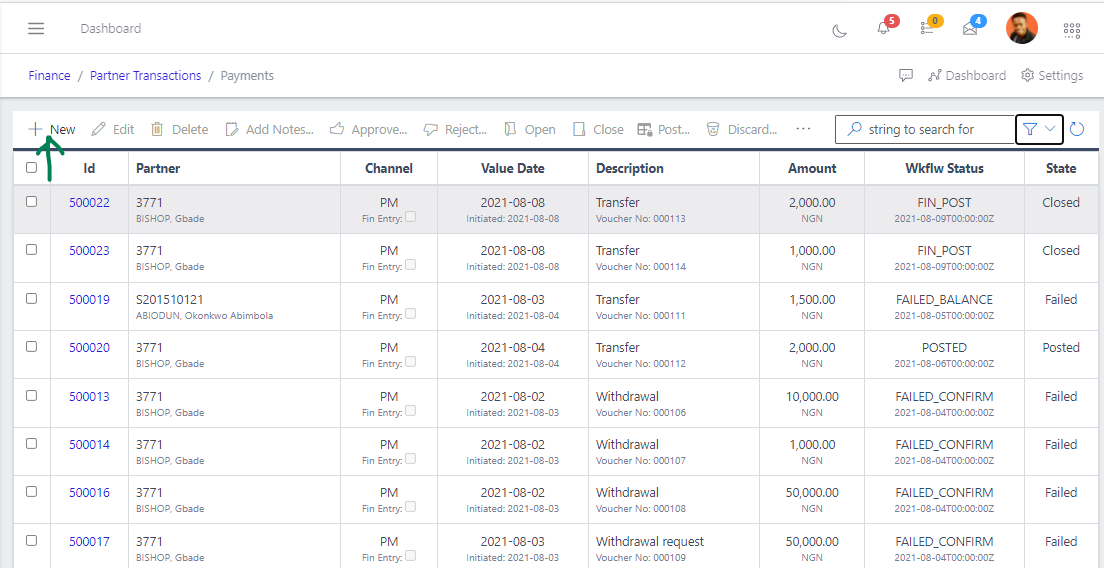
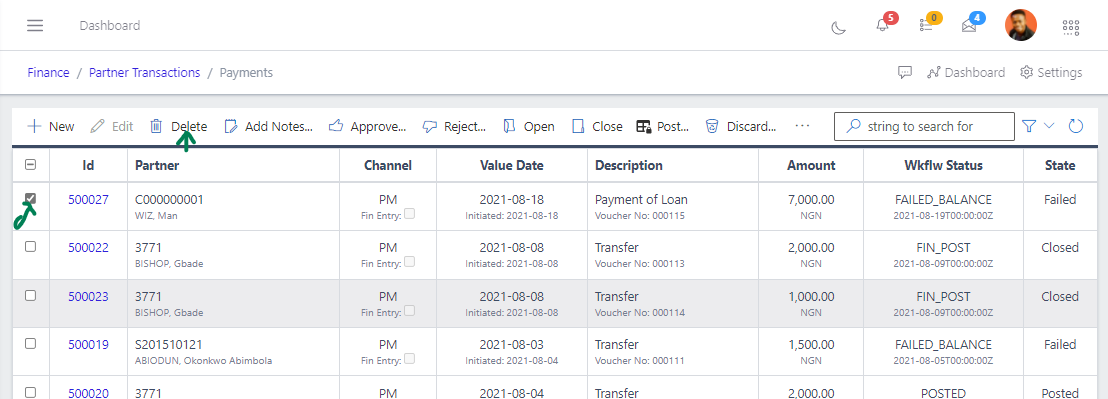
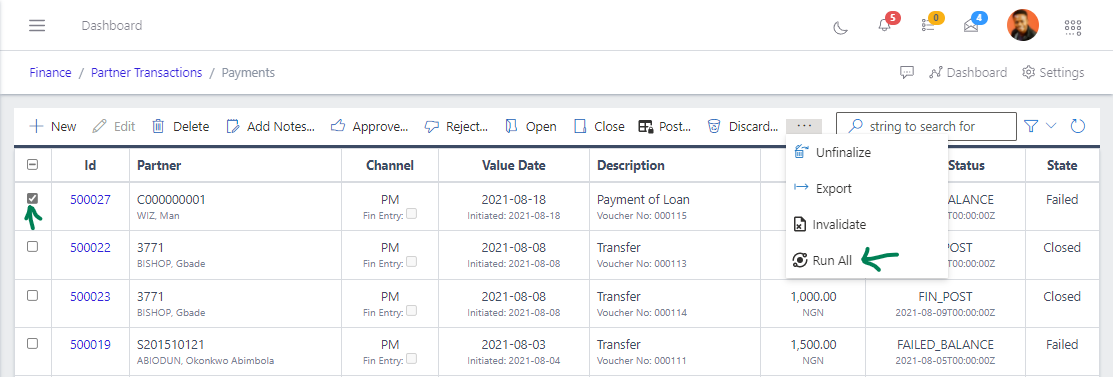
  • To initiate a payment, hit the Create button in the toolbar area and populate the form fields.
Fig 4 Clicking New Button to Create a New Payment

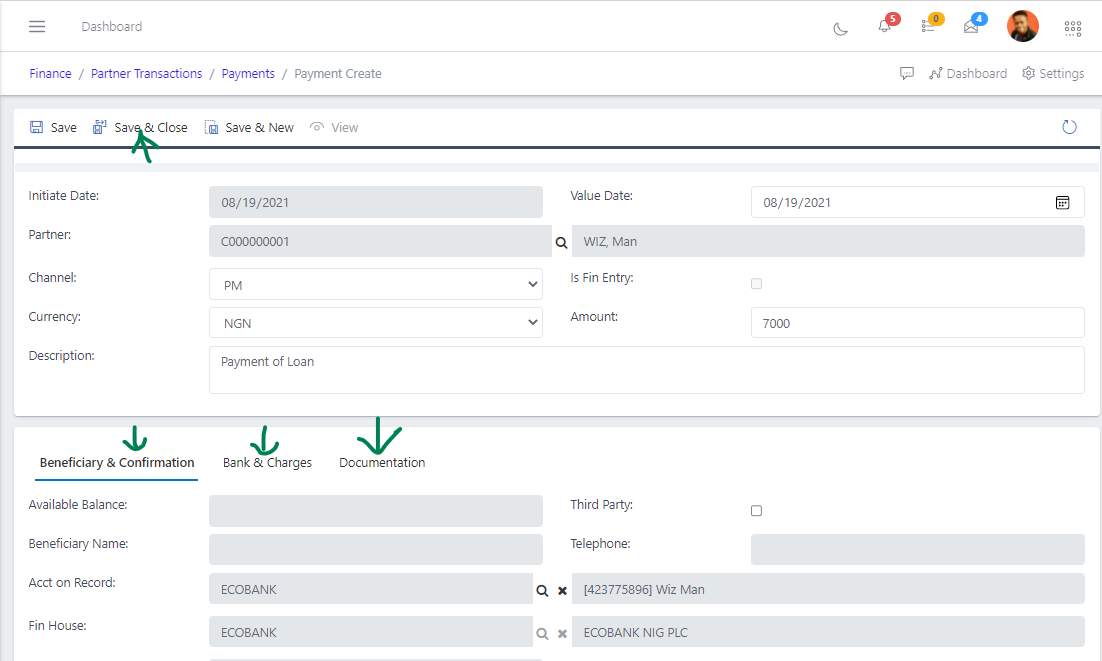
  • The following are some of the fields that needs to be populated:

    • Partner
    • Chanel
    • Currency
    • Is Fin Entry
    • Amount
    • Description
  • You also need to populate the fields in the Beneficiary and Confirmation, Bank and Charges, and Documentation

    • Fill the form fields in the Beneficiary and Confirmation, Bank and Charges tabs
    • Click the New button in the Documentation tab and fill out the form fields. Documents can served and sent for approval or even posted after transactions.
    • After filling out the forms, hit the Save and Close button.
Fig 5 Creating Payment

View a Payment

  • From the list view, click on the ID of the Payment to view it
Fig 6 Viewing a Payment

Edit a Payment

  • From the list view, select the Payment account you want to edit by clicking on a checkbox button(you will note the edit button icon turns lightblue)
  • Click the edit button to edit the payment you just selected
  • After editing, save the changes.

Delete a Payment

  • From the list view, click on the Delete button to delete the payment
Fig 8  Deleting Payment
Fig 8 Deleting Payment

Add Notes to a Payment

  • Notes can be added to payment
  • From the list view, click on the Add Notes button to add a note the payment
Fig 9 Adding Notes to Payment

Approve a Payment

  • From the list view, click on the Approve button to approve the payment
Fig 10 Approving Payment

Reject a Payment

  • From the list view, click on the Reject button to reject the payment
Fig 11 Rejecting Payment

Open a Payment

  • From the list view, select the payment you want to open by clicking on a checkbox button
  • Click the Open button to open the payment you just selected.
Fig 12 Opening Payment

Close a Payment

  • From the list view, select the Payment you want to close by clicking on a checkbox button
  • Click the Close button to close the payment you just selected
Fig 13 Closing Payment

Post a Payment

  • From the list view, select the payment you want to post
  • Click on the Post button to post the payment
Fig 14 Posting Payment

Discard a Payment

  • From the list view, select the payment you want to discard by clicking on a checkbox button
  • Click the on the Discard button
Fig 15 Discarding Payment

Unfinalize a Payment

  • From the list view, select the payment you want to unfinalize by clicking on a checkbox button
  • Click the on the Unfinalize button
Fig 16 Unfinalizing Payment
16 Unfinalizing Payment

Export Payments

  • Click the export the records of payments
Fig 17 Exporting Payment

Run All Payment

  • Click the ellipsis(…) in the tool bar area, which will show a drop down and select the Run All button
Fig 18 Running All Payments