Title here
Summary here
A promissory note is a legal instrument (more particularly, a financing instrument and a debt instrument), in which one party promises in writing to pay a determinate sum of money to the other. This debt instrument usually has a life cycle of under one year.
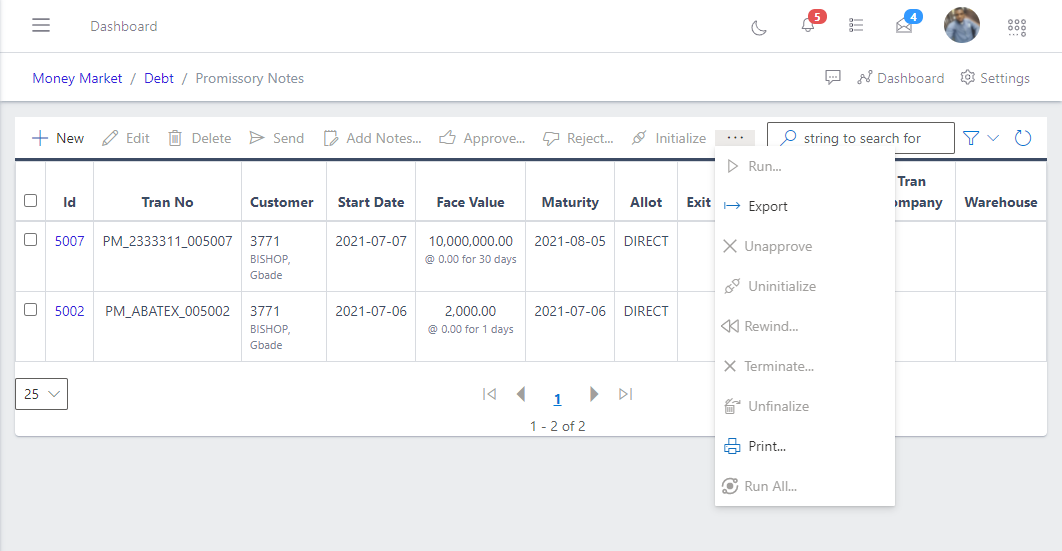
To create a promissory note, one has to hit the “NEW” action button. This then takes one to the create page for the instrument. As seen in Fig5a above , asides the “NEW, EDIT, DELETE” buttons , there are 13 other buttons that are used in executing the workflow of a commercial paper. Futher down , these work flow enabling buttons will be used.
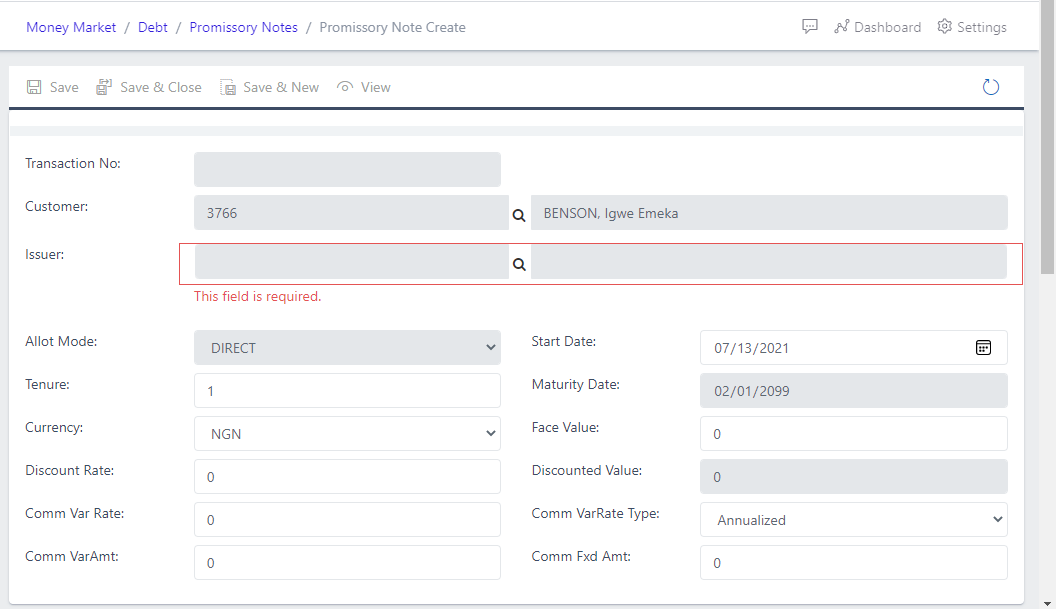
This is where one specifies the customer the promissory note is being created for, other things to be specified here are the “Face value”, “currency” , etc. As seen in Fig5b above “Issuer” is a required field as commercail papers are gotten from issuers/issuing houses.
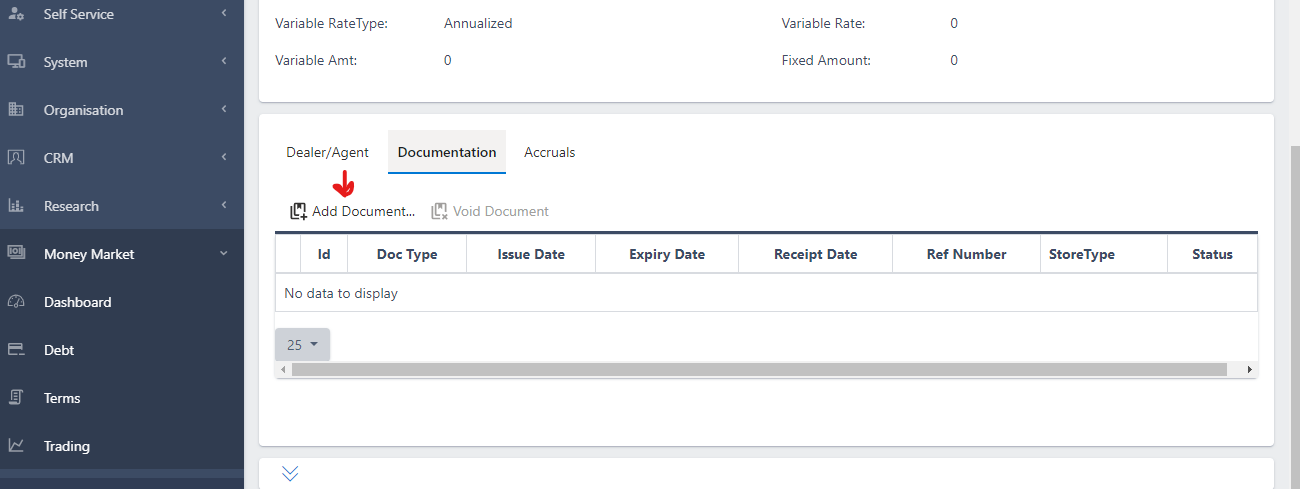
Looking at Fig 5c above, in instances where the instrument comes with supporting documents , this section is where the documemt can be added. One does by clicking the “Add Document” button, then populating the fields shown in Fig 5d below.

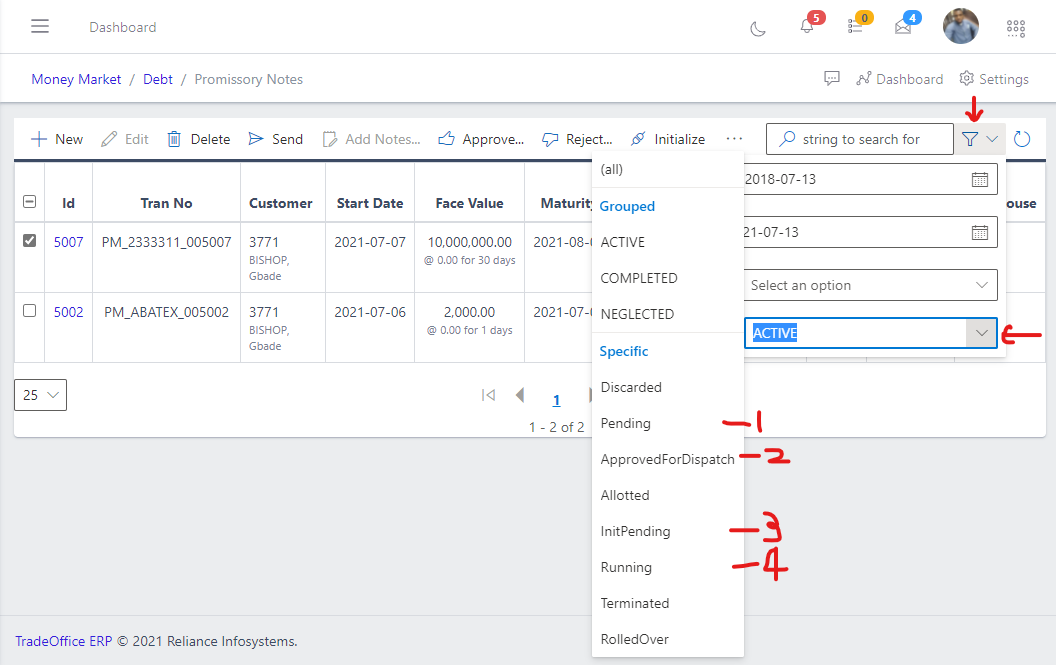
Status: Pending -> Approve For Dispach -> Init Pending, -> Running
As mentioned, while talking about Fig 5a above, there are several buttons that are to be used to change the workflow state of a promissory note from “Pending, all the way to “Running”. When a new Promissory note is created it is in the status of pending, hit the SEND button to get it to the status of “ApprovedForDispatch” as shown in Fig 5e above. The next step is to approve the promissory note clicking the APPROVE button, this will change the status to “initPending” (NOTE: in a strict role based enabled workflow, this would have to be approved by someone else, probably one having adequate finance rights, i.e following the principle of Maker-Checker). Then to get the status to “Running”, after the instrument has been approved one has to click the INITIALIZE button then the RUN button.
A created promissory note can be edited only when its in the (PENDING) state, i.e before it is sent out for approval
The other buttons shown in Fig 5a above (asides the EXPORT, RUNALL, PRINT), are to undo workflow actions at appropriate points in time. For an action that was approved one can un-approve, a sent instrument can be rejected, an initialized instrument can be uninitialized, for where the run button was used the rewind button can be used to undo the action. Terminate button can be used to terminate the workflow of the instrument before it goes all the way to the status of running.